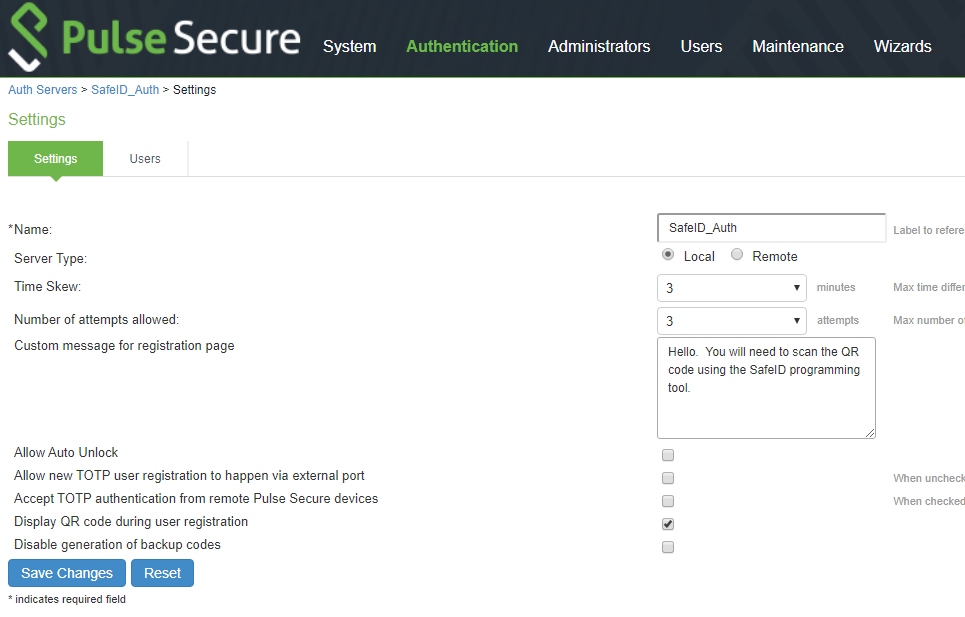
To configure Pulse Secure to use TOTP authentication, follow steps below
- Login into Pulse Secure Console (PSC)
- Select Authentication > Auth. Servers.
- Select Time based One-Time Password (TOTP) Server and click New Server
- Complete the configuration as described below
Settings
Guidelines
Name
Specify a name to identify this configuration, e.g. SafeID Diamond
Server Type Select Local.
Time Skew
Specify maximum time difference between Pulse Connect Secure and end user device while authenticating a user's token, e.g. 5 minutes
Number of attempts allowed
Specify maximum number of consecutive wrong attempts allowed after which account will be locked, e.g. 5 attempts
Custom message for registration page
Specify a custom message which can be shown on new TOTP user registration web-page.
Allow Auto Unlock
When checked, locked account will be automatically unlocked after specified period. (minimum: 10 minutes, maximum: 90 days)
Allow new TOTP user registration to happen via external port
When unchecked (default), new TOTP user registrations will happen only via internal port
Accept TOTP authentication from remote PCS devices When checked, REST access to this TOTP server is allowed from other Pulse Connect Secure devices. Display QR code during user registration When checked, displays QR code during user registration. Disable generation of backup codes When unchecked, generates backup codes. - Save the configuration.
