This article describes how to use Group Policy to automatically distribute DualShield Windows Logon client software to end users' computers.
The first step is to create an AD group and place into the group all the computers on which the DualShield Windows Logon Client will be remotely installed.
In this example, we create a group called "DualShield 2FA Computers"

and we place some PC into the group

The next step is to create a shared network folder where you'll put the DualShield Windows Logon Client installer package (.msi file) that you want to distribute.
The shared network folder can be created on any networked server computer, such as the domain controller.
In this example, we created a shared network folder called "Software" on a domain controller

We need to set up permissions for sharing
Click "Advanced Sharing"

Click "Permissions"

Add "Authenticated Users" and give it the full permissions
Click the "Security" tab

Add the group we created for computers, i.e. "DualShield 2FA Computers", and give it the permission of "Read and Execute"
Finally, copy the software to be distributed in the folder.

Now, we will create a Group Polic Object (GPO) for distributing the software package.
Launch the Group Policy Management console
In the console tree, right-click your domain, e.g. "deepnetmfa.com"

and then select "Create a GPO in this domain, and Link it here..."

Enter the name, e.g. "DualShield Windows Logon Client G2"
and then click "OK"

Expand "Group Policy Objects"

Select the newly created GPO, i.e. "DualShield Windows Logon Client G2"
On the right pane, in the section "Security Filtering", remove "Authenticated Users" and Add "DualShield 2FA Computers "

Now, right click the newly created GPO, and select "Edit"
This will launch the Group Policy Management Editor

Now, navigate to "Computer Configuration \ Policies \ Software Settings \ Software installation"

Right click "Software installation" and select "New | Package"

Do NOT select the drive letter. Instead, select "Network", and the computer where the shared network drive is located.
Then, select the software installer package, e.g. "SetupDSClient-6.2.0121.0929-x64.msi"
The window below will popup

Select "Assigned", then click "OK"

That's it.
Next time, when a computer in the group "DualShield 2FA Computers" restarts, the software will be automatically installed on the computer.
On a PC, you can use the command "gpupdate /force" to force GPO update

If you have multiple domain controllers. make sure the newly created GPO is replicated across to all domain controllers.
You can use the command "gpresult /R" to check the domain controller this PC is currently connected to

If the software is not automatically installed on the participating PCs, check the event log on the PC
If you see an error like "The error was : %%1274"
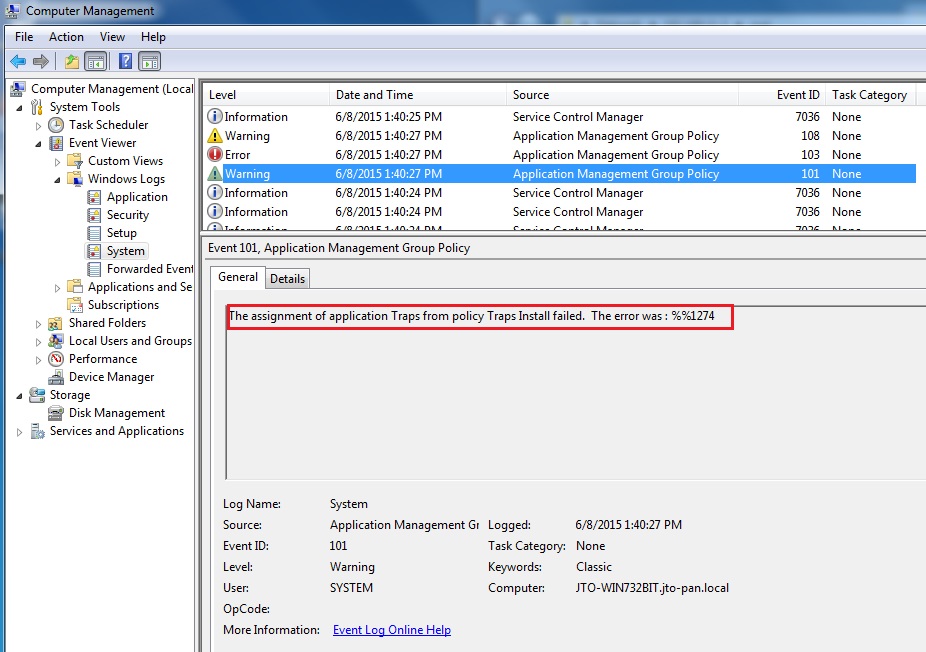
Then, you must set the options below.
Enable “Always wait for the network at computer startup and logon”

Enable “Startup policy processing wait time” and set it to 90 seconds.
