
Launch Network Policy Server
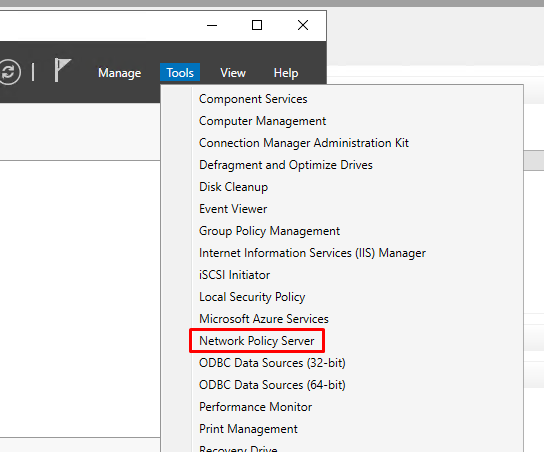
- In Server Manager click "Tools"
- Select Network Policy Server
Create a RADIUS Client
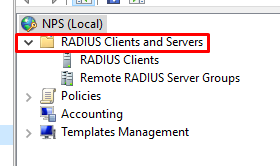
- Expand "Radius Clients and Servers"
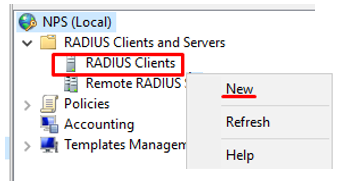
2. Right Click "Radius Clients" and select "New" from the menu
3. Enter a Friendly name, e.g, "RRAS"
4. Enter the RRAS’s IP in the IP address filed, e.g. "127.0.0.1", if on the same machine,
5. Enter the Shared secret password
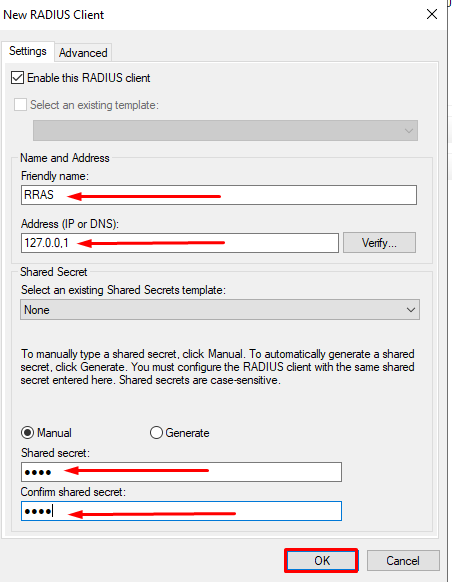
6. Click "OK"
Create a Remote RADIUS Server Group
- Right Click "Remote RADIUS Server Group" and select "New" from the menu
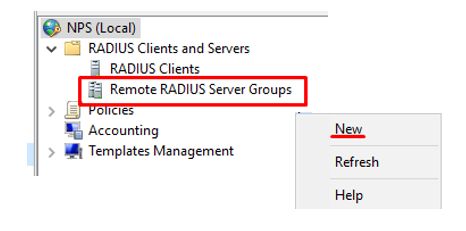
2. Enter a group name e.g. "DualShield MFA"
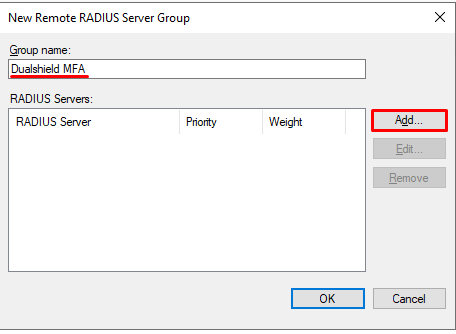
3. Click "Add" and Enter the name or IP address of the DualShield Radius Server
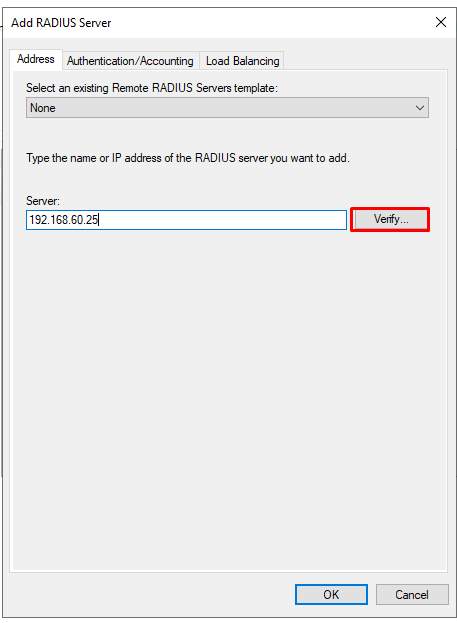
4. Click Verify
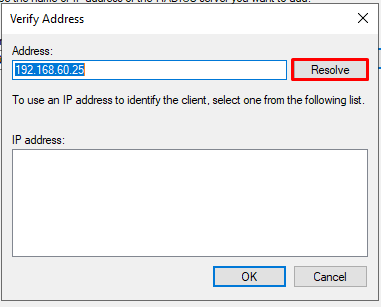
5. The IP Address will move down to the IP address box
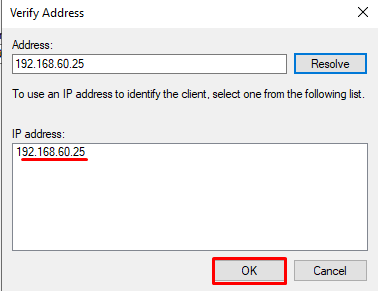
6. Click OK
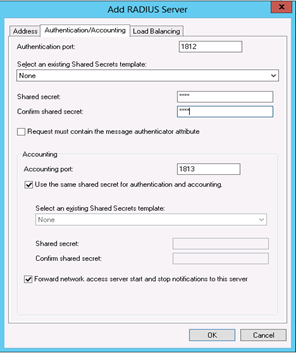
7. Select "Authentication/Accounting" tab on the Radius Clients Context Menu, enter the Shared secret password
8. Select "Load Balancing" tab, and copy the timing settings as below..
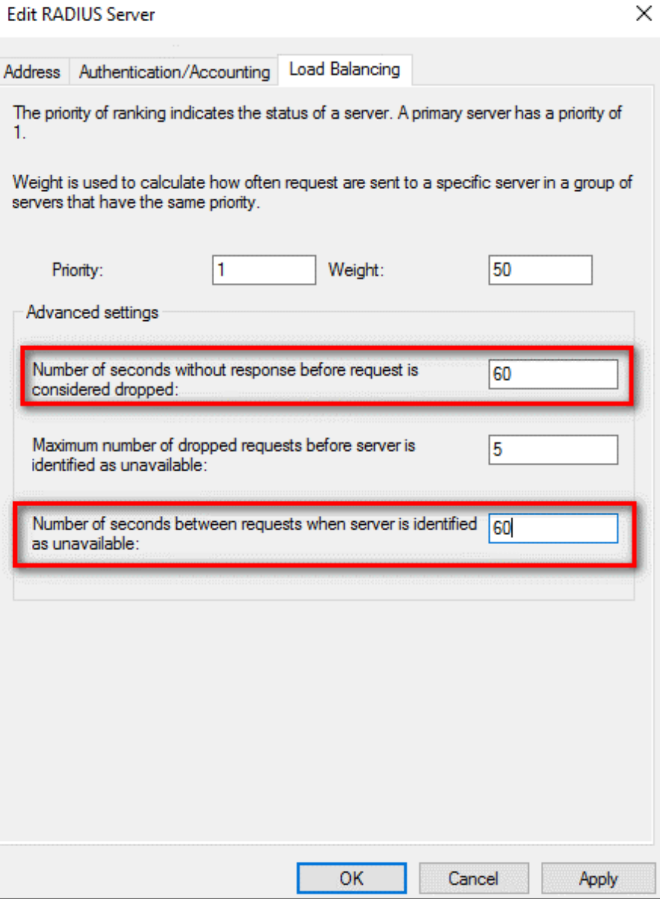
9. Click OK.
Create a Connection Request Policy
- Expand "Policies"
- Right Click "Connection Request Policies" and select "New" from the menu
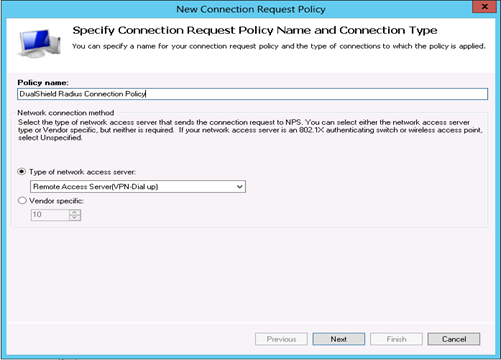
- Enter a Policy name, e.g. "DualShield Radius Connection Policy"
- Change type of network access server to "Remote Access Server (VPN-Dial up)" and click "Next"
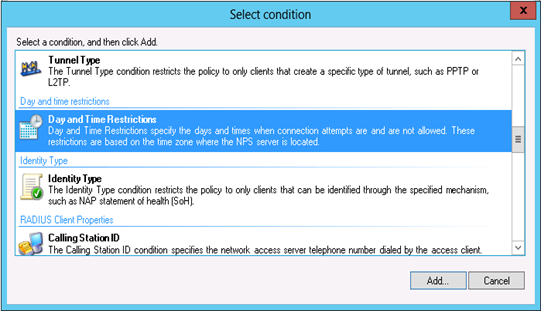
- Add a new condition "Day and Time Restrictions" and select "Permitted" to allow a certain time of connection.
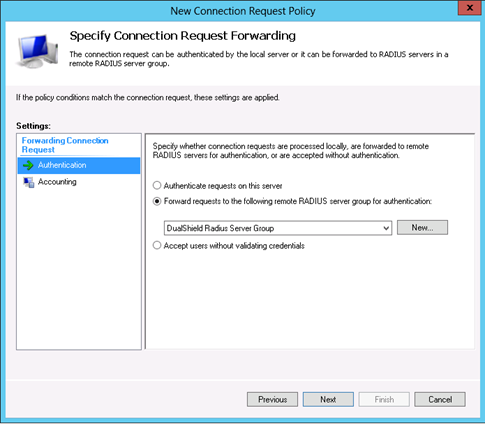
- Select "Forward requests to the following remote RADIUS server group for authentication" and select the newly server group "DualShield Radius Server Group"
- Click "Next", "Next" and "Finish".
- Make sure Dualshield is at the top of the list biy right-clicking and selcting Move Up and processing order is number 1. Also, disable other connection request policies by right-clicking and selecting Disabled from the menu.

Create a Network Policy
- Right Click "Network Policies" and select "New" from the menu
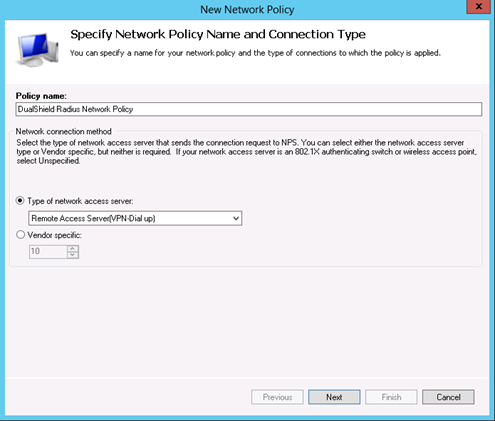
- Enter a policy name, e.g. "DualShield Radius Network Policy"
- Change type of network access server to "Remote Access Server (VPN-Dial up)" and click "Next"
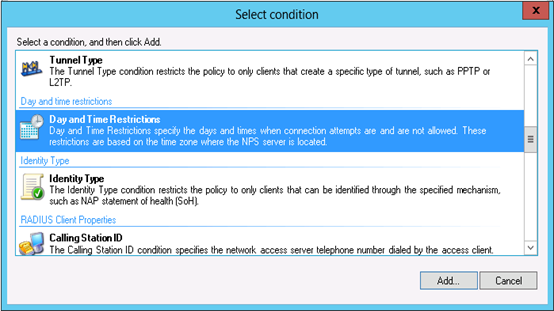
- Add a new condition "Day and Time Restrictions" and select "Permitted" to allow certain time of connection and press "OK" and "Next"
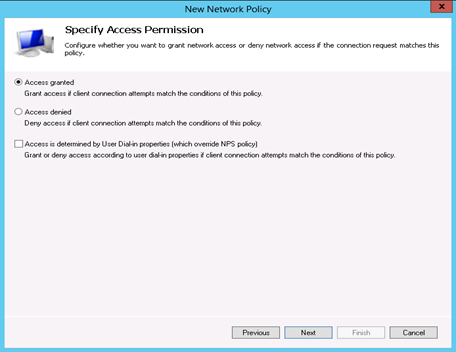
- Specify Access Permission and click "Next"
- Select the authentication methods e.g. MS-CHAP v2
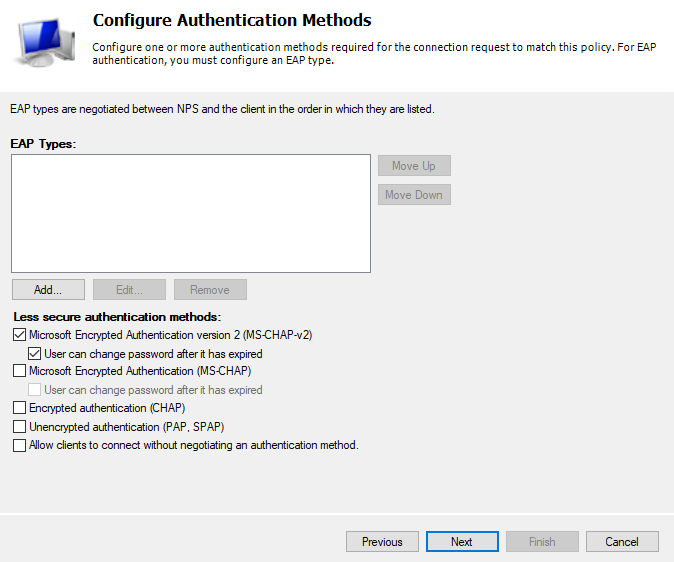
- Click "No" to the warning message.
- Click "Next", "Next", "Next" and "Finish"


