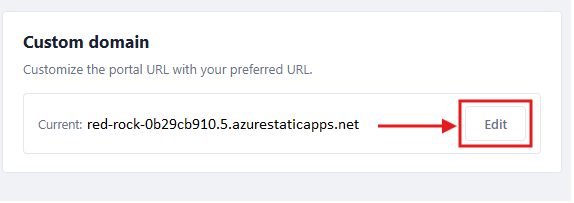
The Custom domain section in Portal Settings, with its Edit button
By default, your portal has an address the system generated for you. This guide shows you how to replace it with your own — for example, portal.yourcompany.com — so it's easier for your team to remember and looks like part of your own organization.
Before you start
From the Dashboard, click Portal Settings, then find the Custom domain section and click Edit.
The Custom domain section in Portal Settings, with its Edit button
In the Domain box, type the web address you'd like to use (for example cloma.deepnetid.com). Then click Show CNAME Record Values to reveal the record you'll need to add.
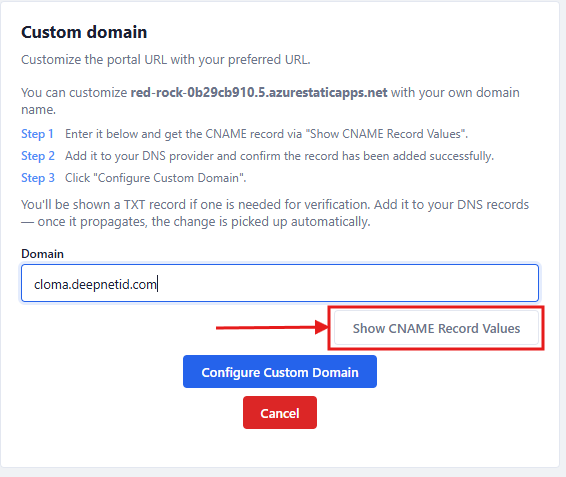
The Domain field and "Show CNAME Record Values" button
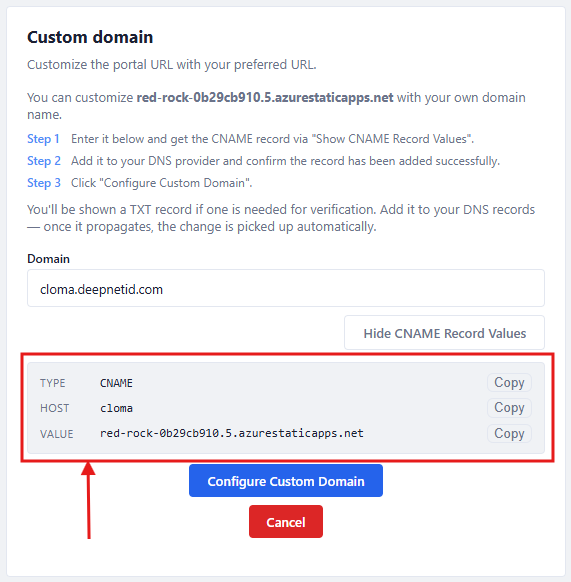
The CNAME values shown on Portal Settings — copy these into your domain provider's record
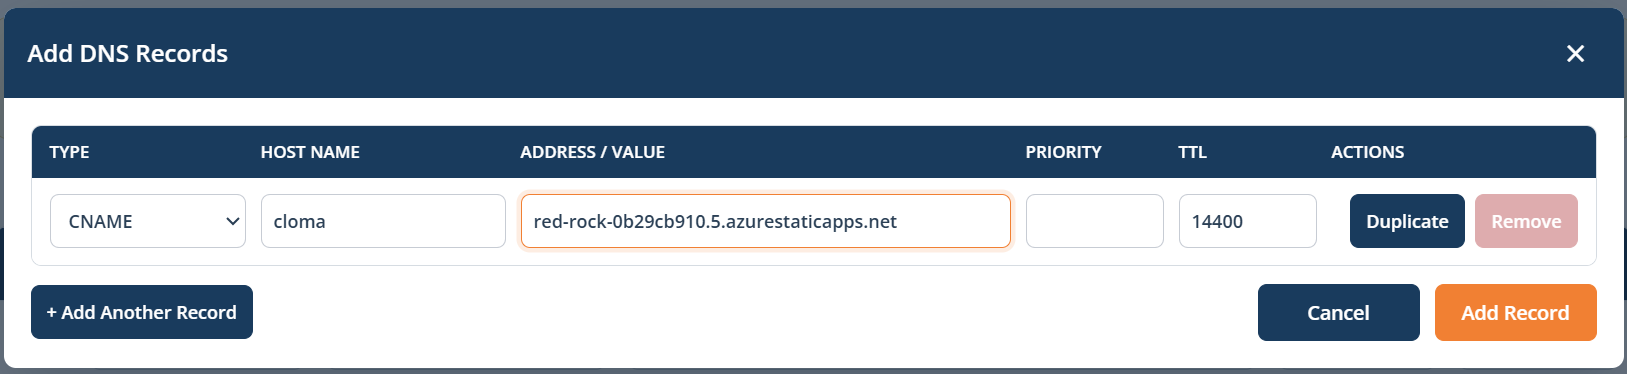
Sign in to wherever you manage your domain (for example, GoDaddy, Namecheap, or your IT provider's own system) and add a new CNAME record using the values shown on the Portal Settings page. It typically looks like this:
Type | CNAME |
Host | portal |
Value | (shown under "Show CNAME Record Values", with its own Copy buttons) |
ℹ️ If you're not sure how to do this yourself, your website or IT provider can usually add it for you in a couple of minutes — just send them the values shown on this page.
Below is an actual example:
Back on the Portal Settings page, click Configure Custom Domain. If an extra verification record (a TXT record) is needed, the page will show it — add that with your domain provider the same way.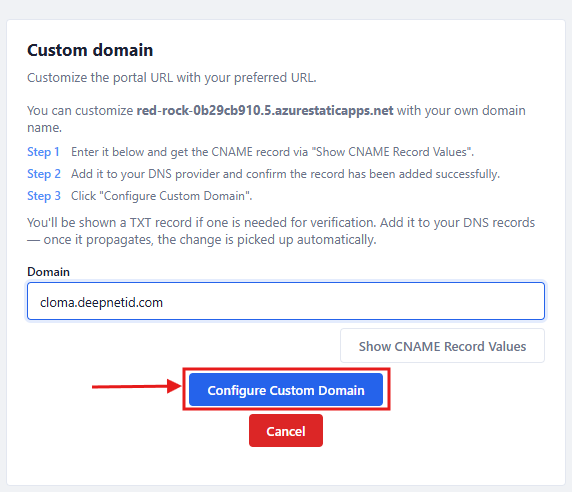
The "Configure Custom Domain" button on Portal Settings
The page shows a status while it checks for your DNS record, then finalizes automatically once it's found — no further clicks needed. This can take anywhere from a few minutes to a few hours depending on your domain provider; you can leave the page and come back later, or click Cancel setup if you need to stop partway through.
⚠️ Don't remove the record you added afterward — it needs to stay in place for the address to keep working.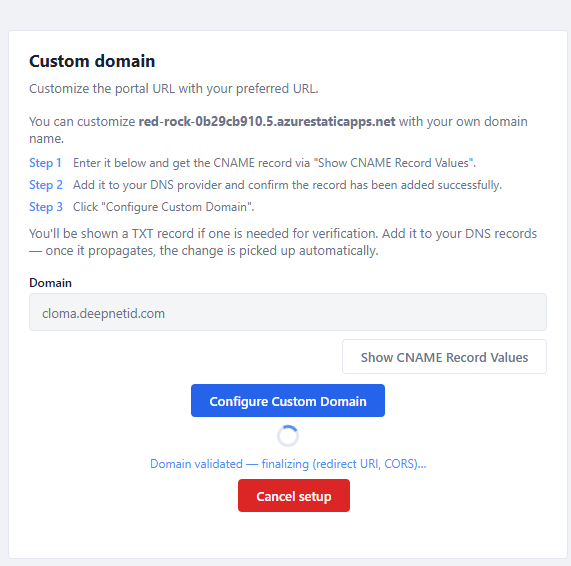
"Domain validated — finalizing…" — this finishes on its own, no action needed
Your portal now has its own address. If you ever need to change it, come back to the same Custom Domain section in Portal Settings and follow these steps again with the new address.