Step-by-step walkthrough of the desktop setup wizard, from signing in through a live, working portal — including granting other admins access and, later, repairing or removing a deployment.
The wizard signs in with a real Microsoft account and confirms it has the access the setup will need before touching anything in the tenant.
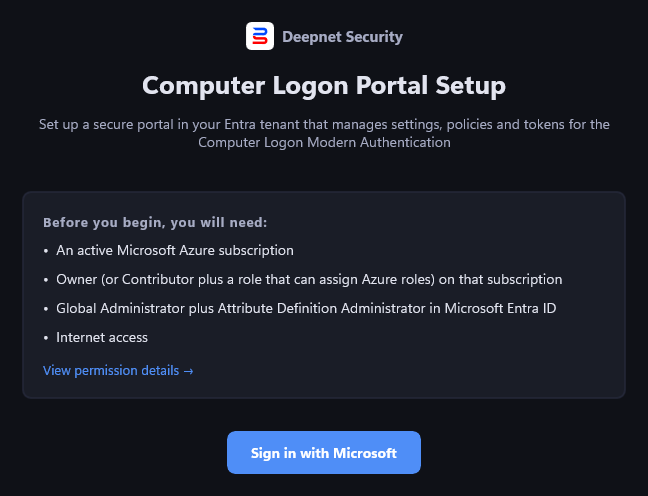
The welcome screen lists what's needed before starting: an active Azure subscription, Owner (or Contributor plus role-assignment rights) on that subscription, and Global Administrator plus Attribute Definition Administrator in Microsoft Entra ID.
Click Sign in with Microsoft and authenticate as the account that will run the setup.
TIP "View permission details" expands the exact Azure and Entra permissions the wizard checks for — useful if a sign-in gets blocked later on a missing role. |
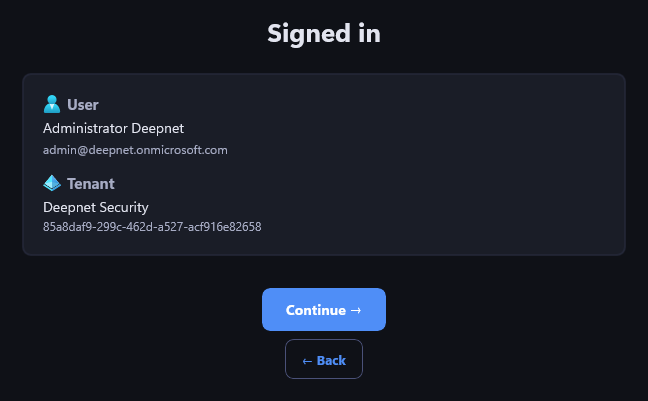
Once authenticated, the wizard shows exactly which user and which Entra tenant it's about to operate against — a checkpoint before anything is created. Confirm this is the right tenant, then Continue.
Three decisions before anything is created: which subscription pays for it, which Azure region hosts it, and — optionally — which mailbox delivers OATH token credentials to end users.
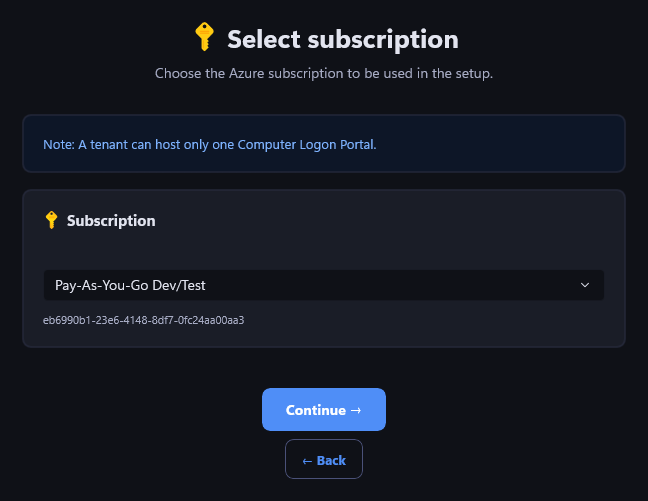
Pick the Azure subscription the portal will be provisioned into. A tenant can only ever host one Computer Logon Portal — if the selected subscription already has one, the wizard detects it here and offers to repair or manage it instead of creating a second one.
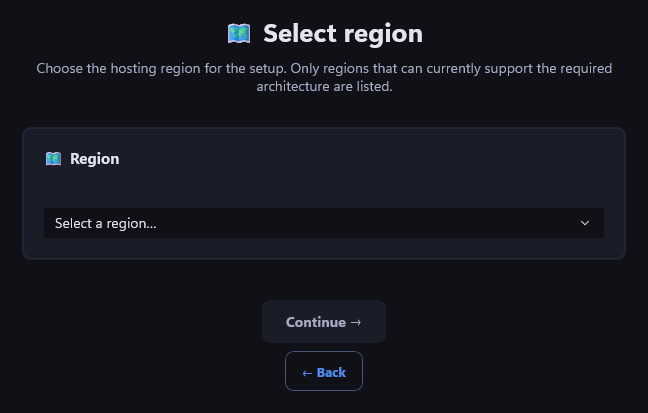
Only regions that currently support the full required architecture (Consumption-plan compute, Static Web Apps) are listed. This is a real deployment decision — data residency, latency to end users — so the wizard leaves it unselected rather than guessing on your behalf.
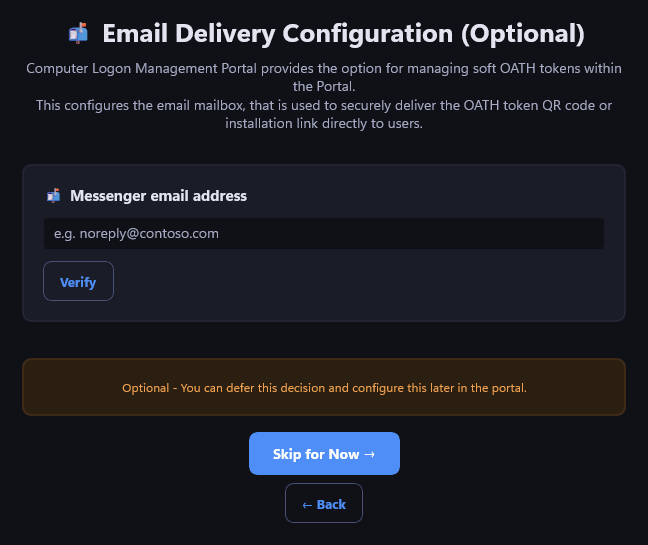
If the portal will manage soft OATH tokens, this configures the mailbox used to email a token's QR code or installation link directly to end users. Enter an address and Verify, or Skip for Now — it can be configured later from inside the portal.
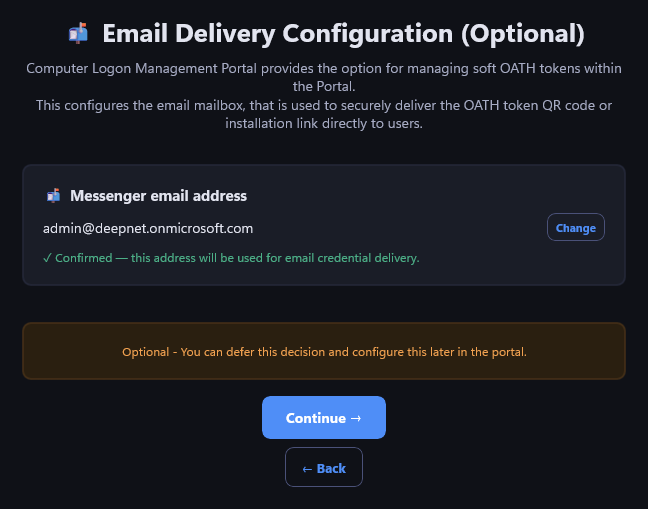
Once verified, the address is shown with a confirmation that it will be used for credential delivery. Use Change to pick a different mailbox, or Continue to move on.
A final summary, a preview of exactly what gets created and what it costs to run, and then the live provisioning run itself.
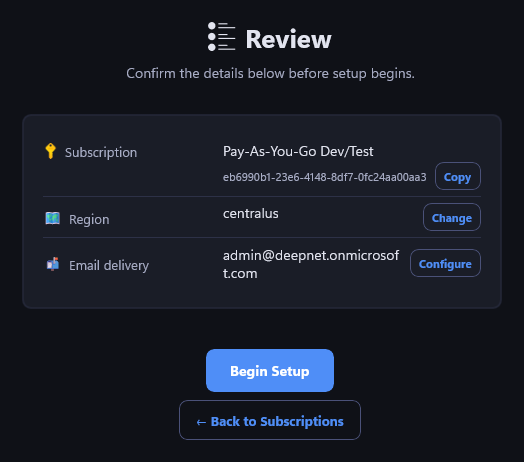
A single summary of every choice made so far — subscription, region, email delivery — each with its own Change/Configure shortcut back to that step. Begin Setup moves on to the architecture preview; nothing is created yet.
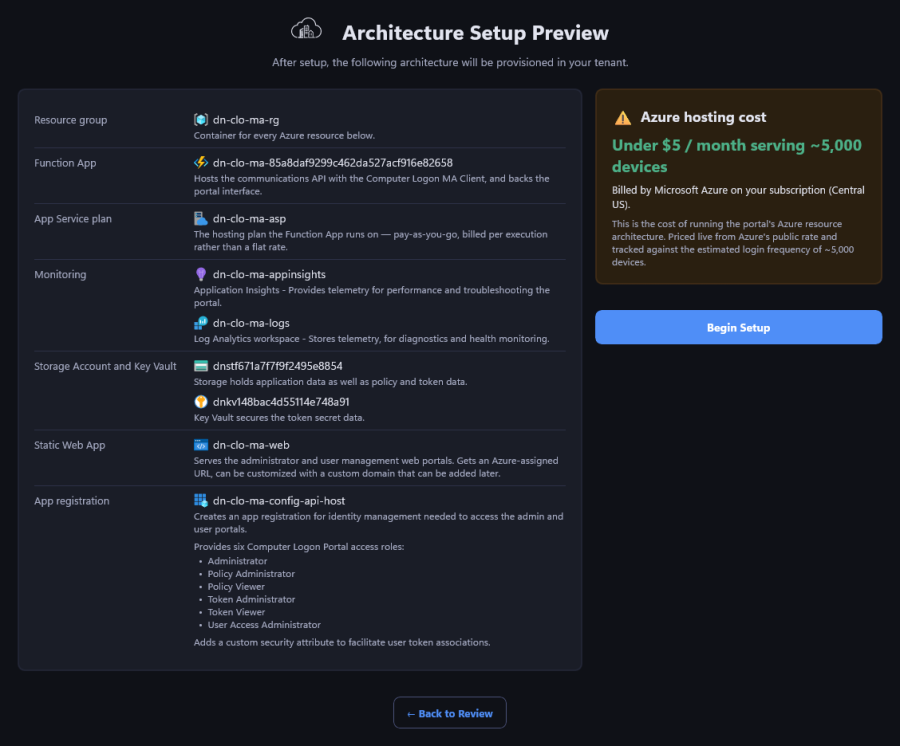
Every Azure resource the run will create — resource group, Function App, storage account, Key Vault, Static Web App, and the app registration behind sign-in — with a one-line explanation of what each one is for.
The cost panel is priced live from Azure's own retail rates for the selected region, modeled against roughly 5,000 devices — not a flat estimate. Begin Setup starts real provisioning.
STEP 09
Setup progress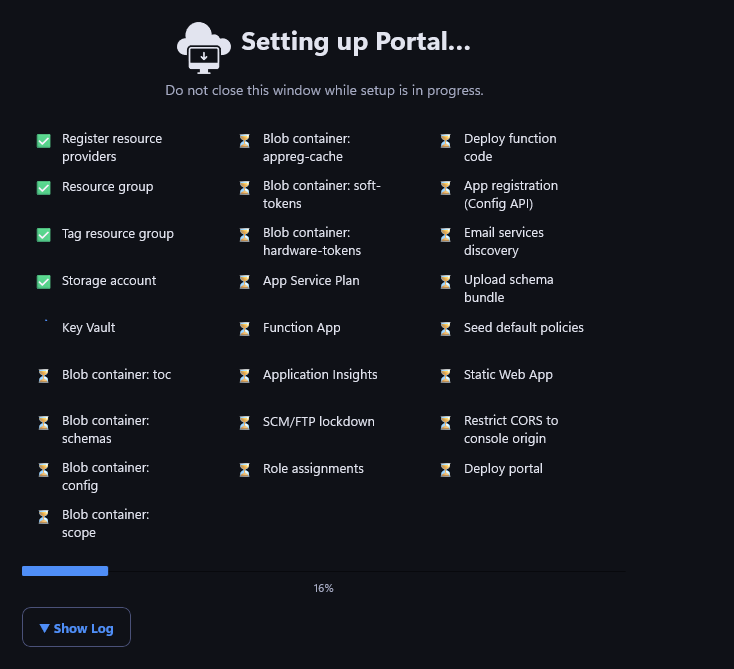
Every provisioning step runs in view, checked off as it completes. This typically takes several minutes — don't close the window while it's running. If it's ever interrupted, relaunching the wizard resumes from exactly where it left off.
The account that ran setup is automatically the first Administrator. This optional step grants portal access to anyone else who needs it, right after provisioning finishes.
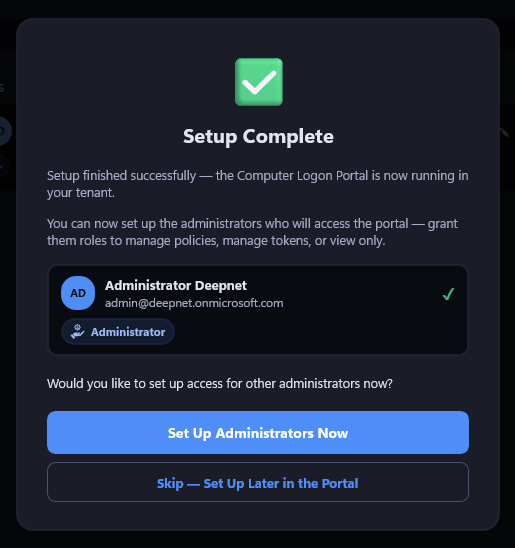
Provisioning succeeded. The signed-in account is already listed as Administrator. Set Up Administrators Now continues into the access screen below; Skip — Set Up Later in the Portal jumps straight to the finish screen — access can always be managed from inside the portal afterward.
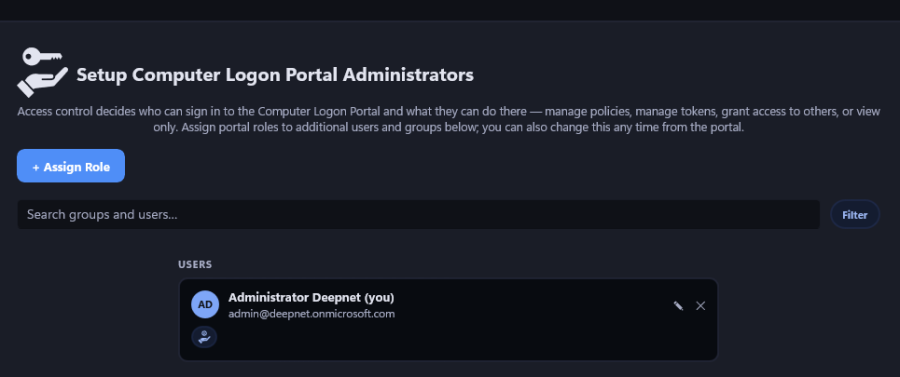
Shows everyone who currently has portal access — just the signed-in admin, on a fresh install. + Assign Role grants access to another user or group; searching and filtering work the same way here as inside the deployed portal itself.
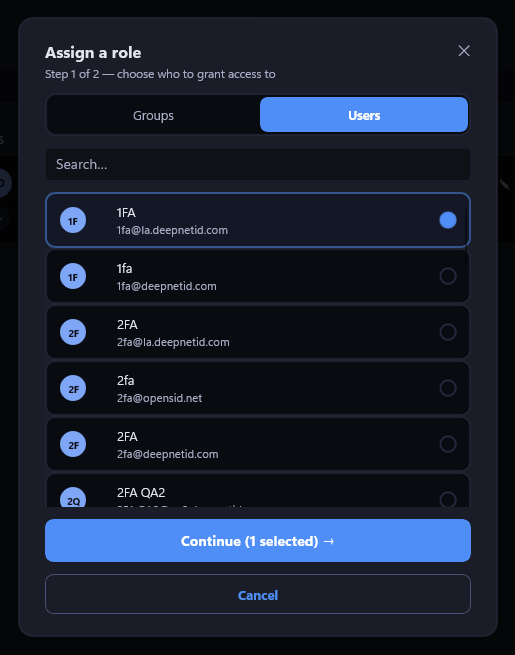
Search across both Users and Groups, and select one or more — a single batch can mix both kinds. Selections are preserved even when switching tabs, so a group and an individual user can be granted the same role in one pass.
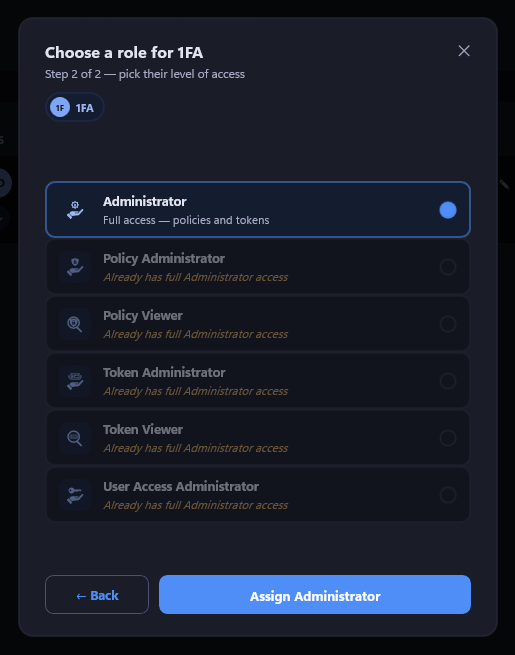
Six roles cover full administration down to read-only viewing of just policies or just tokens. A principal already holding a broader role can't also be given a redundant narrower one — those options grey out with the reason shown inline.
The portal is live. This screen is also where a custom domain gets added later, whenever that's ready.
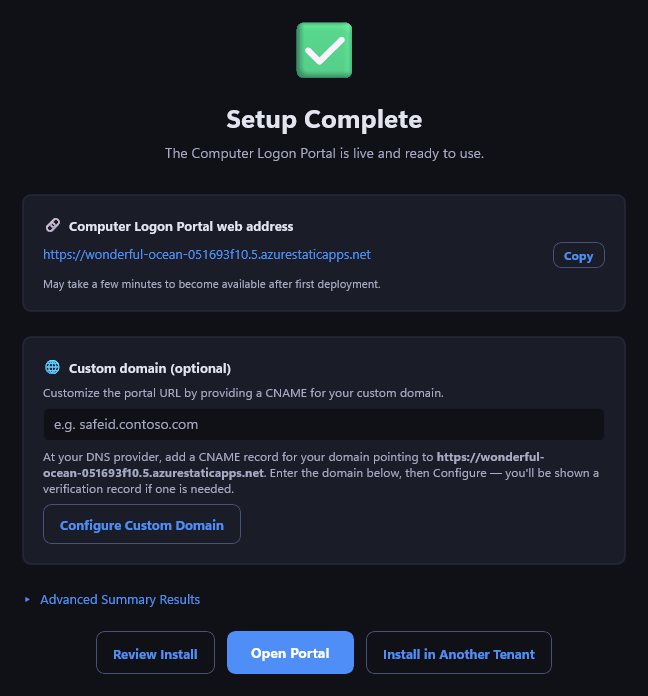
The portal's web address is ready to share with end users — Copy grabs it directly. A custom domain is entirely optional and can be added here or any time later by pointing a CNAME record at the generated address and clicking Configure Custom Domain.
Open Portal launches it in the browser; Install in Another Tenant signs out and restarts the wizard clean for a second deployment.