Table of Contents
| No Format | ||
|---|---|---|
| ||
1) Create Logon Procedure
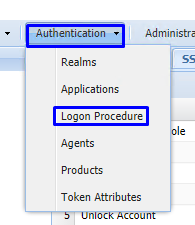
On the Management Console go to Authentication> Logon Procedure
Create a new logon procedure as follows:
, navigate to "Authentication | Logon Procedure", then click on the  button;

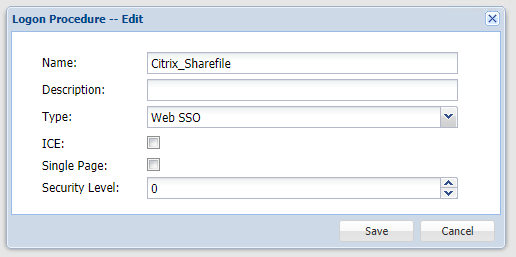
A new window will now open titled "Logon Procedure - New";

Fill in the form with name set to "Citrix_Sharefile", Typeset to: "Web SSO", then click  ;
;
 Name: Citrix_Sharefile
Type: Web SSO
Click: Save
2) Add Logon steps
Select the drop down menu corresponding to the Logon Procedure you will be using and click on Logon Steps.
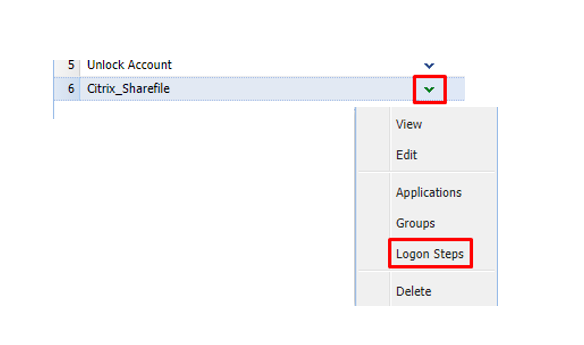
Left click on the context menu of the newly created logon procedure, then select "Logon Steps";

A new panel will now open that can be used to add logon steps to the newly created logon procedure, click on  to add the first authentication method;

A list of authentication methods that are compatible with the logon procedure type will now be listed.In the popup windows, click the ![]() button on the toolbar
button on the toolbar
Select the desired authentication method or methods, e.g. "Static Password
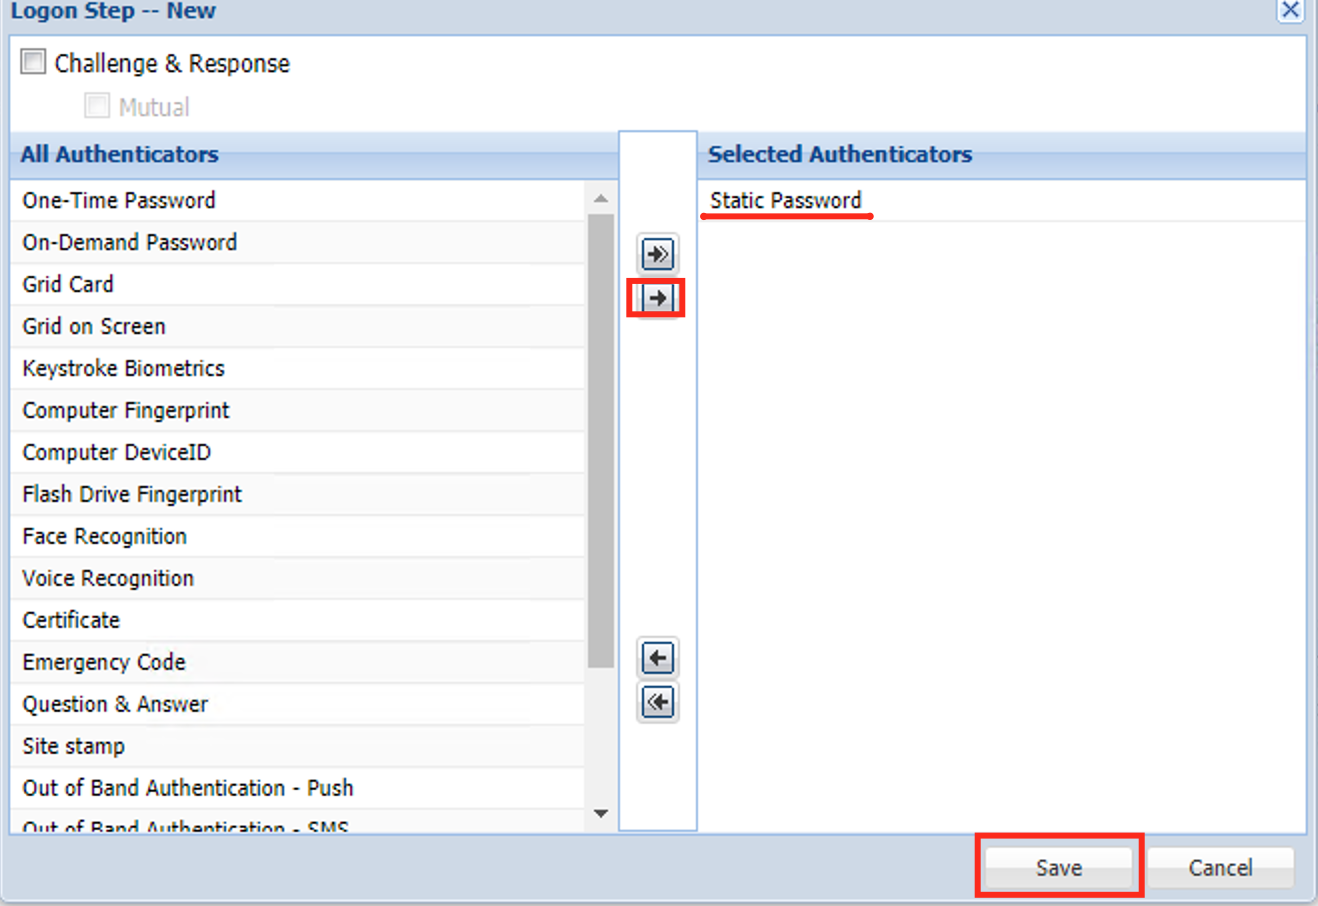
Click Save
Repeat to add more logon steps if desired, e.g. One-Time Password
", then click 

Additional steps can be added by clicking on  , and repeating the steps earlier;

In the above example two steps were added, "Static Password" and "One-Time Password".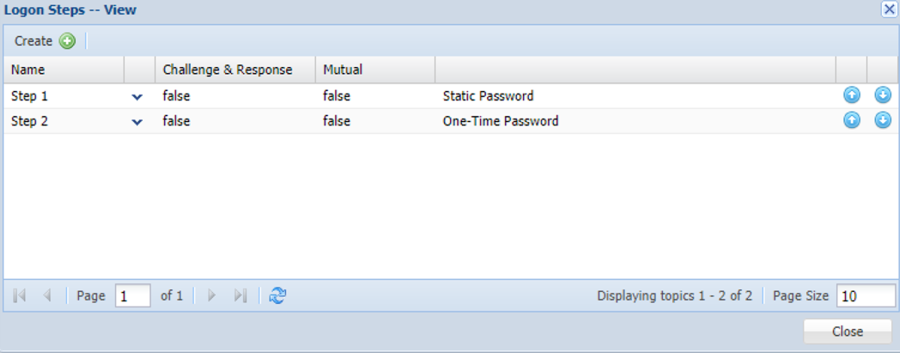
3) Create an Application
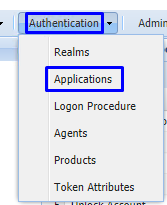
On the Management Console go to Authentication>Applications
Create a new Application as follows:
Name: Citrix_Sharefile
Realm: Select your Realm
Logon Procedure: Citrix_Sharefile
, navigate "Authentication | Applications", then click on the  button;

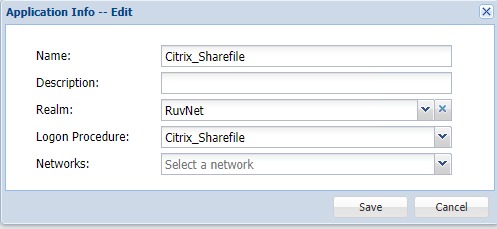
A new window titled "Application - New" will now open;

Fill in the form with "Name:" set to "Citrix_Sharefile",
"Realm:" set to: "Select your Realm",
"logon procedure" set to "Citrix_Sharefile", then click ;

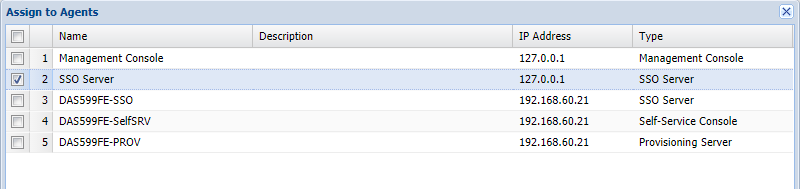
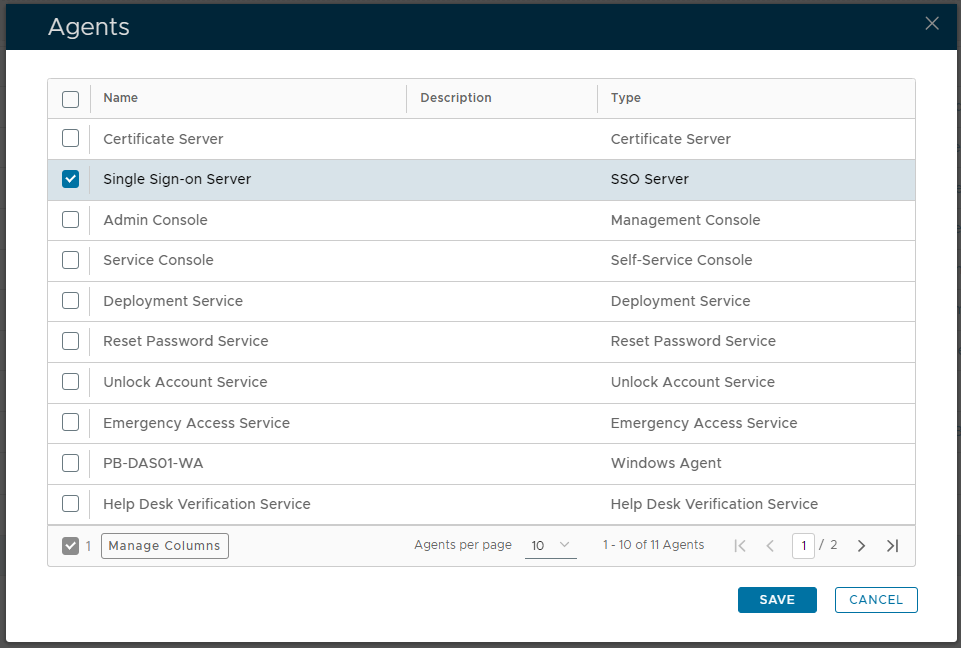
4) Bind the Application to an SSO Server Agent
Select the drop down menu corresponding to the newly created Application you will be using and click on Agents
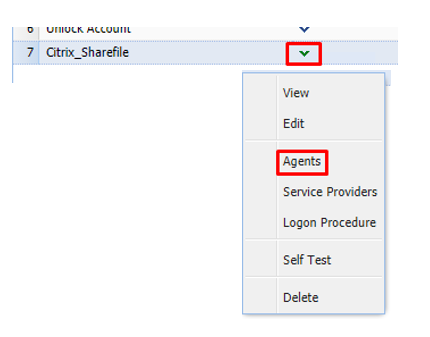
Left click on the context menu of your newly created application and select "Agents";

A new window titled "Agents" will now open, tick Tick the box of the SSO Server you will be using and click Save below.
5) Download the IDP Metadata file
Select the drop down menu corresponding to the SSO server you will be using and click on Download IDP Metadata.

