Sign into Saleforce console

Click the Setup icon on the top-right corner, then select Setup

Create a New Permission Set for STS
Navigate to ADMINISTRATION | Users | Permission Sets
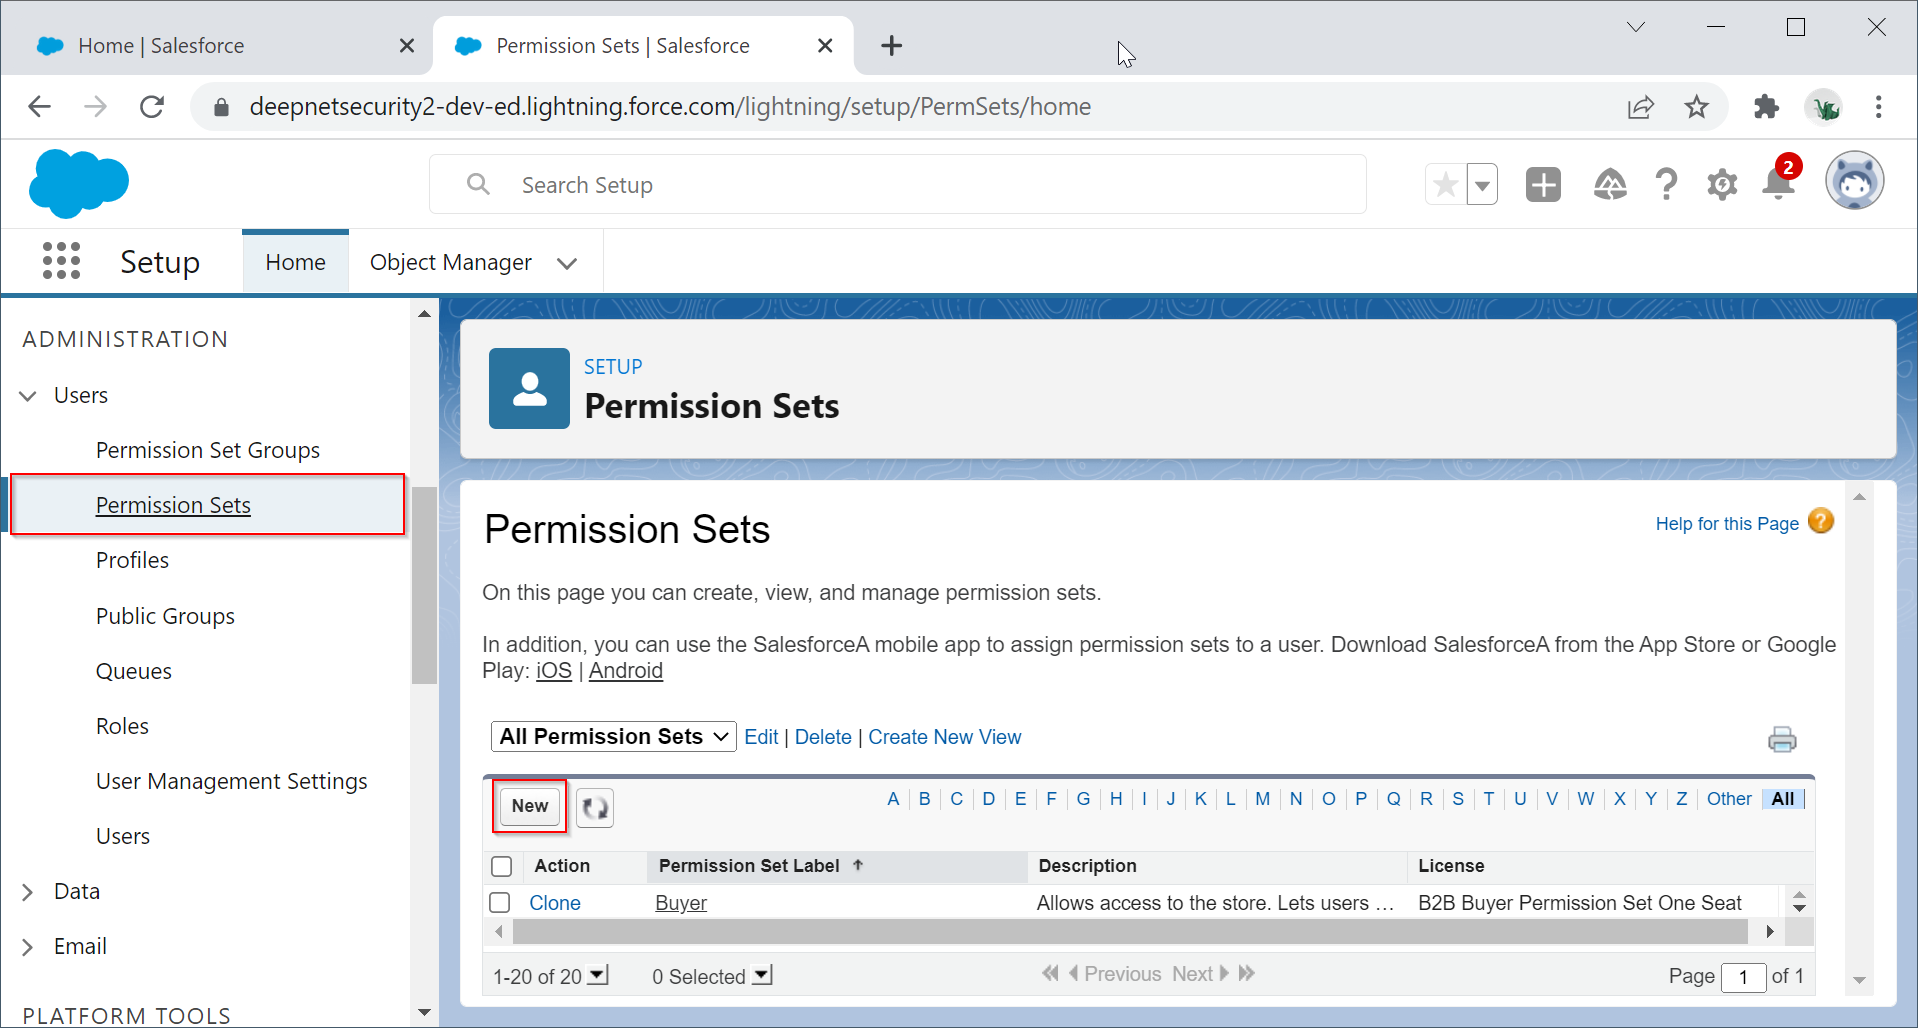
Click the New button
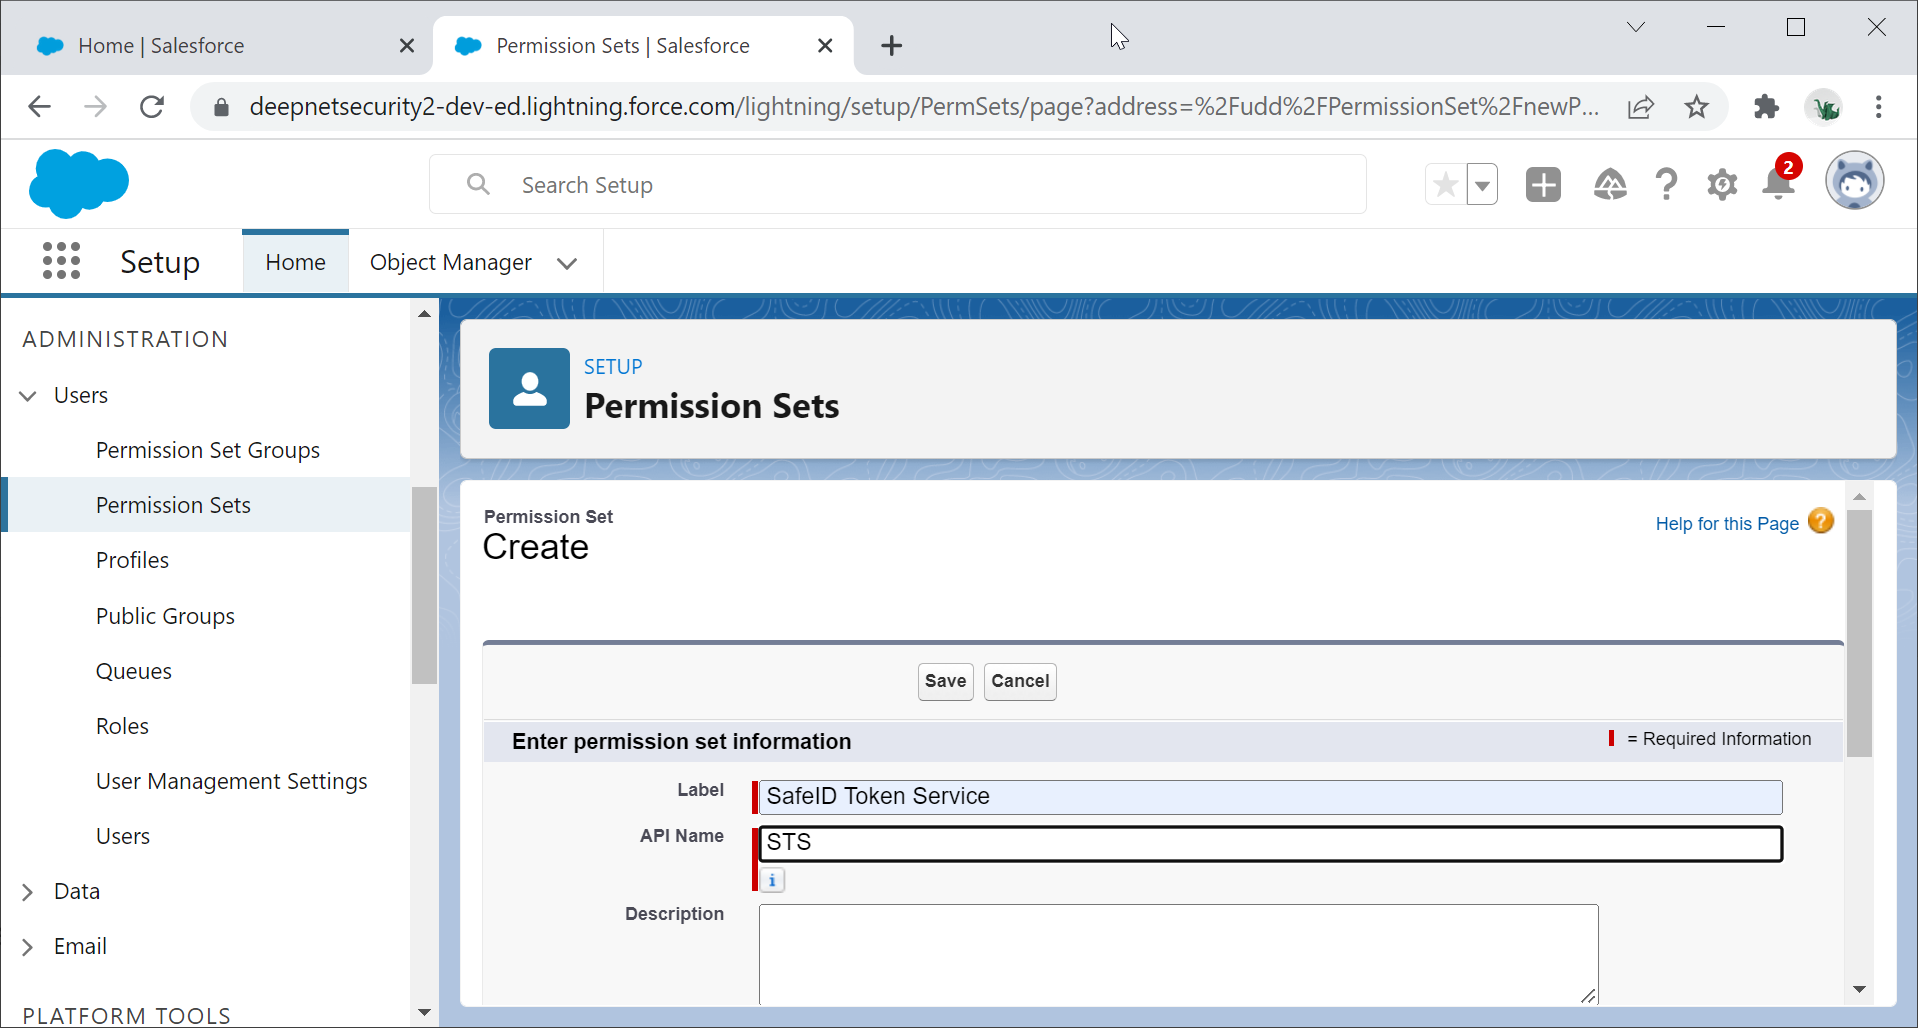
Enter the Lebel and API Name
Click Save to create this new permission set
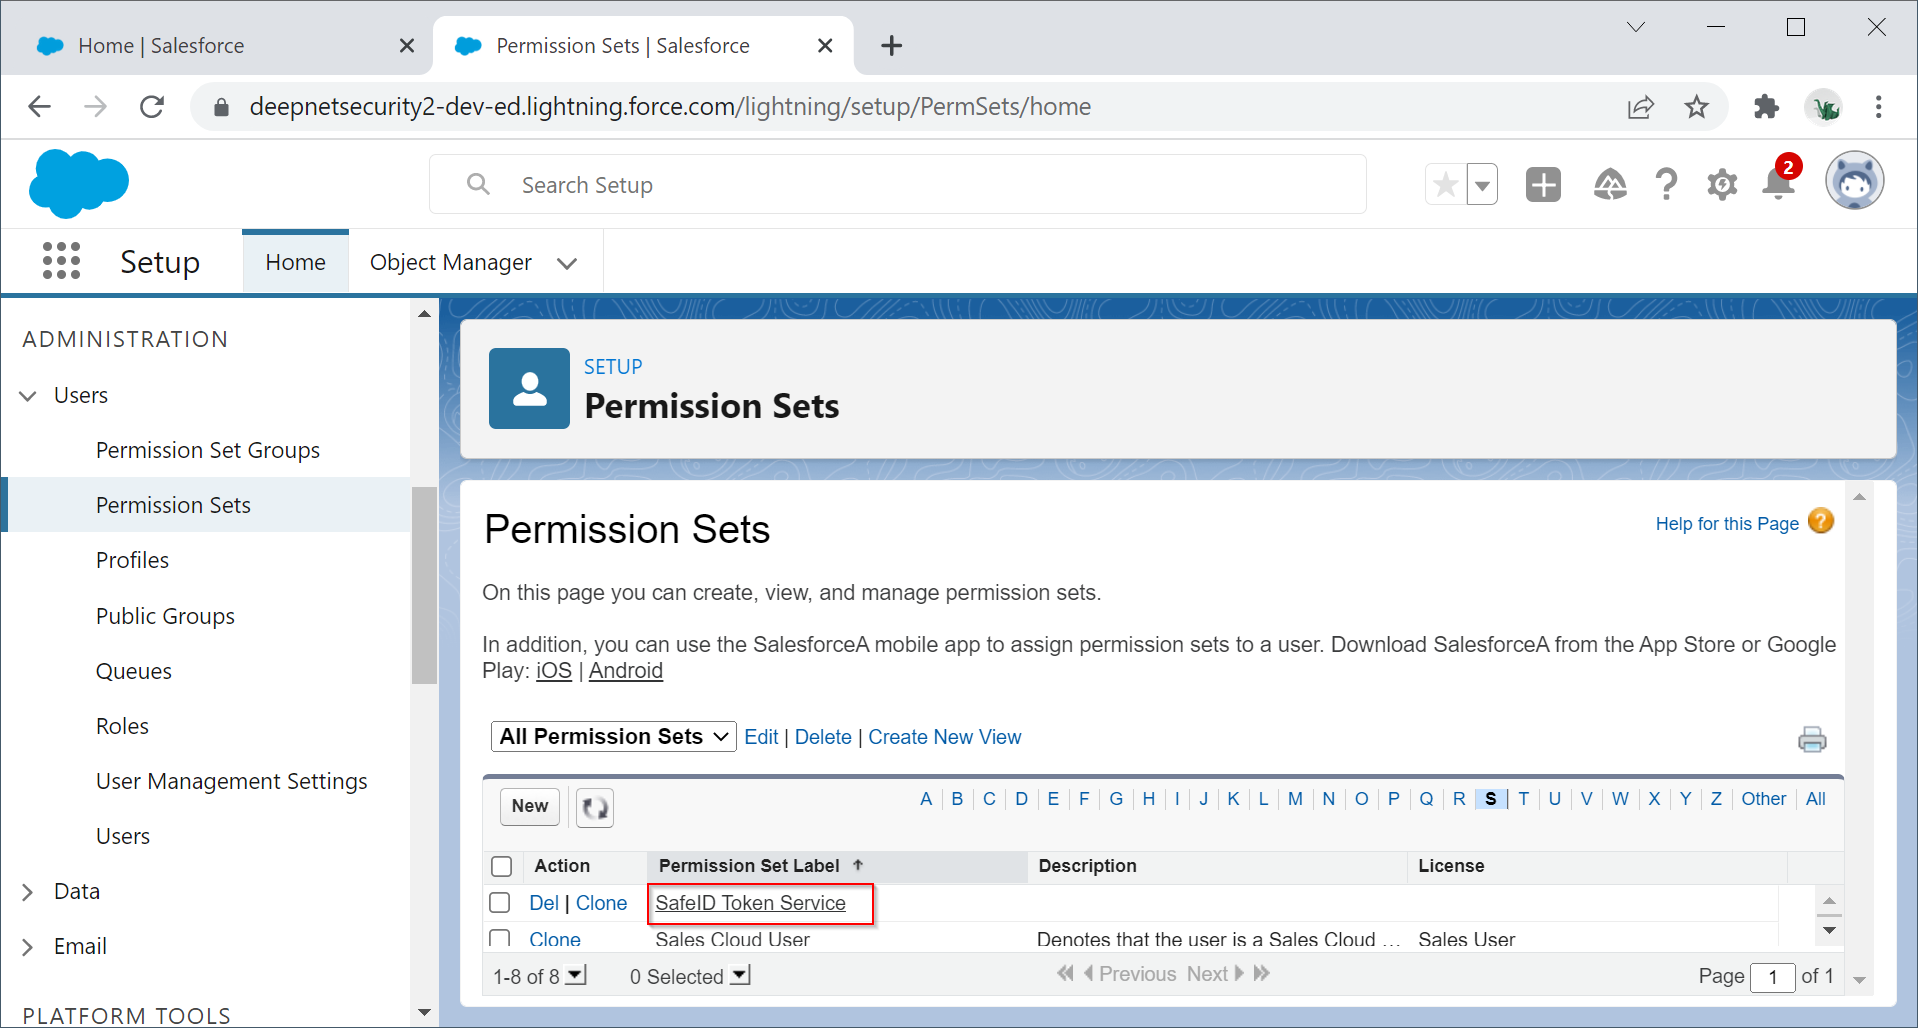
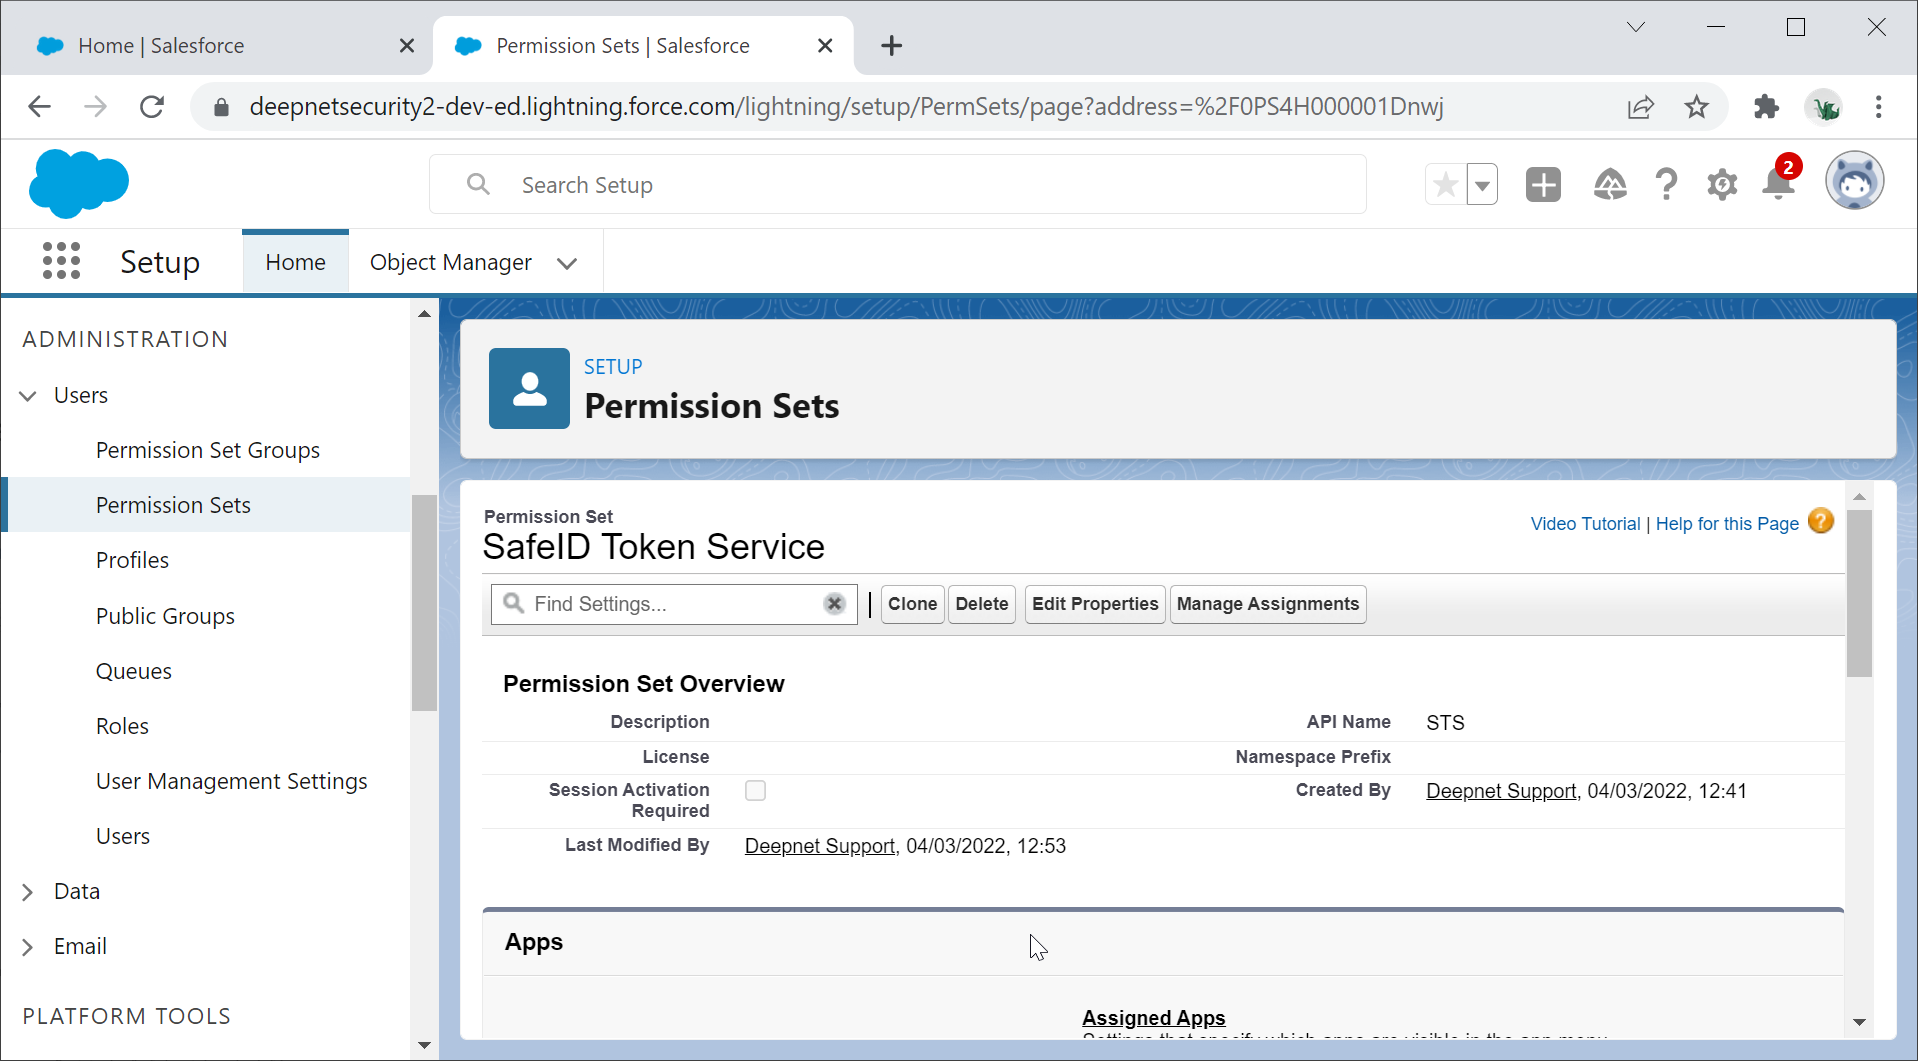
Click the newly created permission set, e.g. SafeID Token Service
Scroll down to the System section
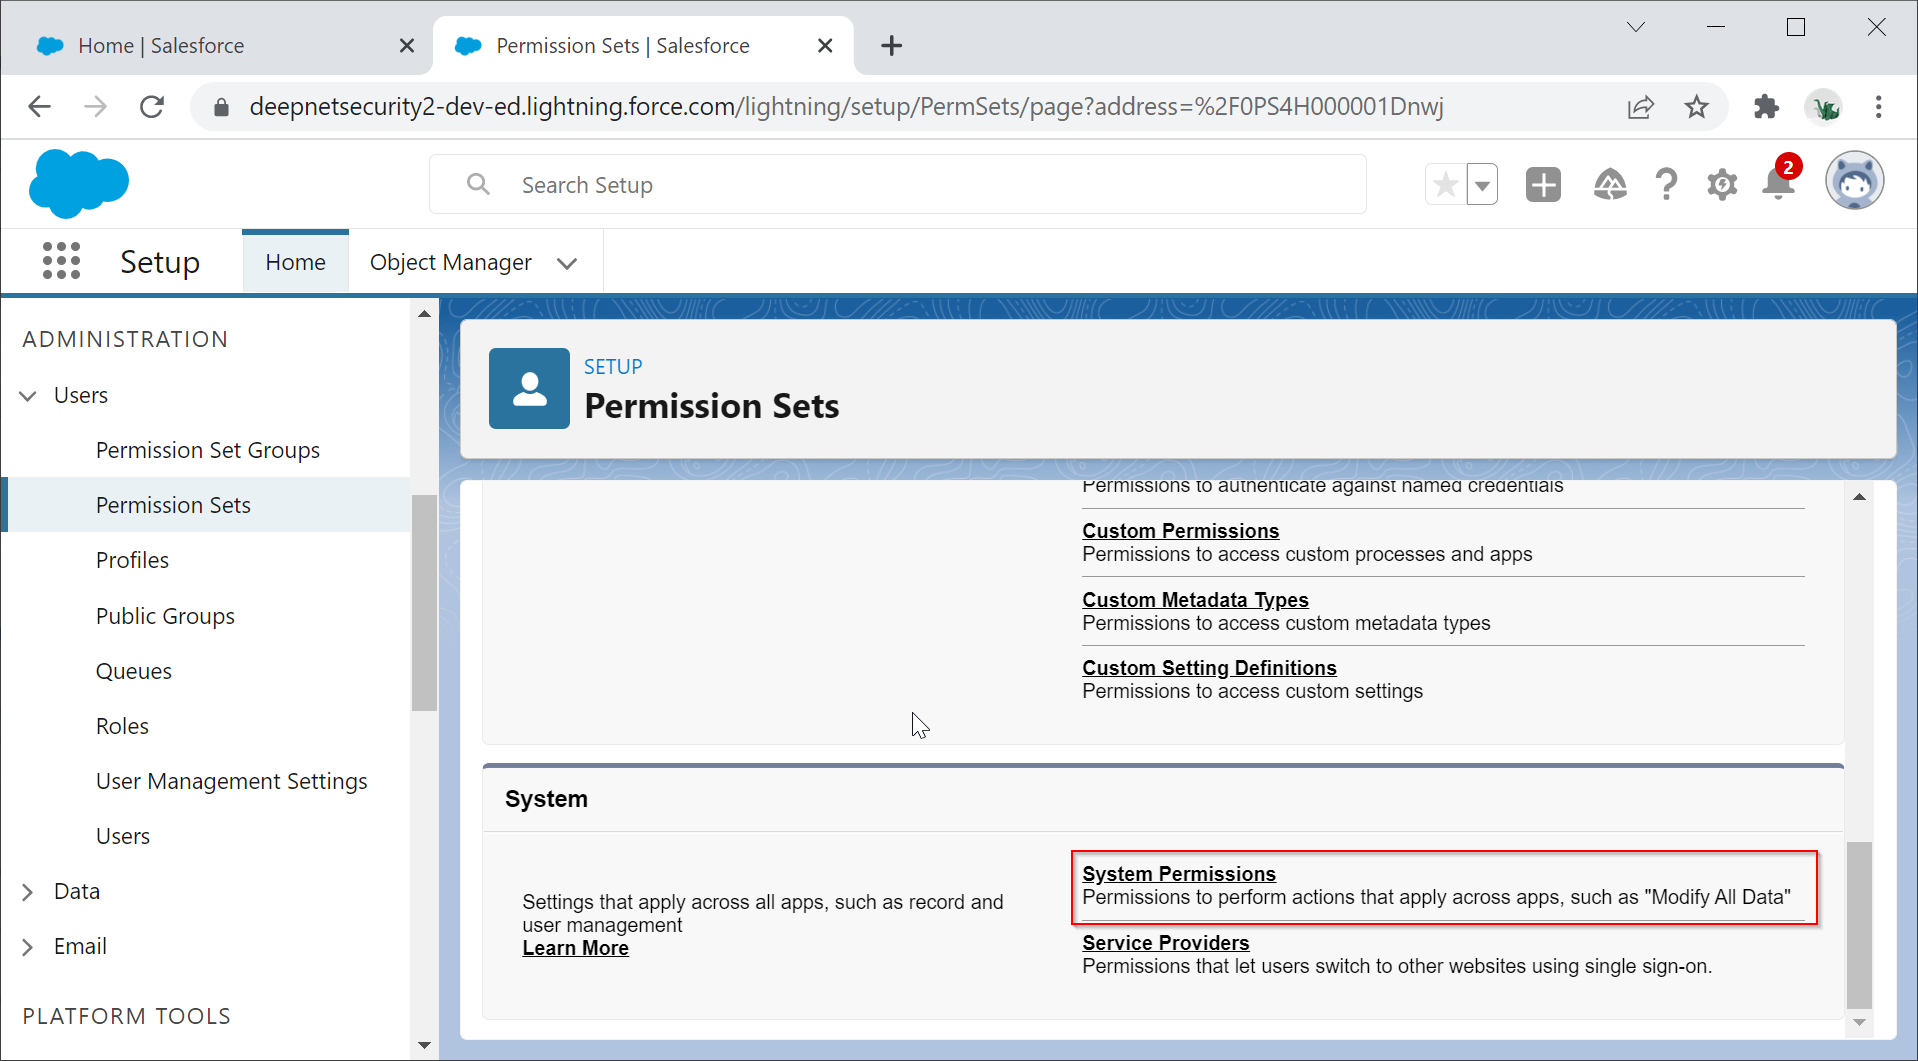
Click the System Permissions link
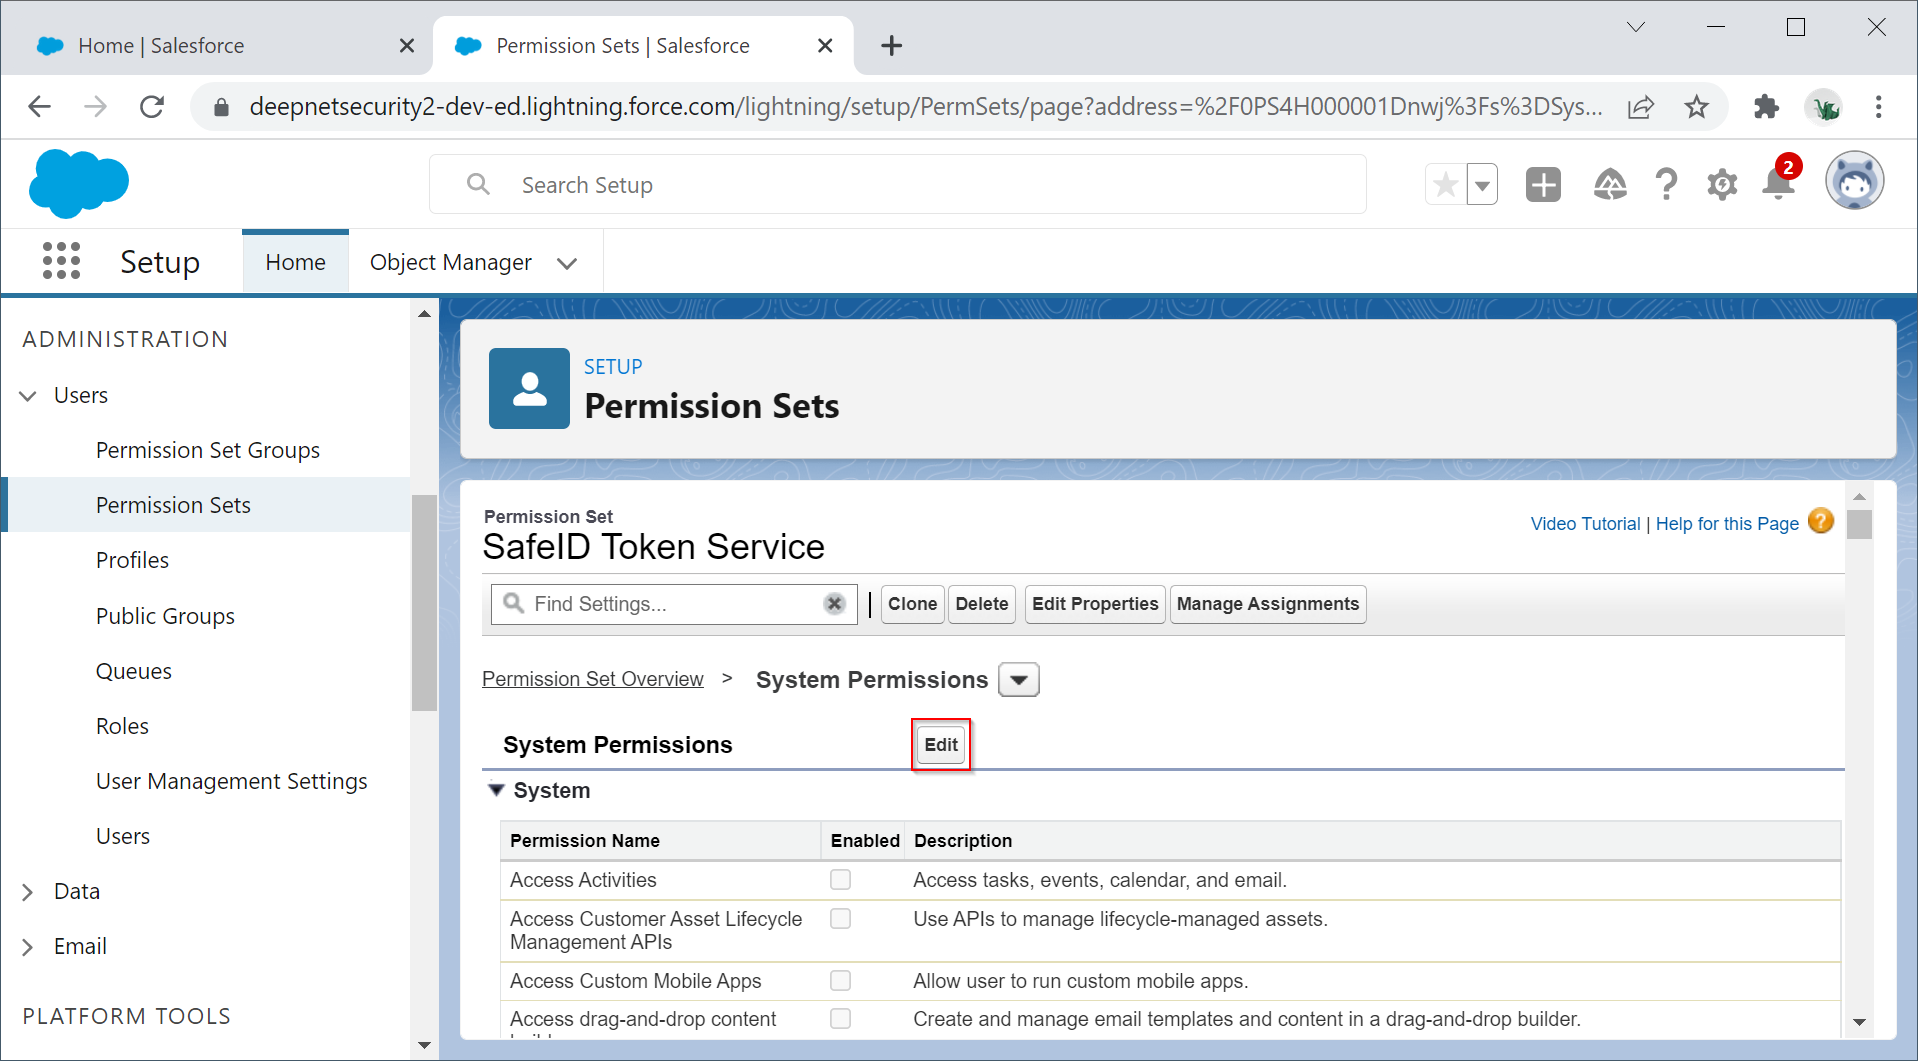
Click the Edit button

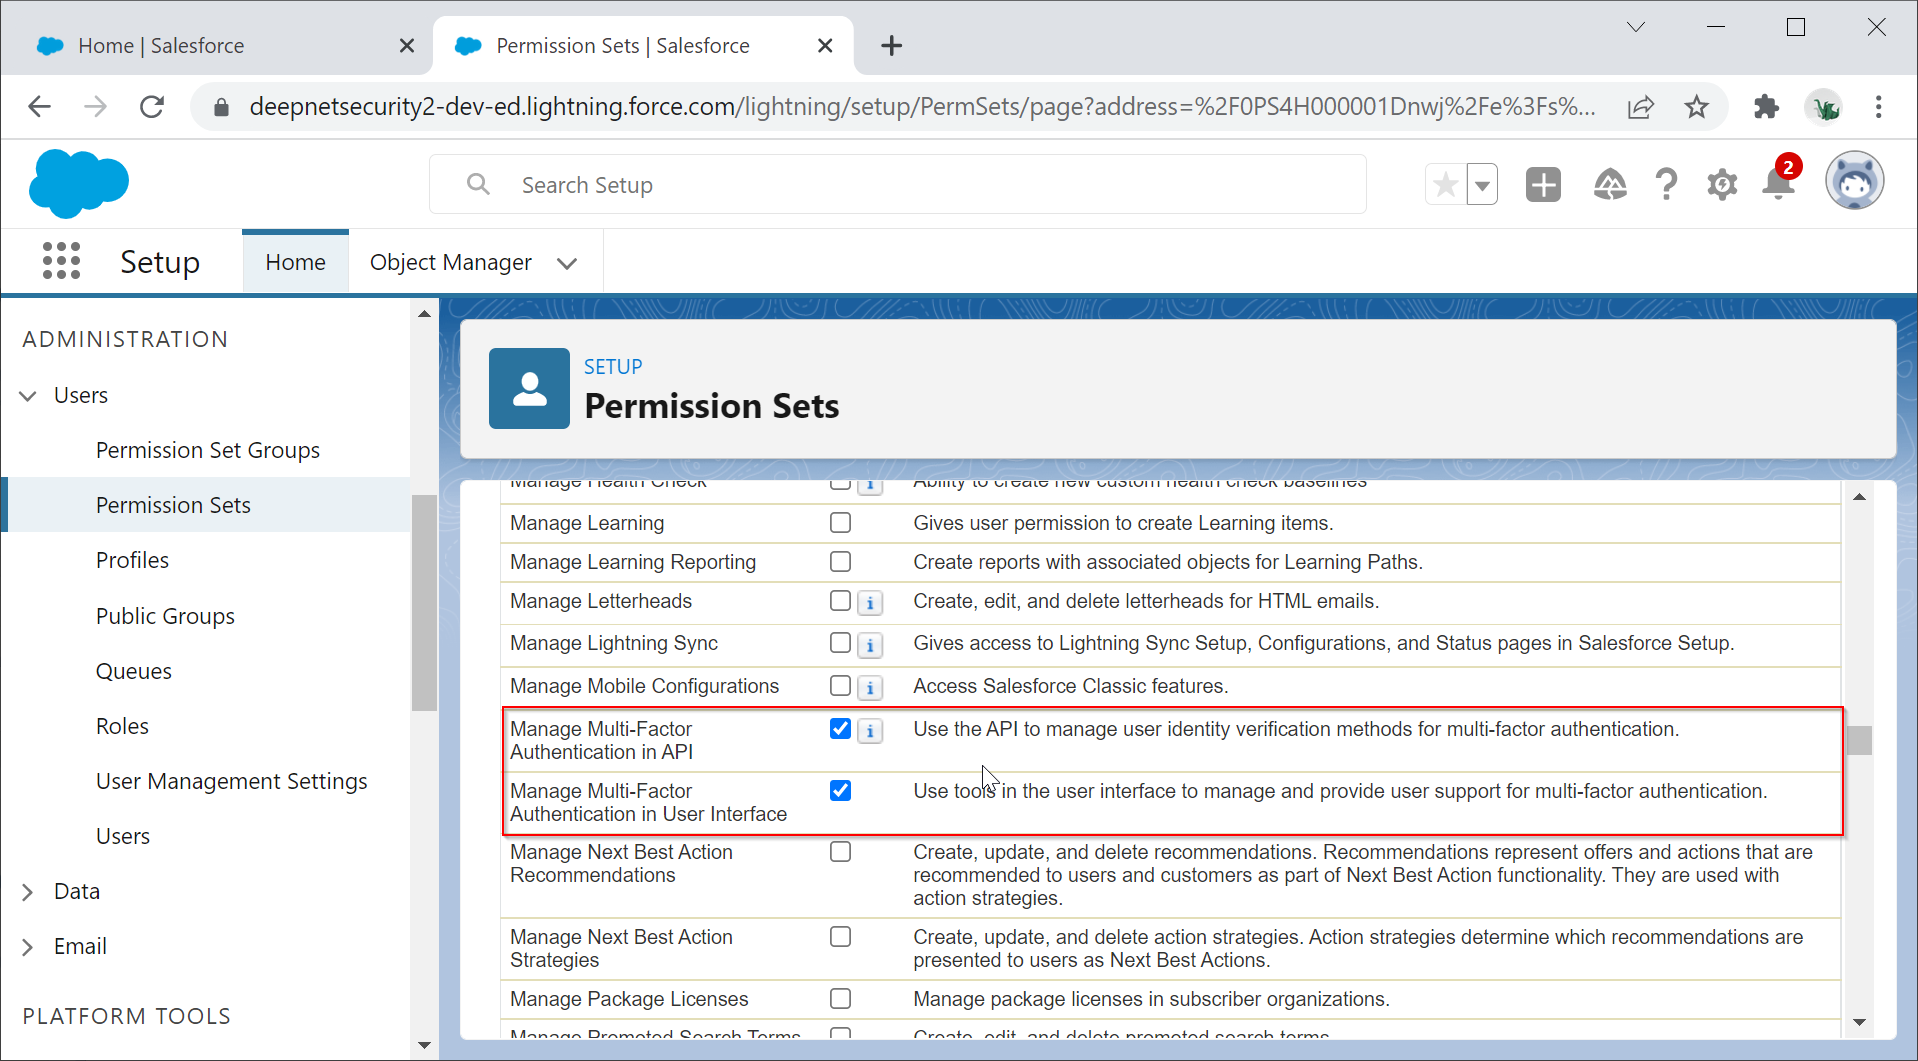
Scroll down until you see the option "Manage Multi-Factor Authentication in API"

Enable the option "Manage Multi-Factor Authentication in API" and "Manage Multi-Factor Authentication in User Interface"
Scroll up to the top
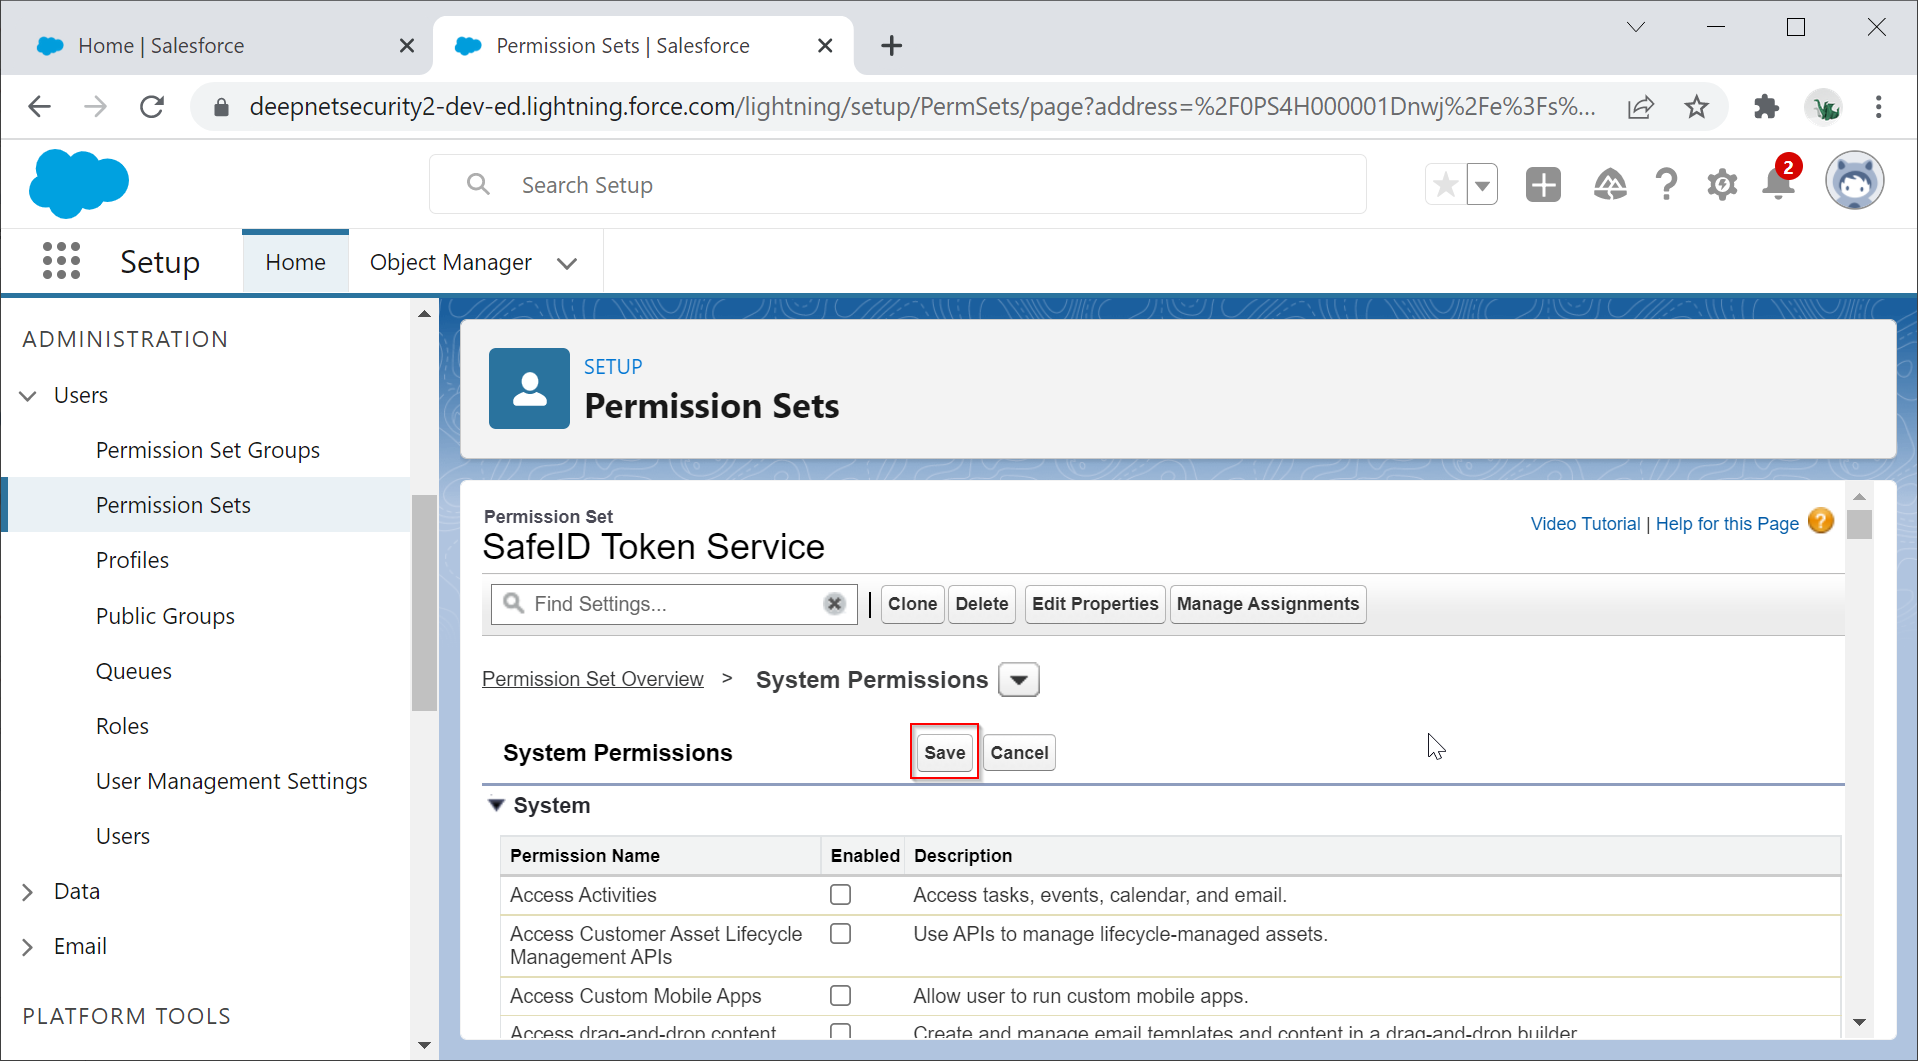
Click the "Save" button to save the settings.
Create the Access User for STS
Navigate to ADMINISTRATION | Users | Users
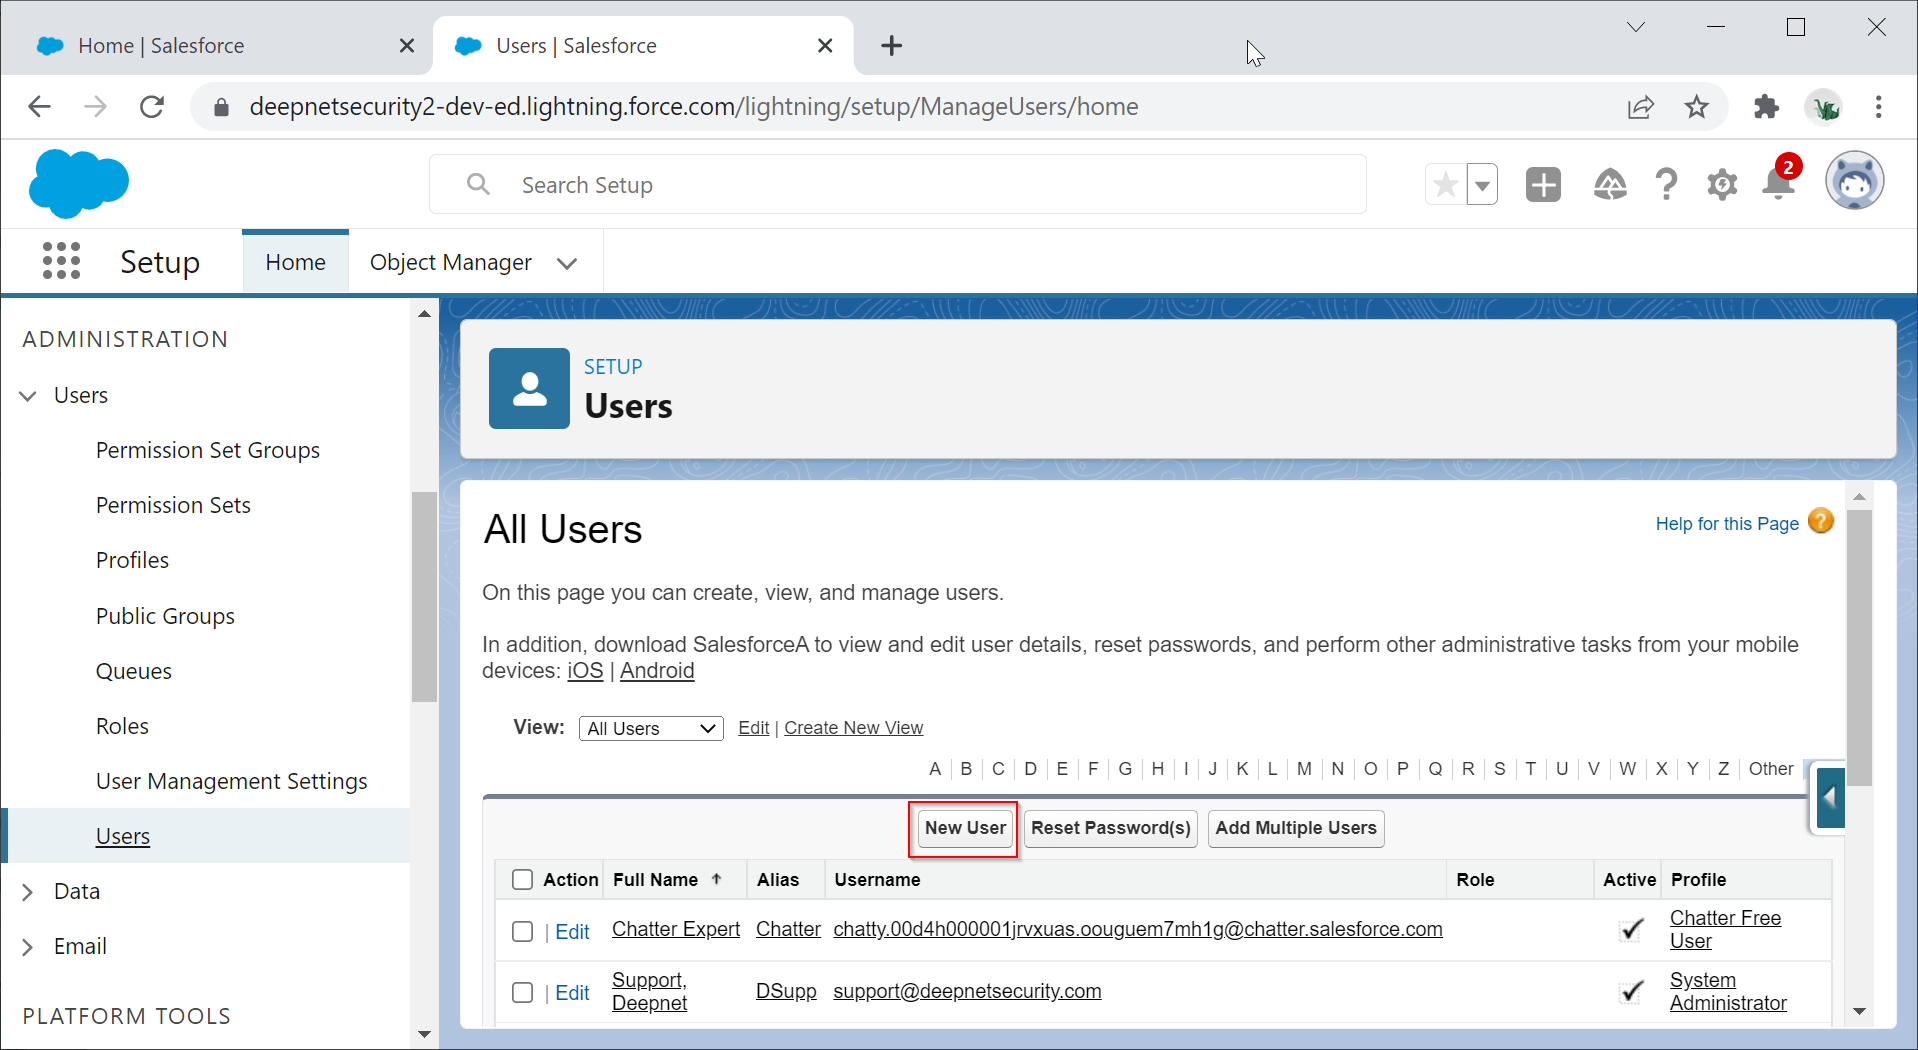
Click New User
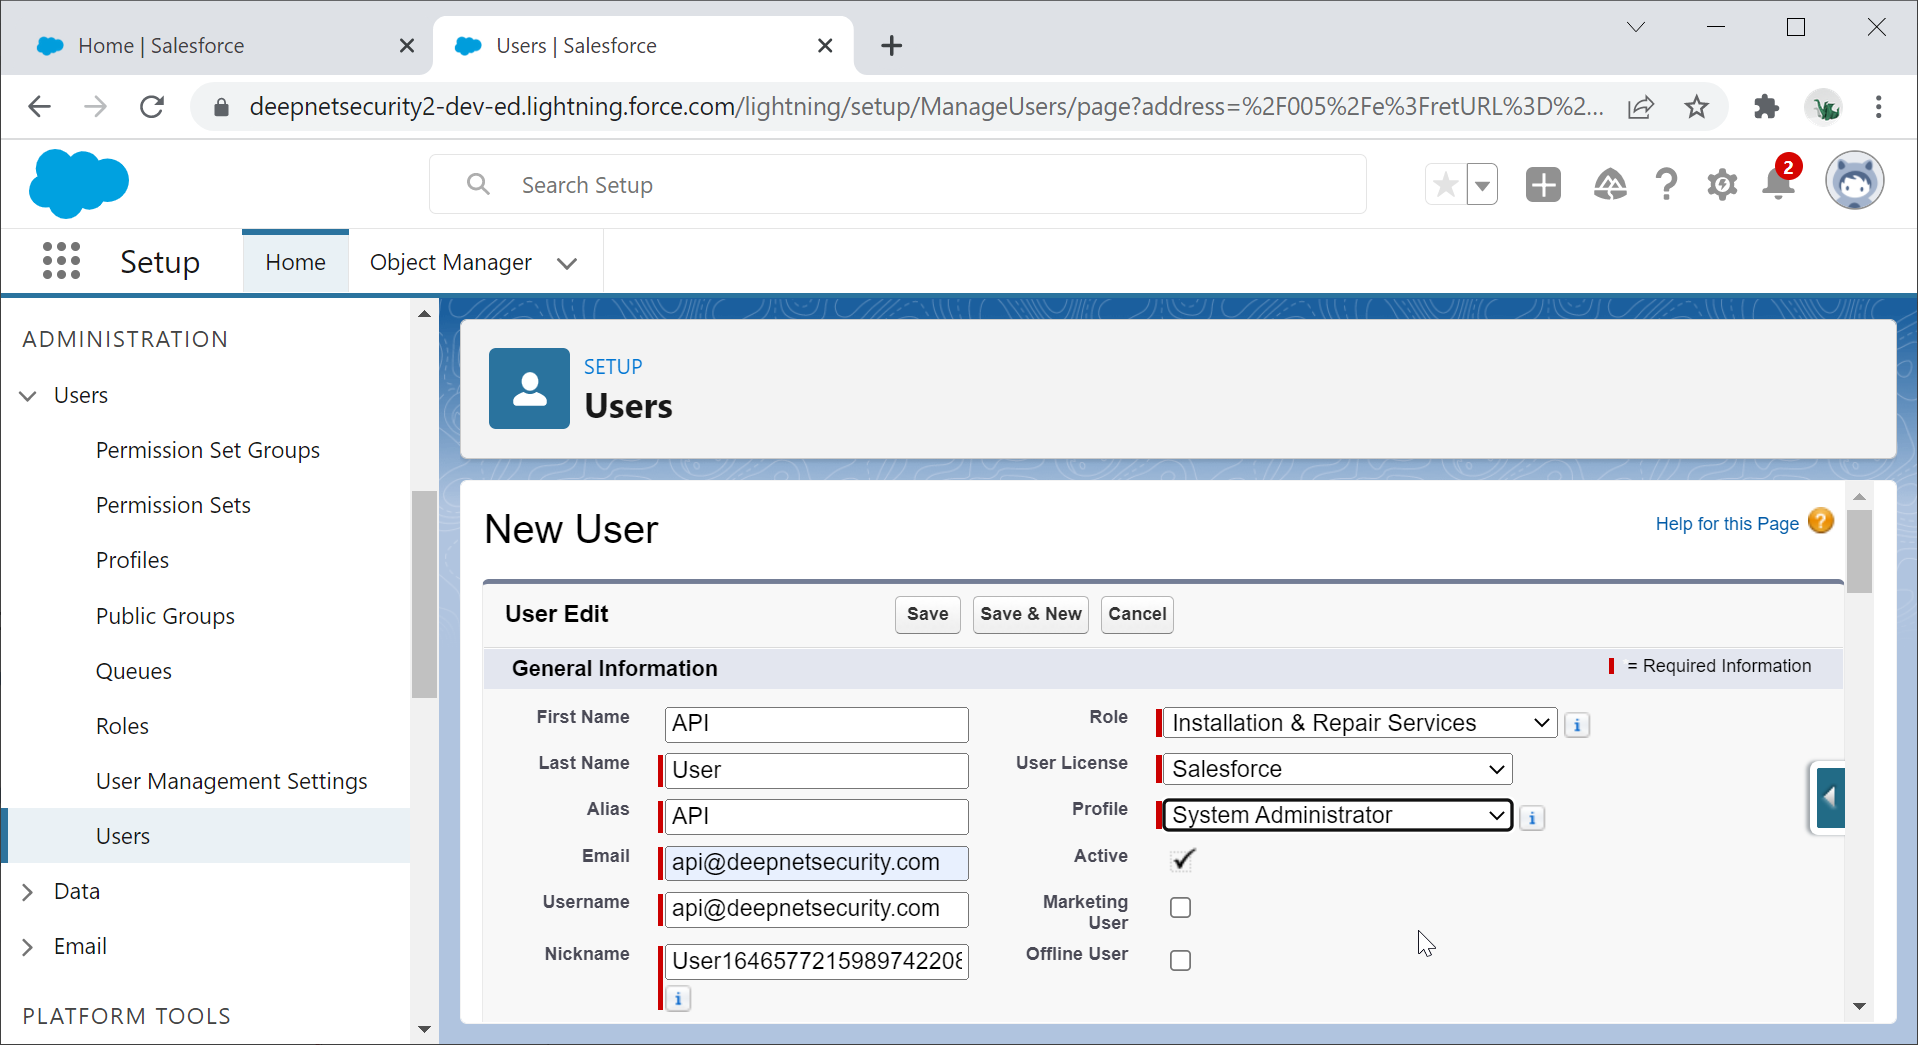
Fill out the new user's properties, and make sure the User License must be set as Salesforce
Click Save to create the new user
You will receive an email from Saleforce
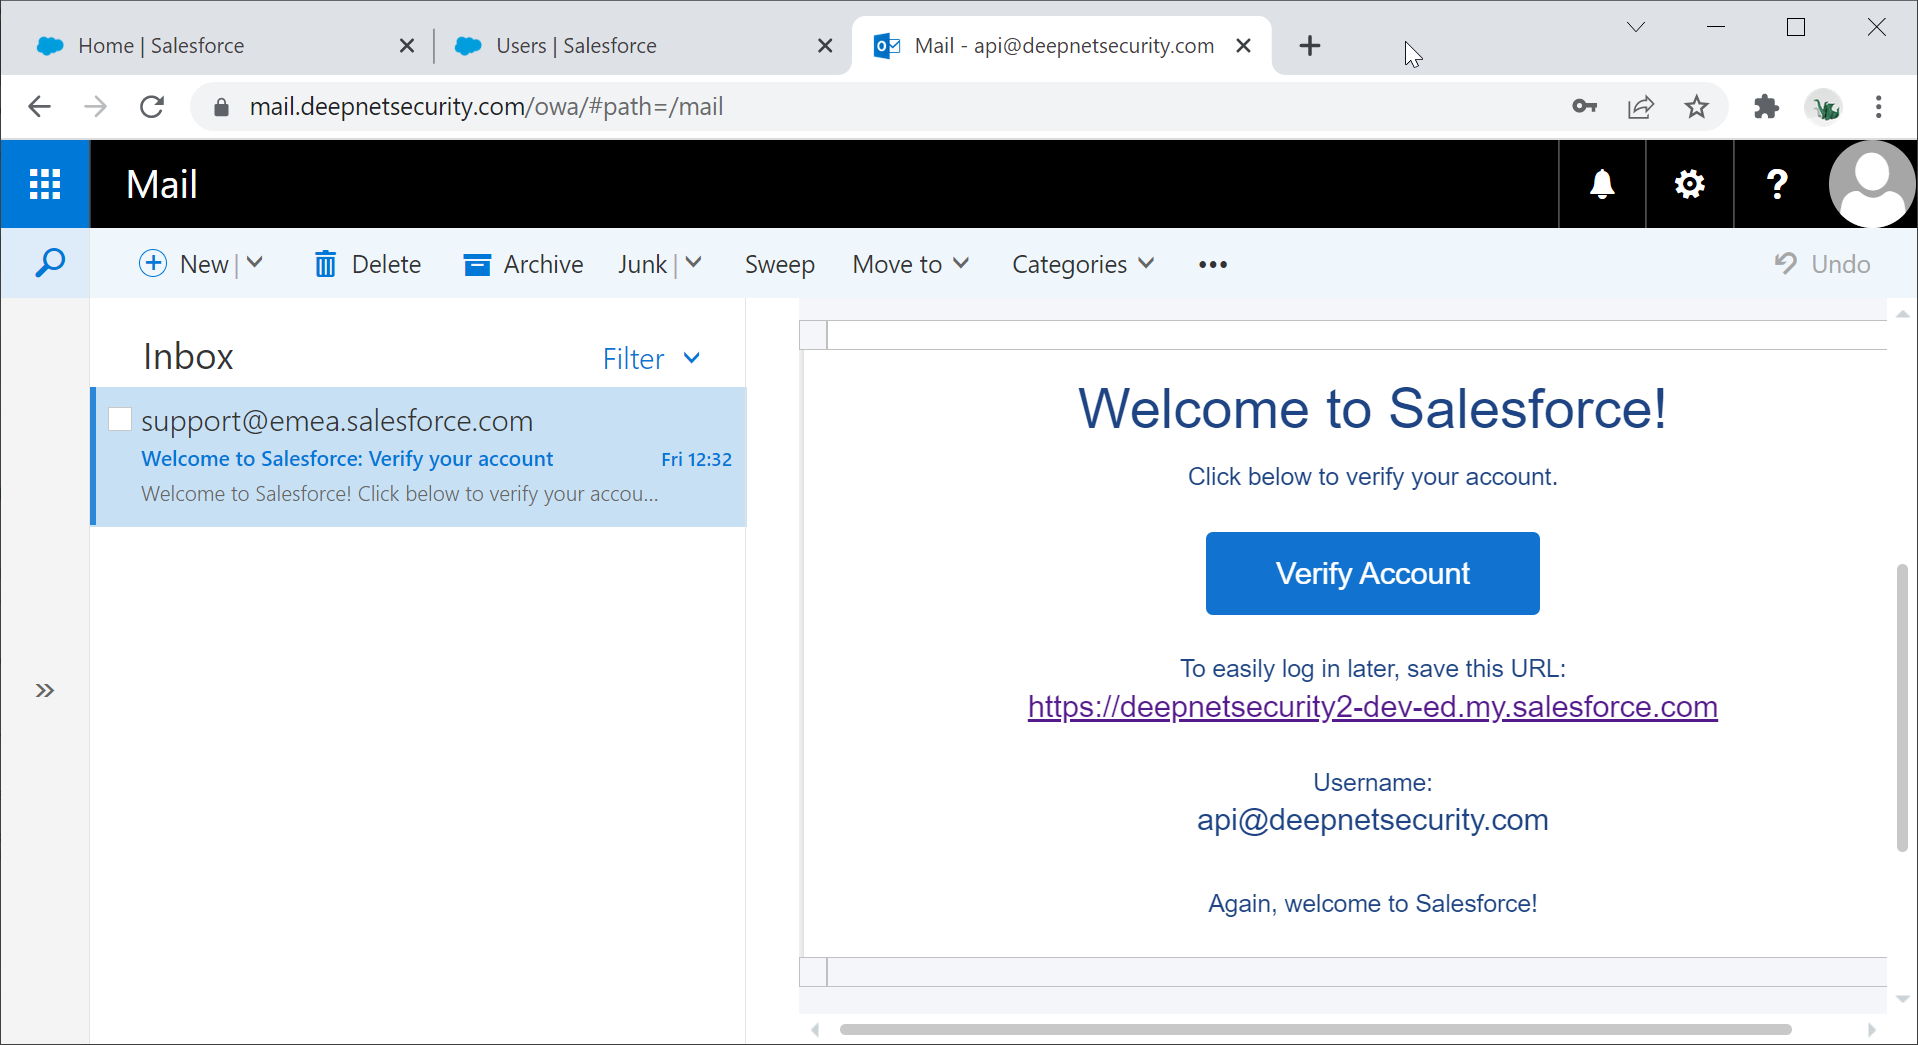
Click Verify Account to verify your account and set the password of the account
Assign the STS permission set to the STS access user
In the Salesforce console, navigate to ADMINISTRATION | Users | Users
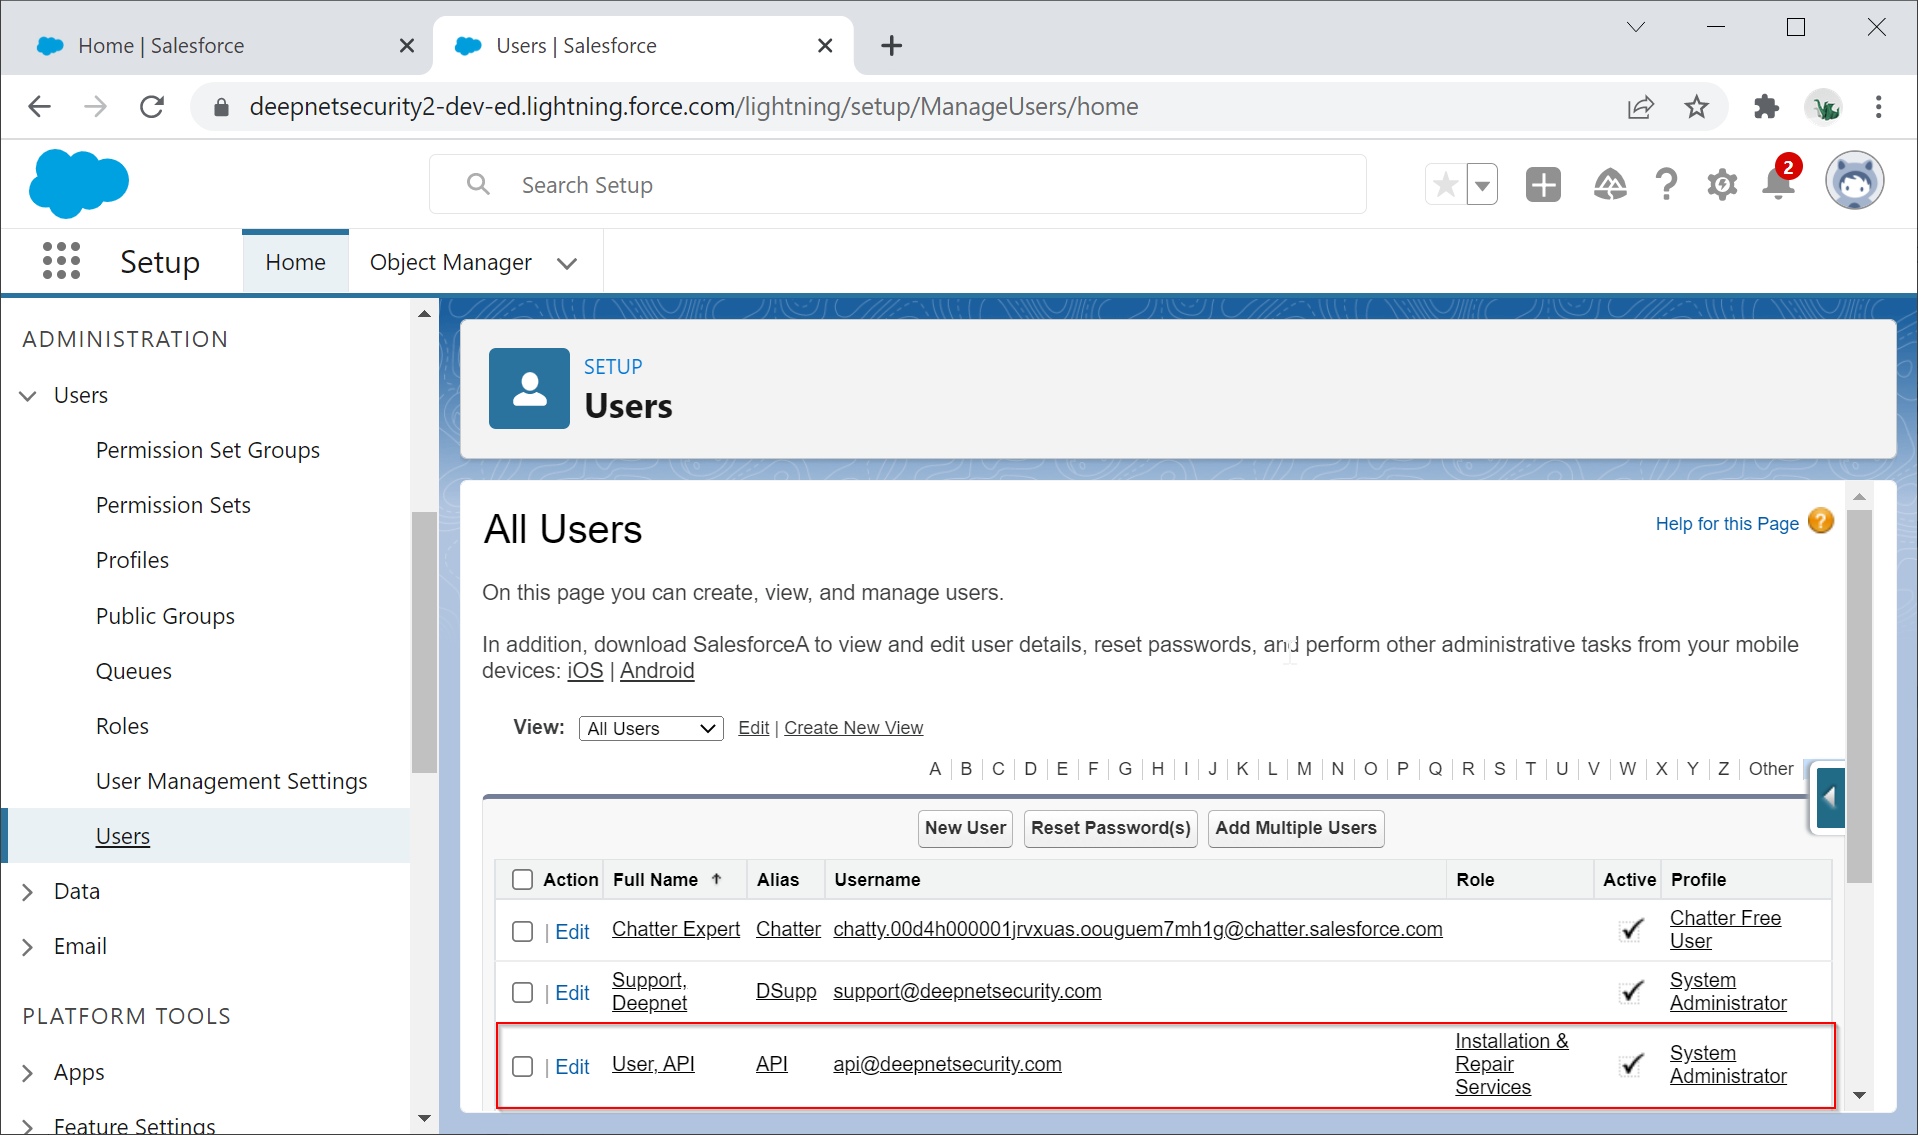
Click the newly created user account, e.g. API
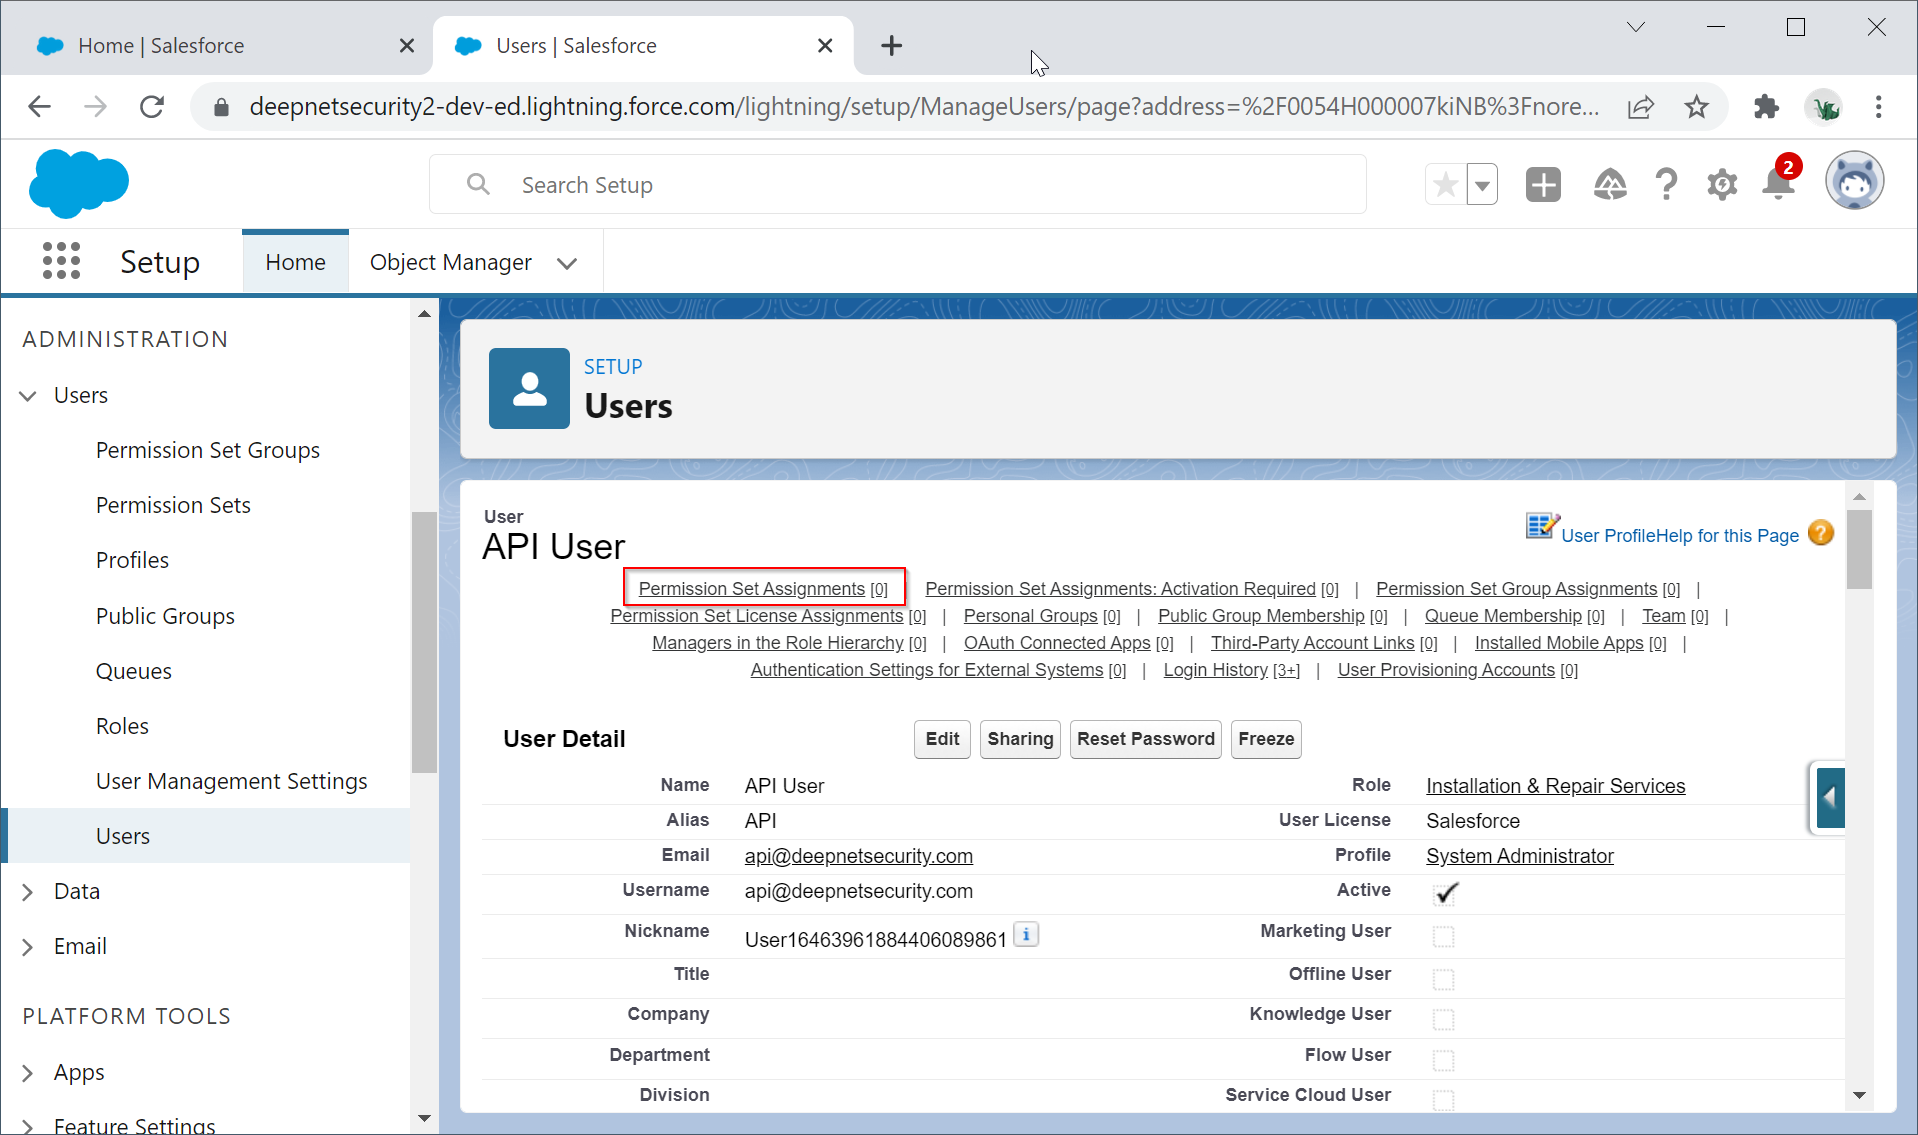
Click "Permission Set Assignments
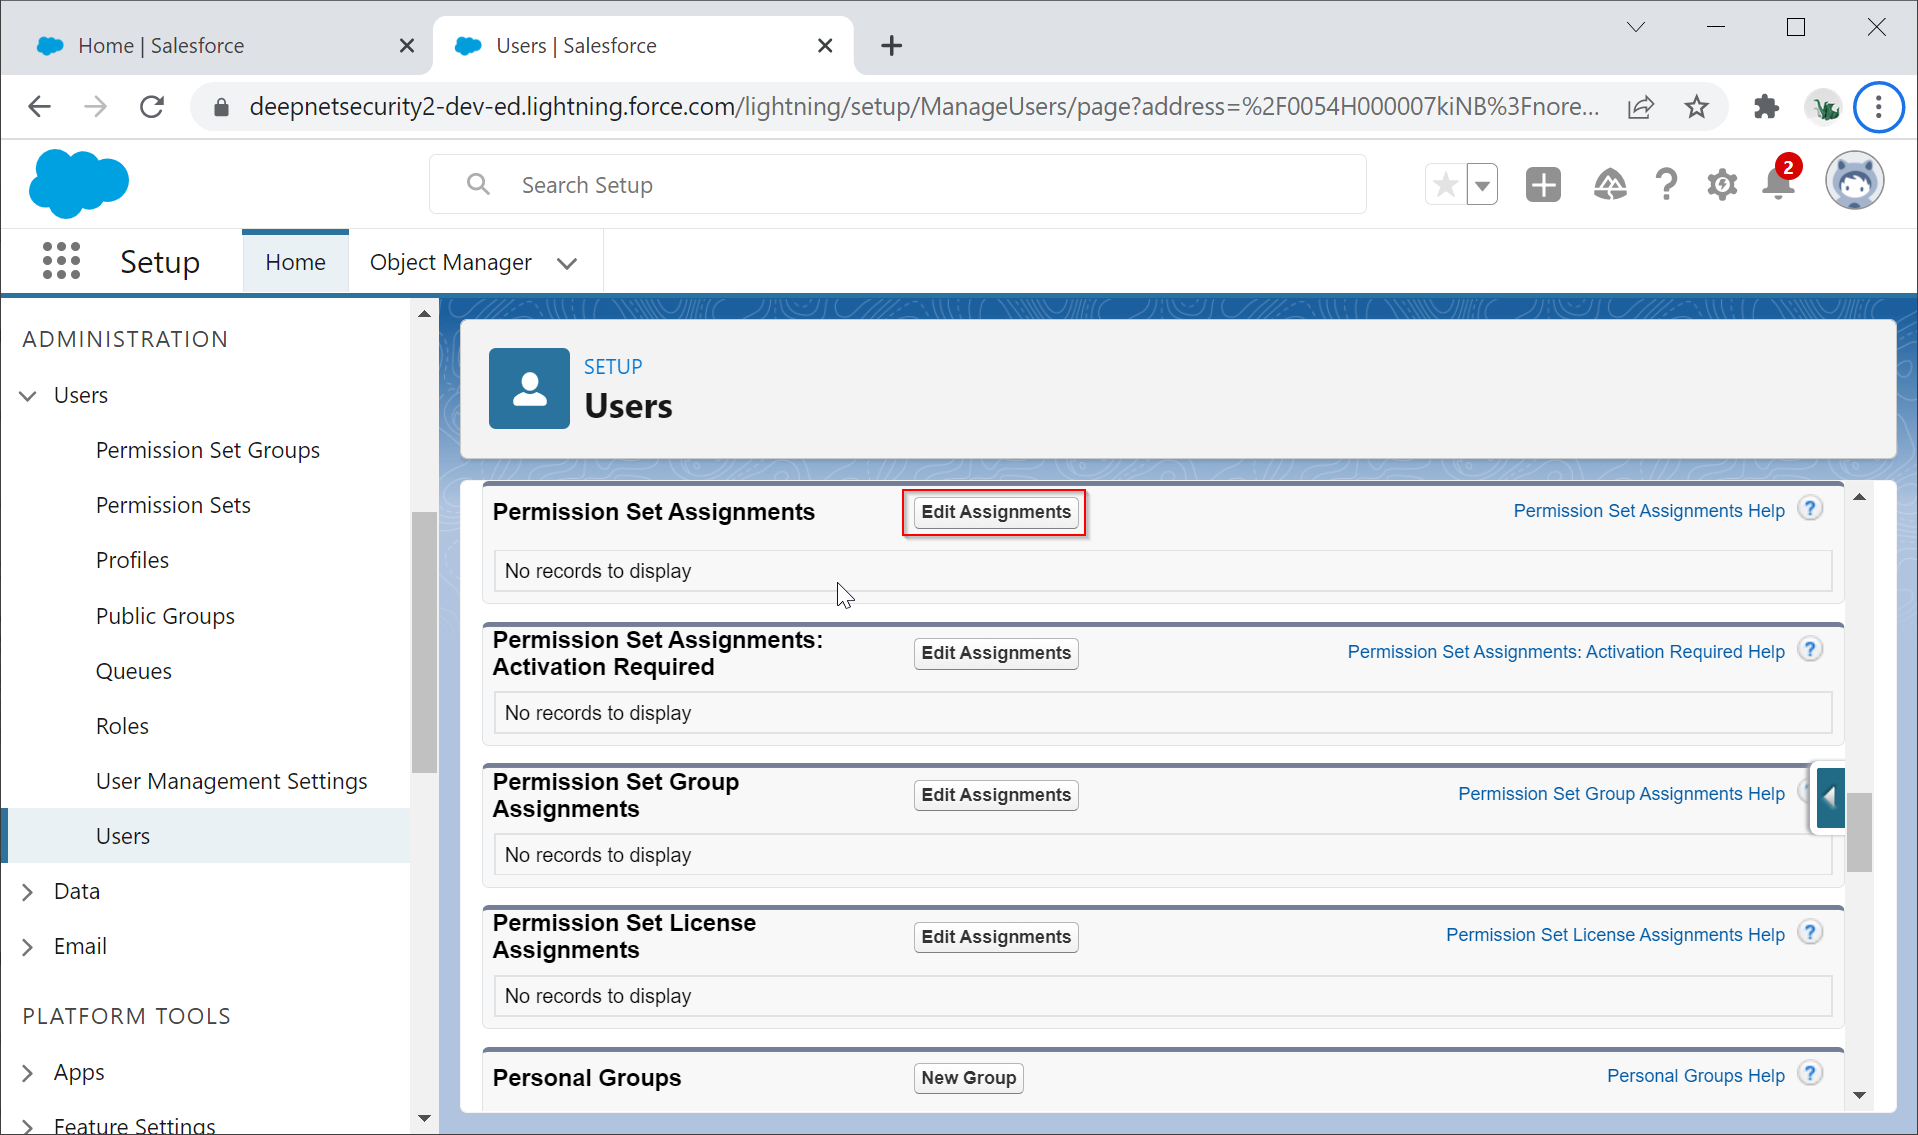
Click "Edit Assignments"
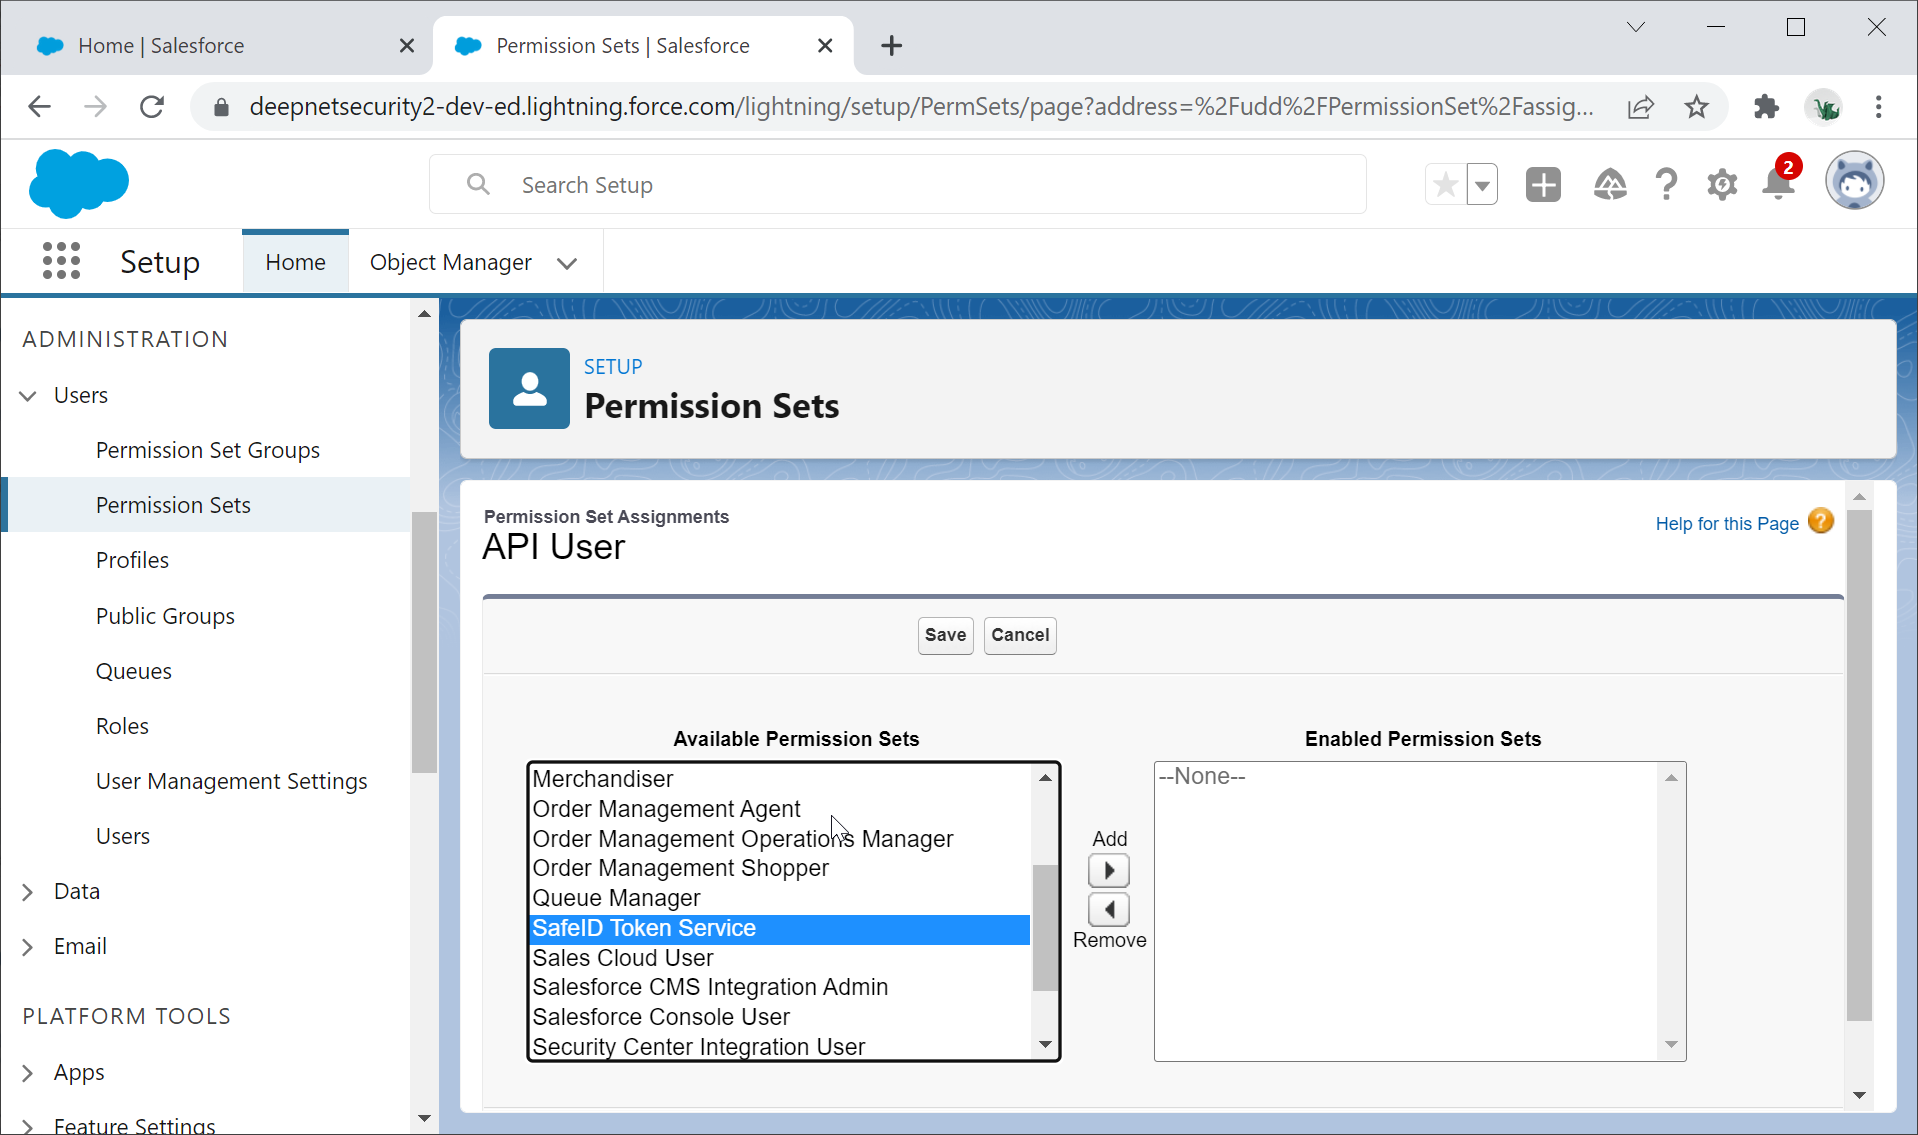
Select the permission set you created earlier for STS, e.g. SafeID Token Service
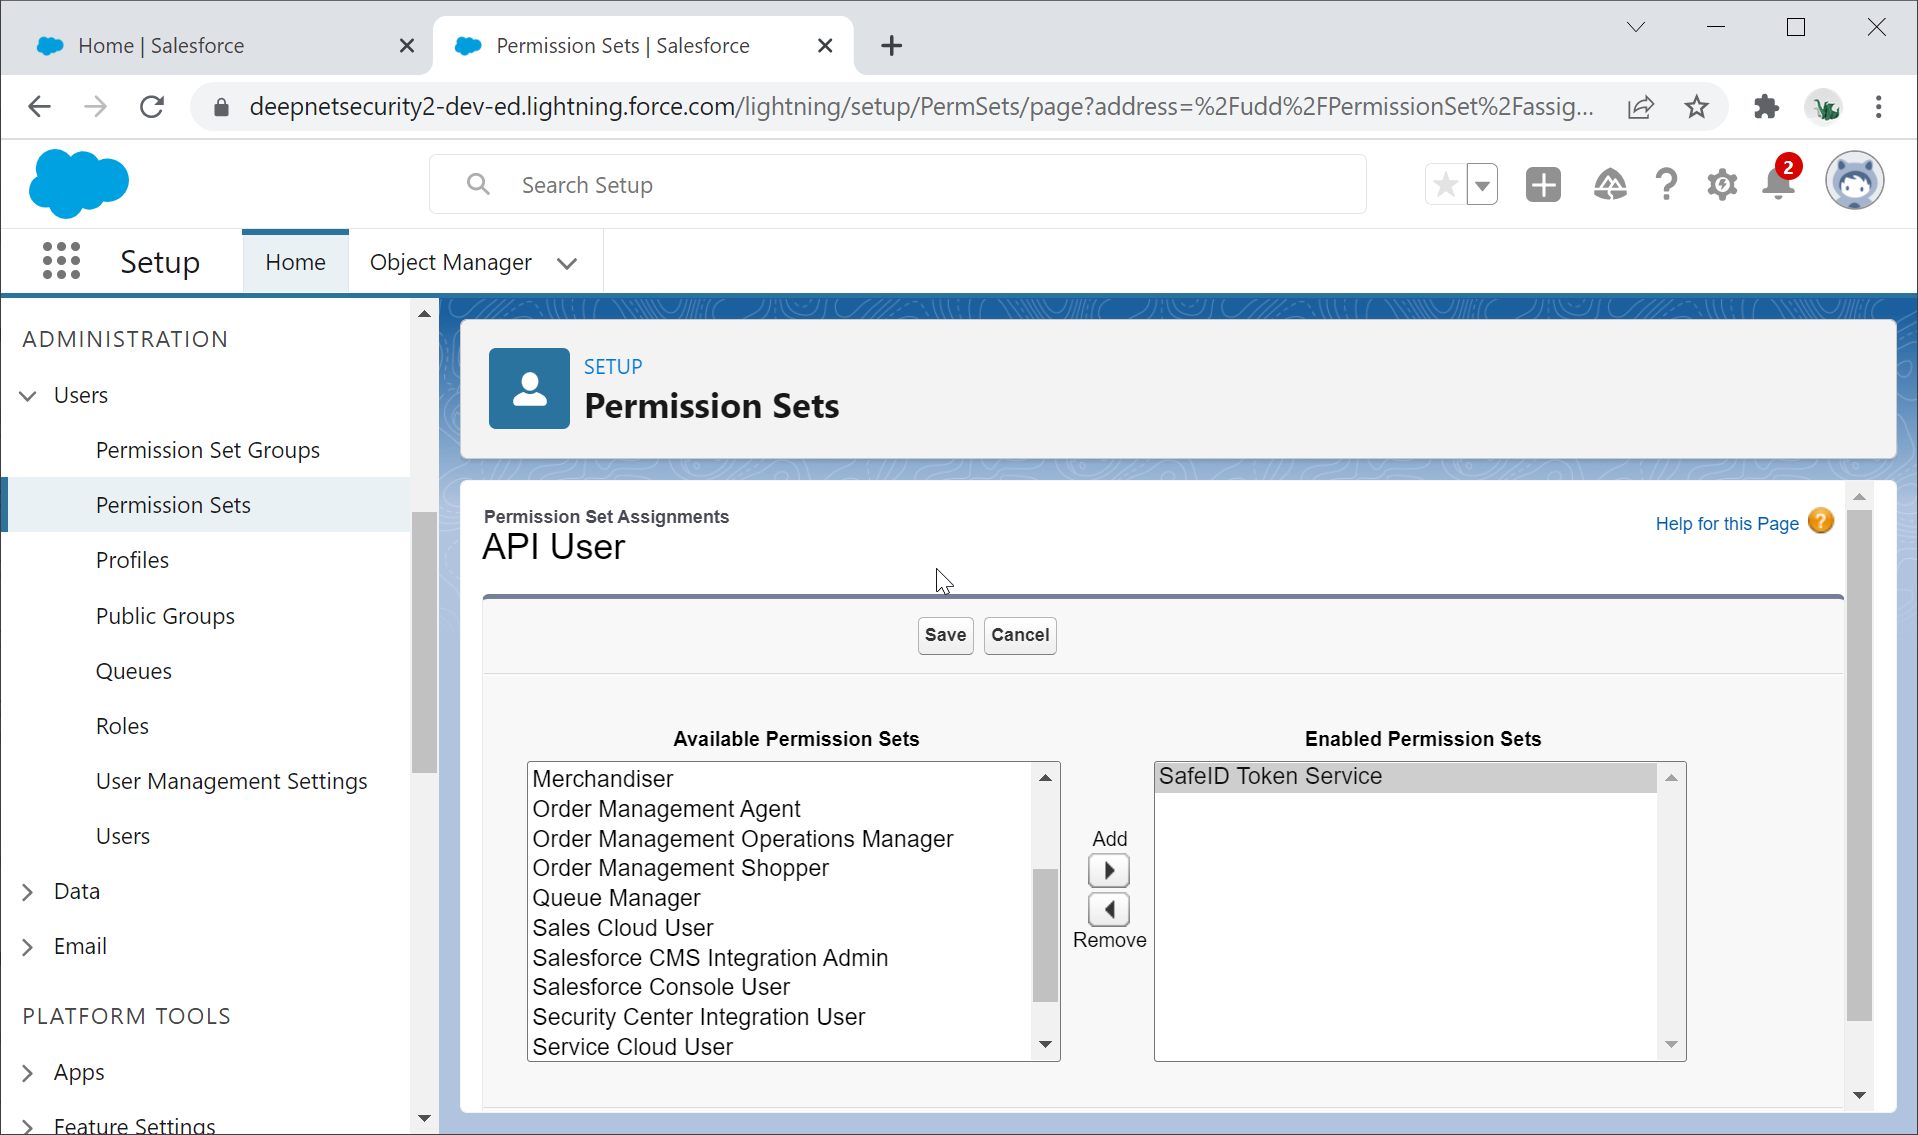
Click the Save button to save the settings
If you get an error at this time, then make sure the user has a license that allows the Permission Set to be assigned
Create a new App for STS
Navigate to PLATFORM TOOLS | Apps | App Manager
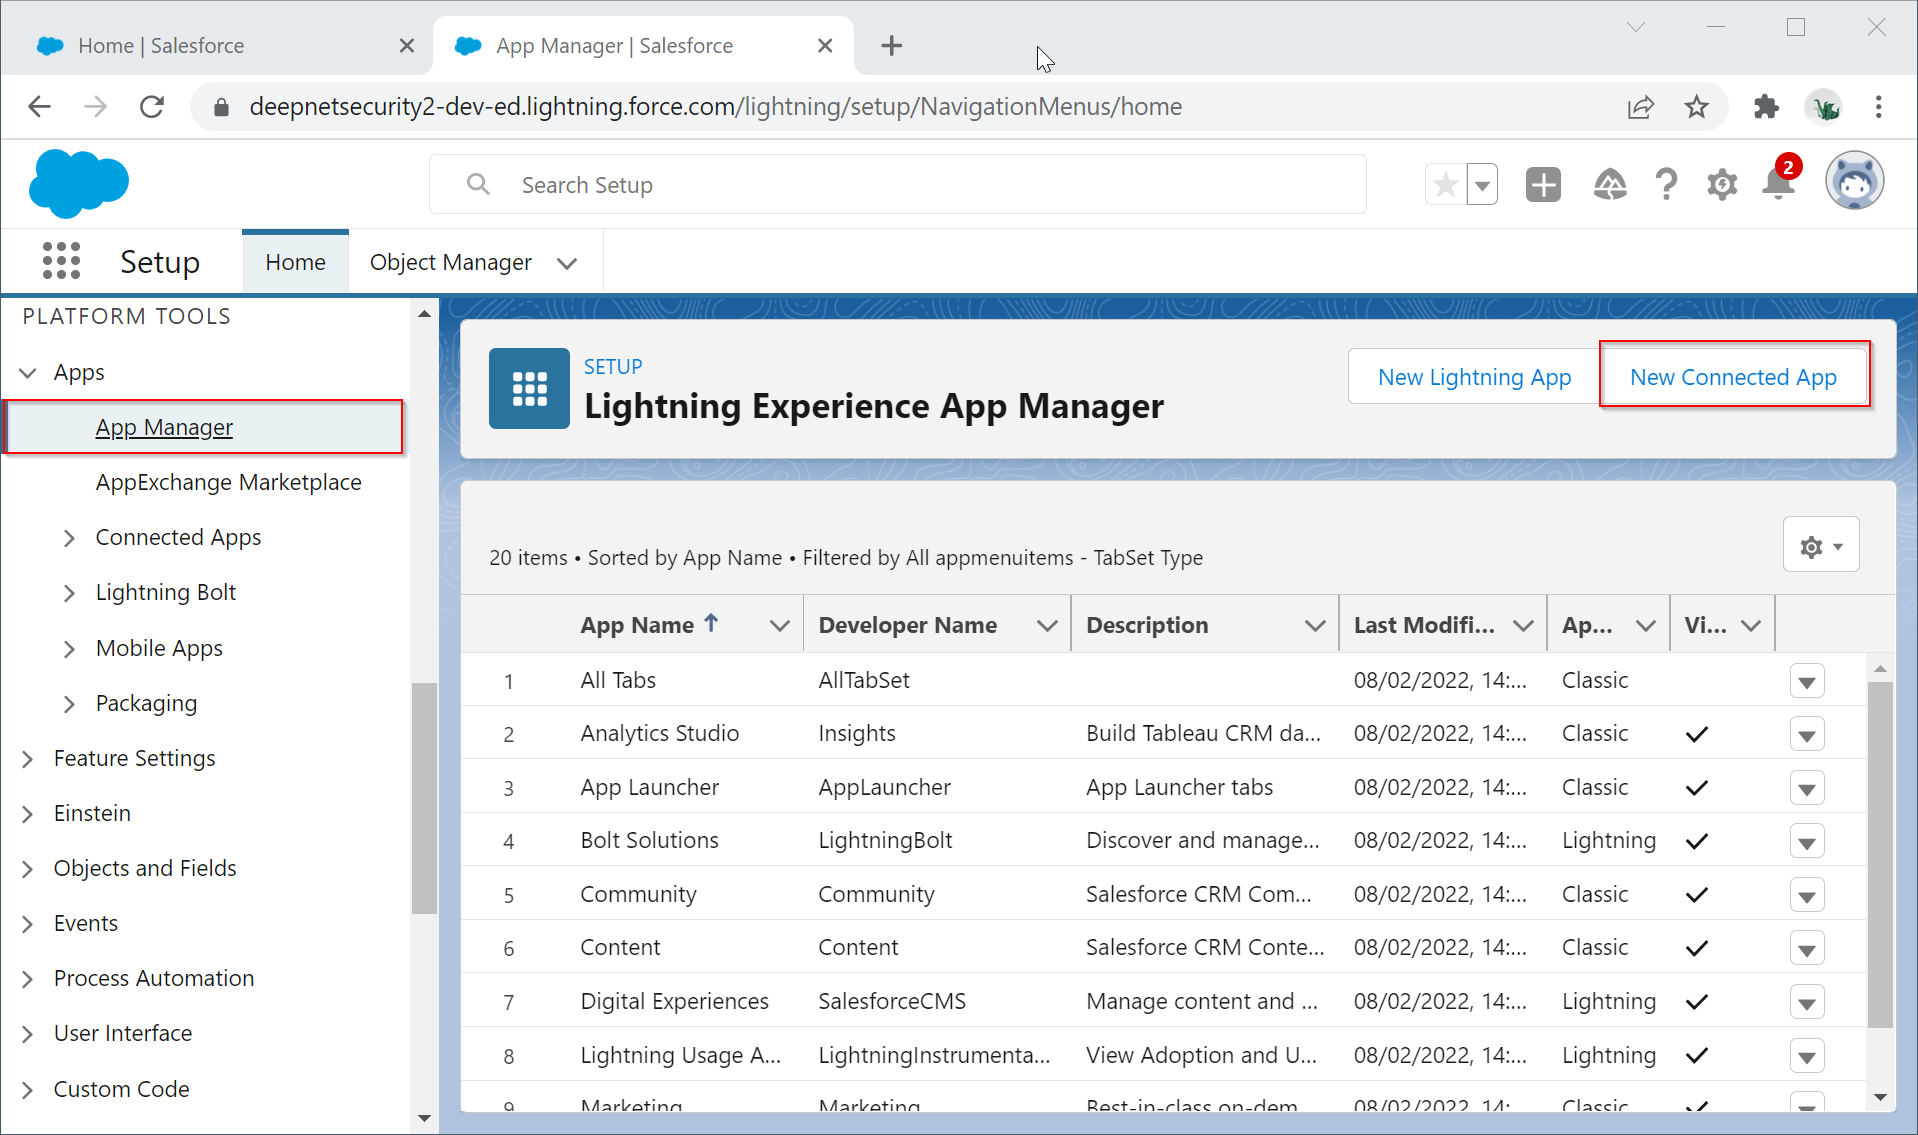
Click "New Connected App"
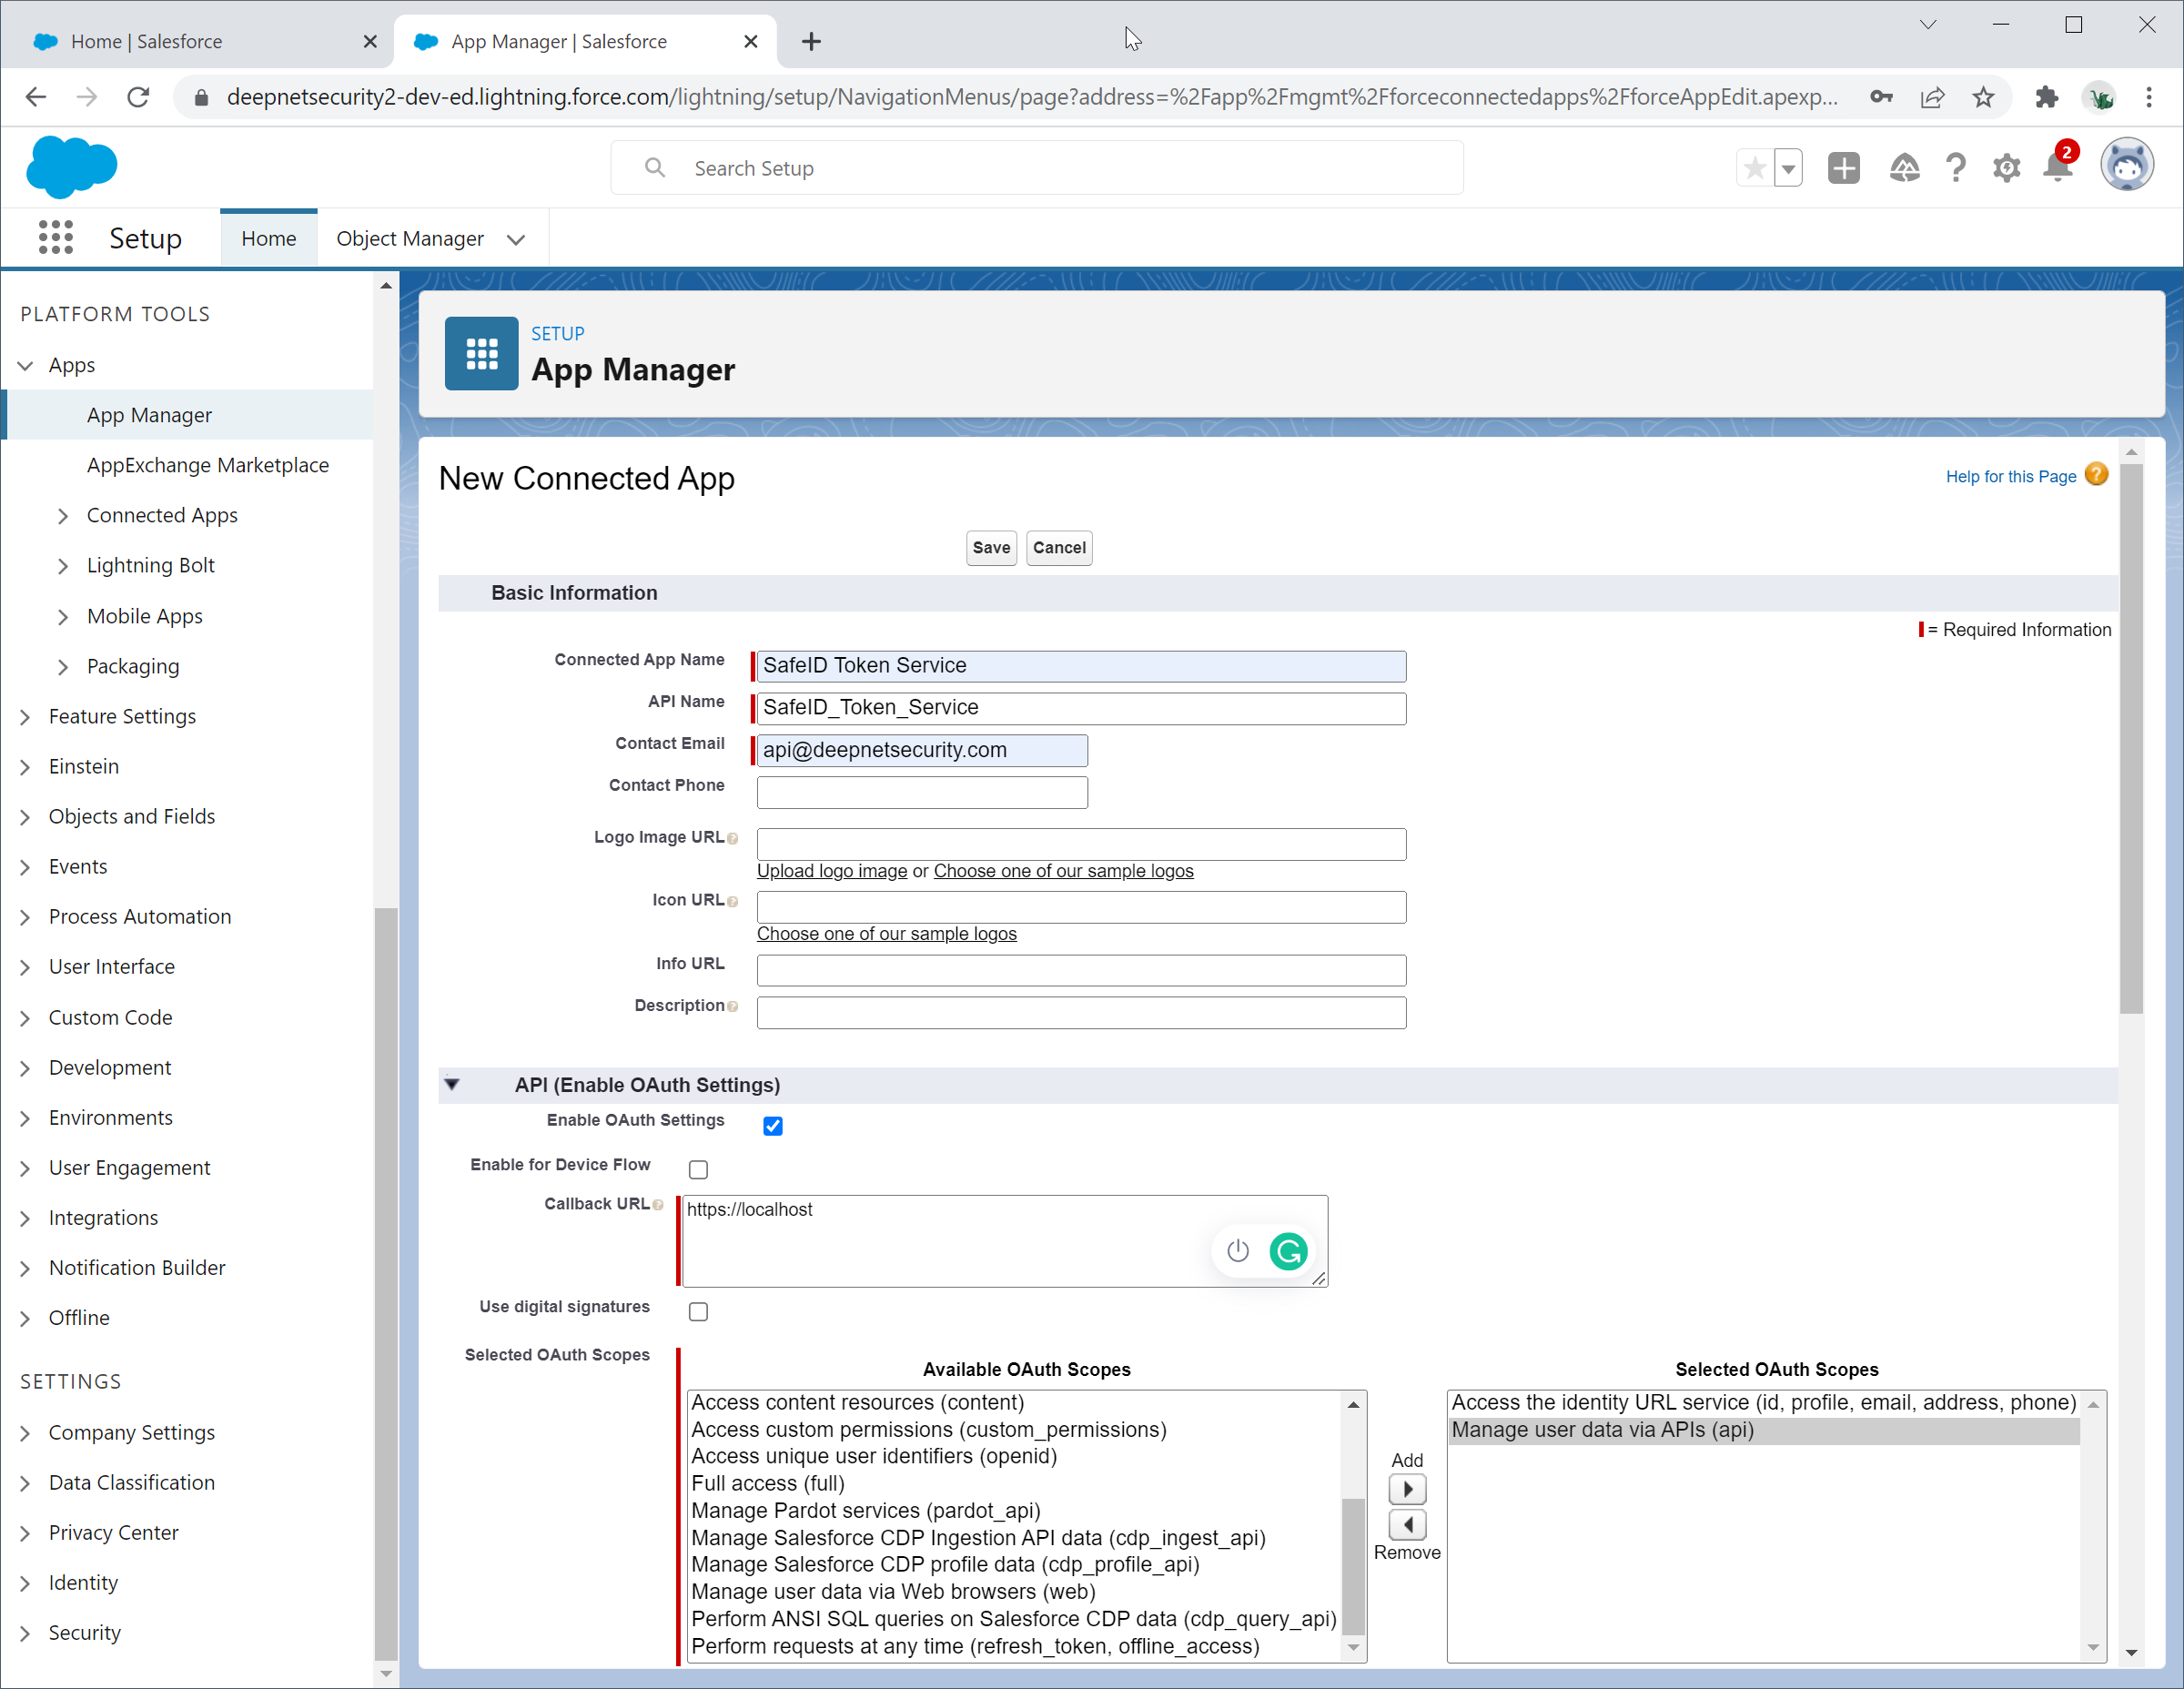
Fill in App Name, API Name and Contact Email
Enable the option "Enable OAuth Settings"
Add “Access the identity URL service" and "Manage User data via APIs” in the selected OAuth Scopes section.
Click the Save button to create this new app
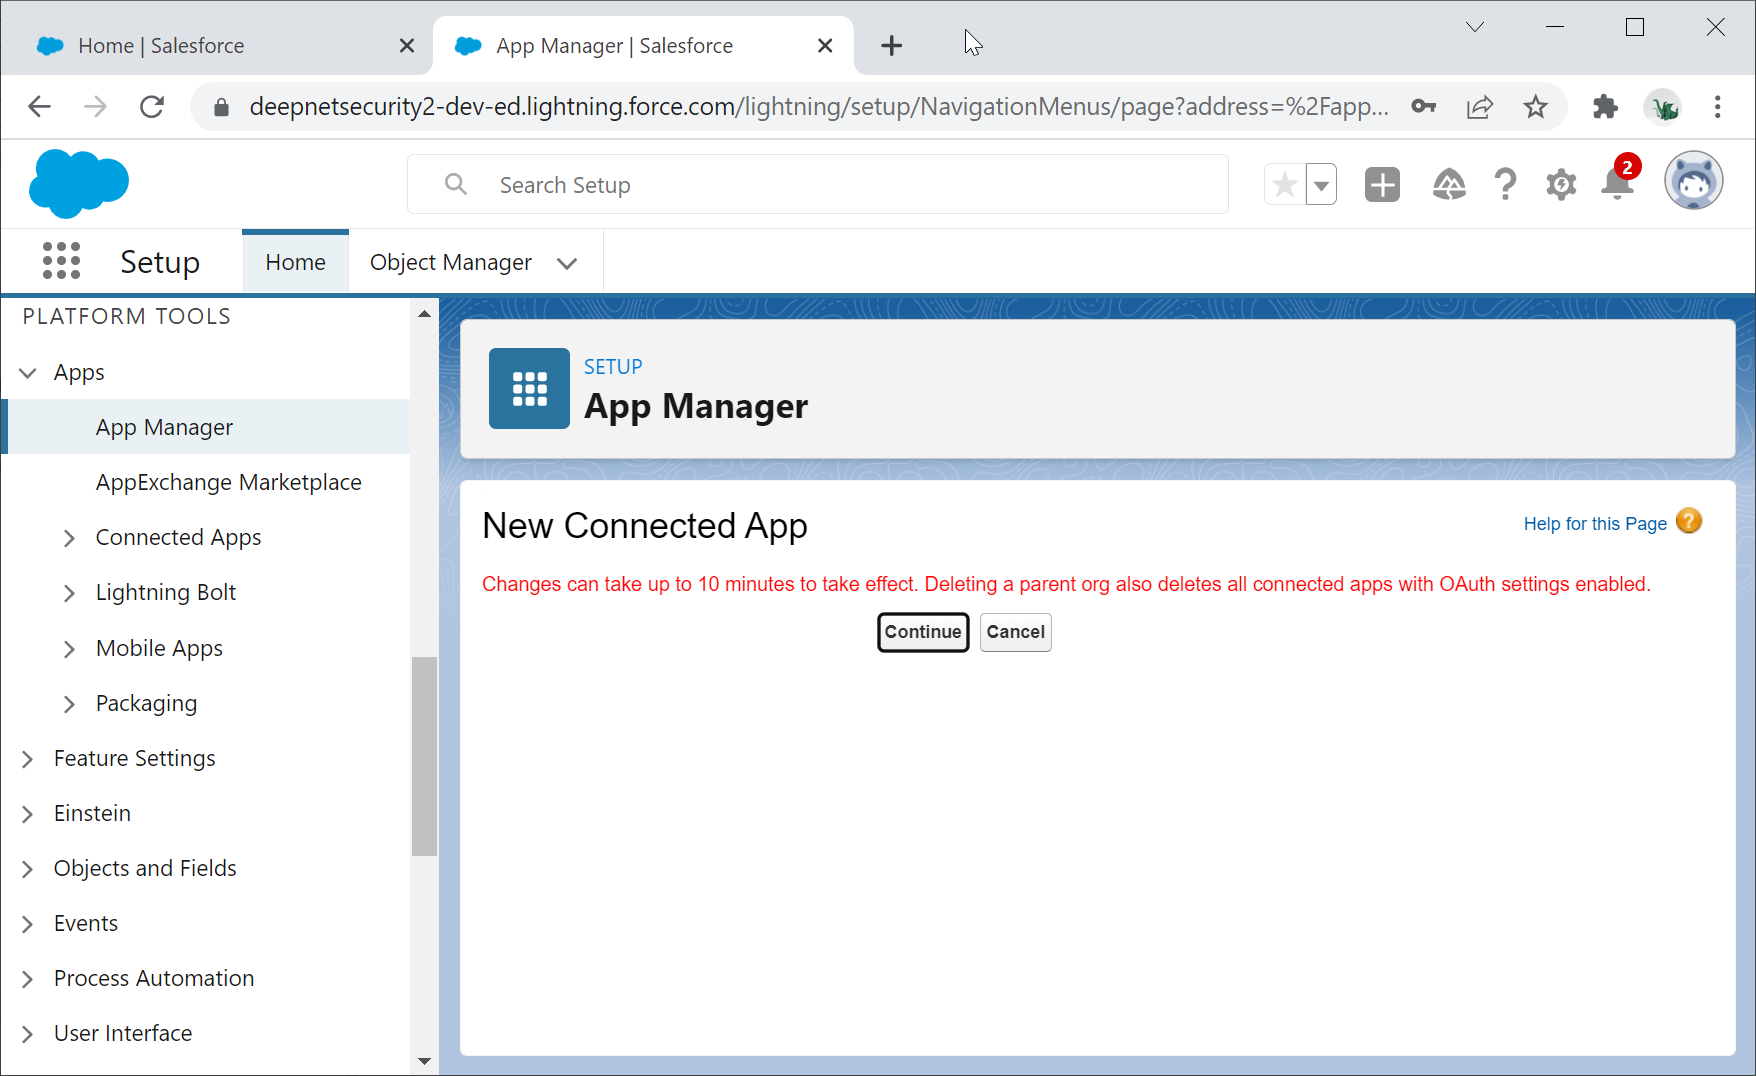
Click Continue
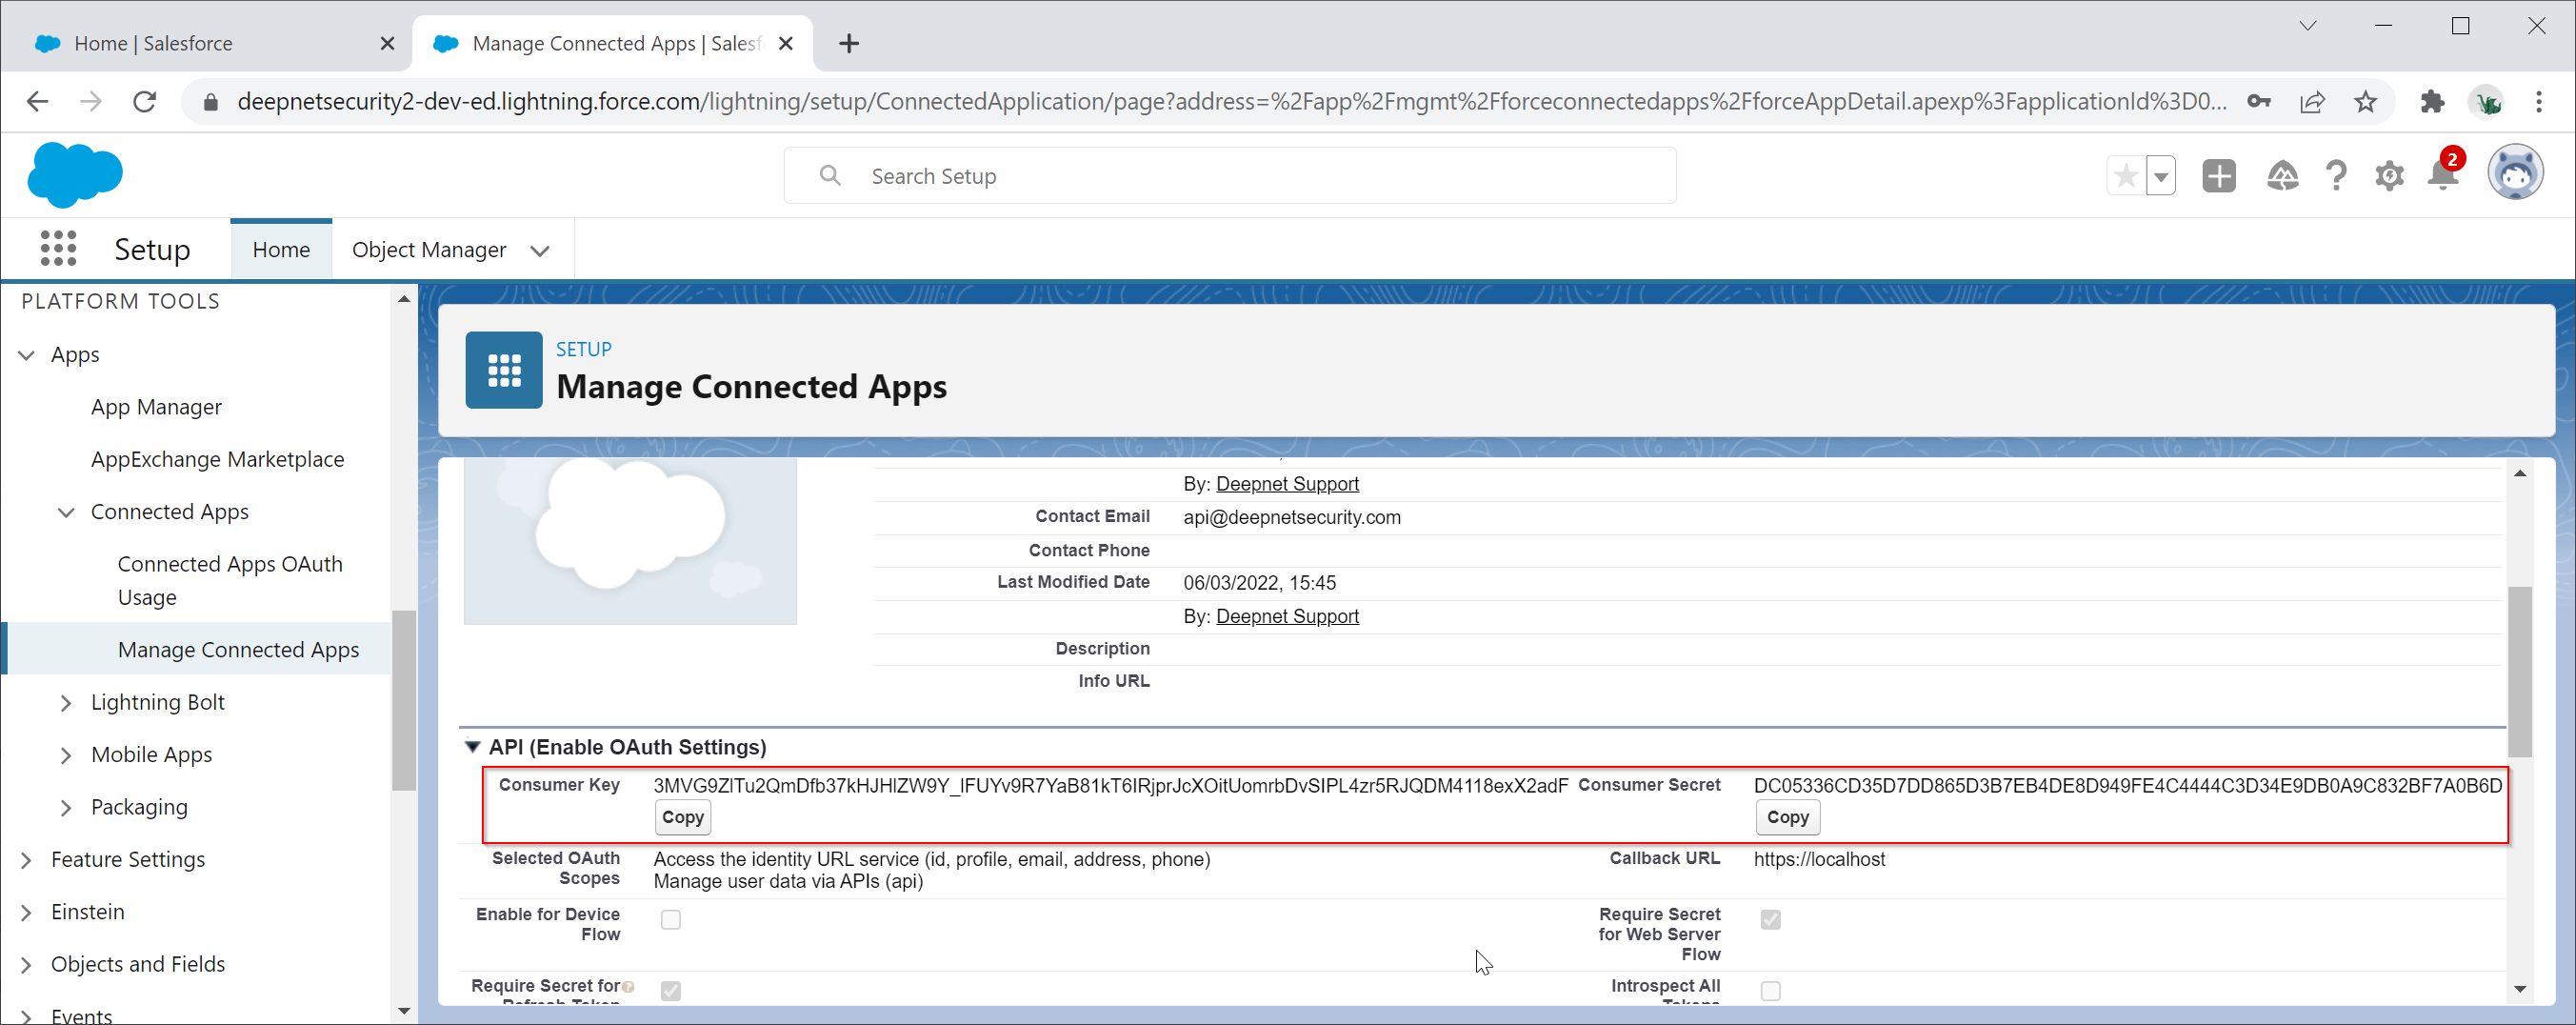
Once you’ve been redirected to the page for the App you just created take a copy of the Consumer Key and also Consumer Secret in the API section.
Configure IP Relaxation for STS
To allow the STS server to communicate with Salesforce, you either need to set the IP relaxation to “Relax IP Restrictions” or add the IP range of the Azure servers to your security settings.
To change the IP Relaxation follow the directions below.
Navigate to PLATFORM TOOLS | Apps | Connected Apps | Manage Connect Apps
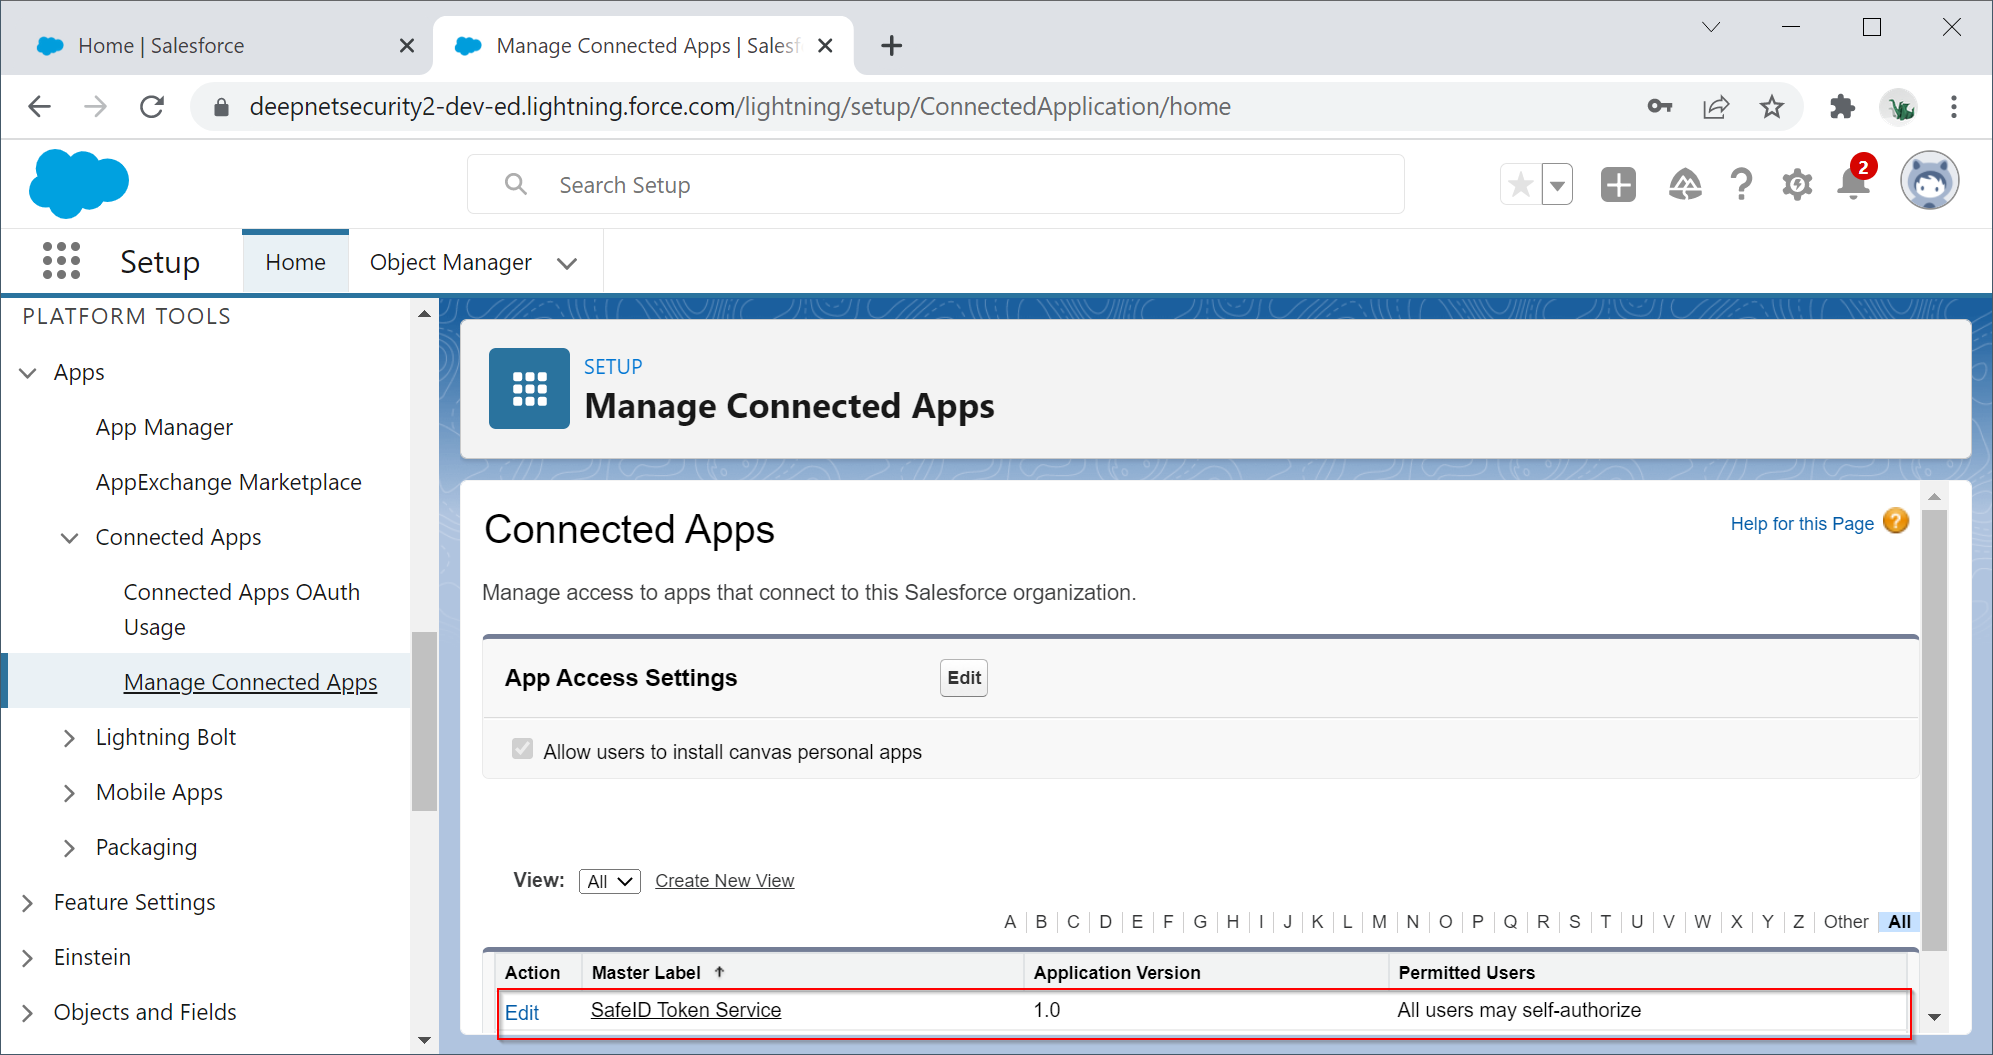
Click Edit against the STS app
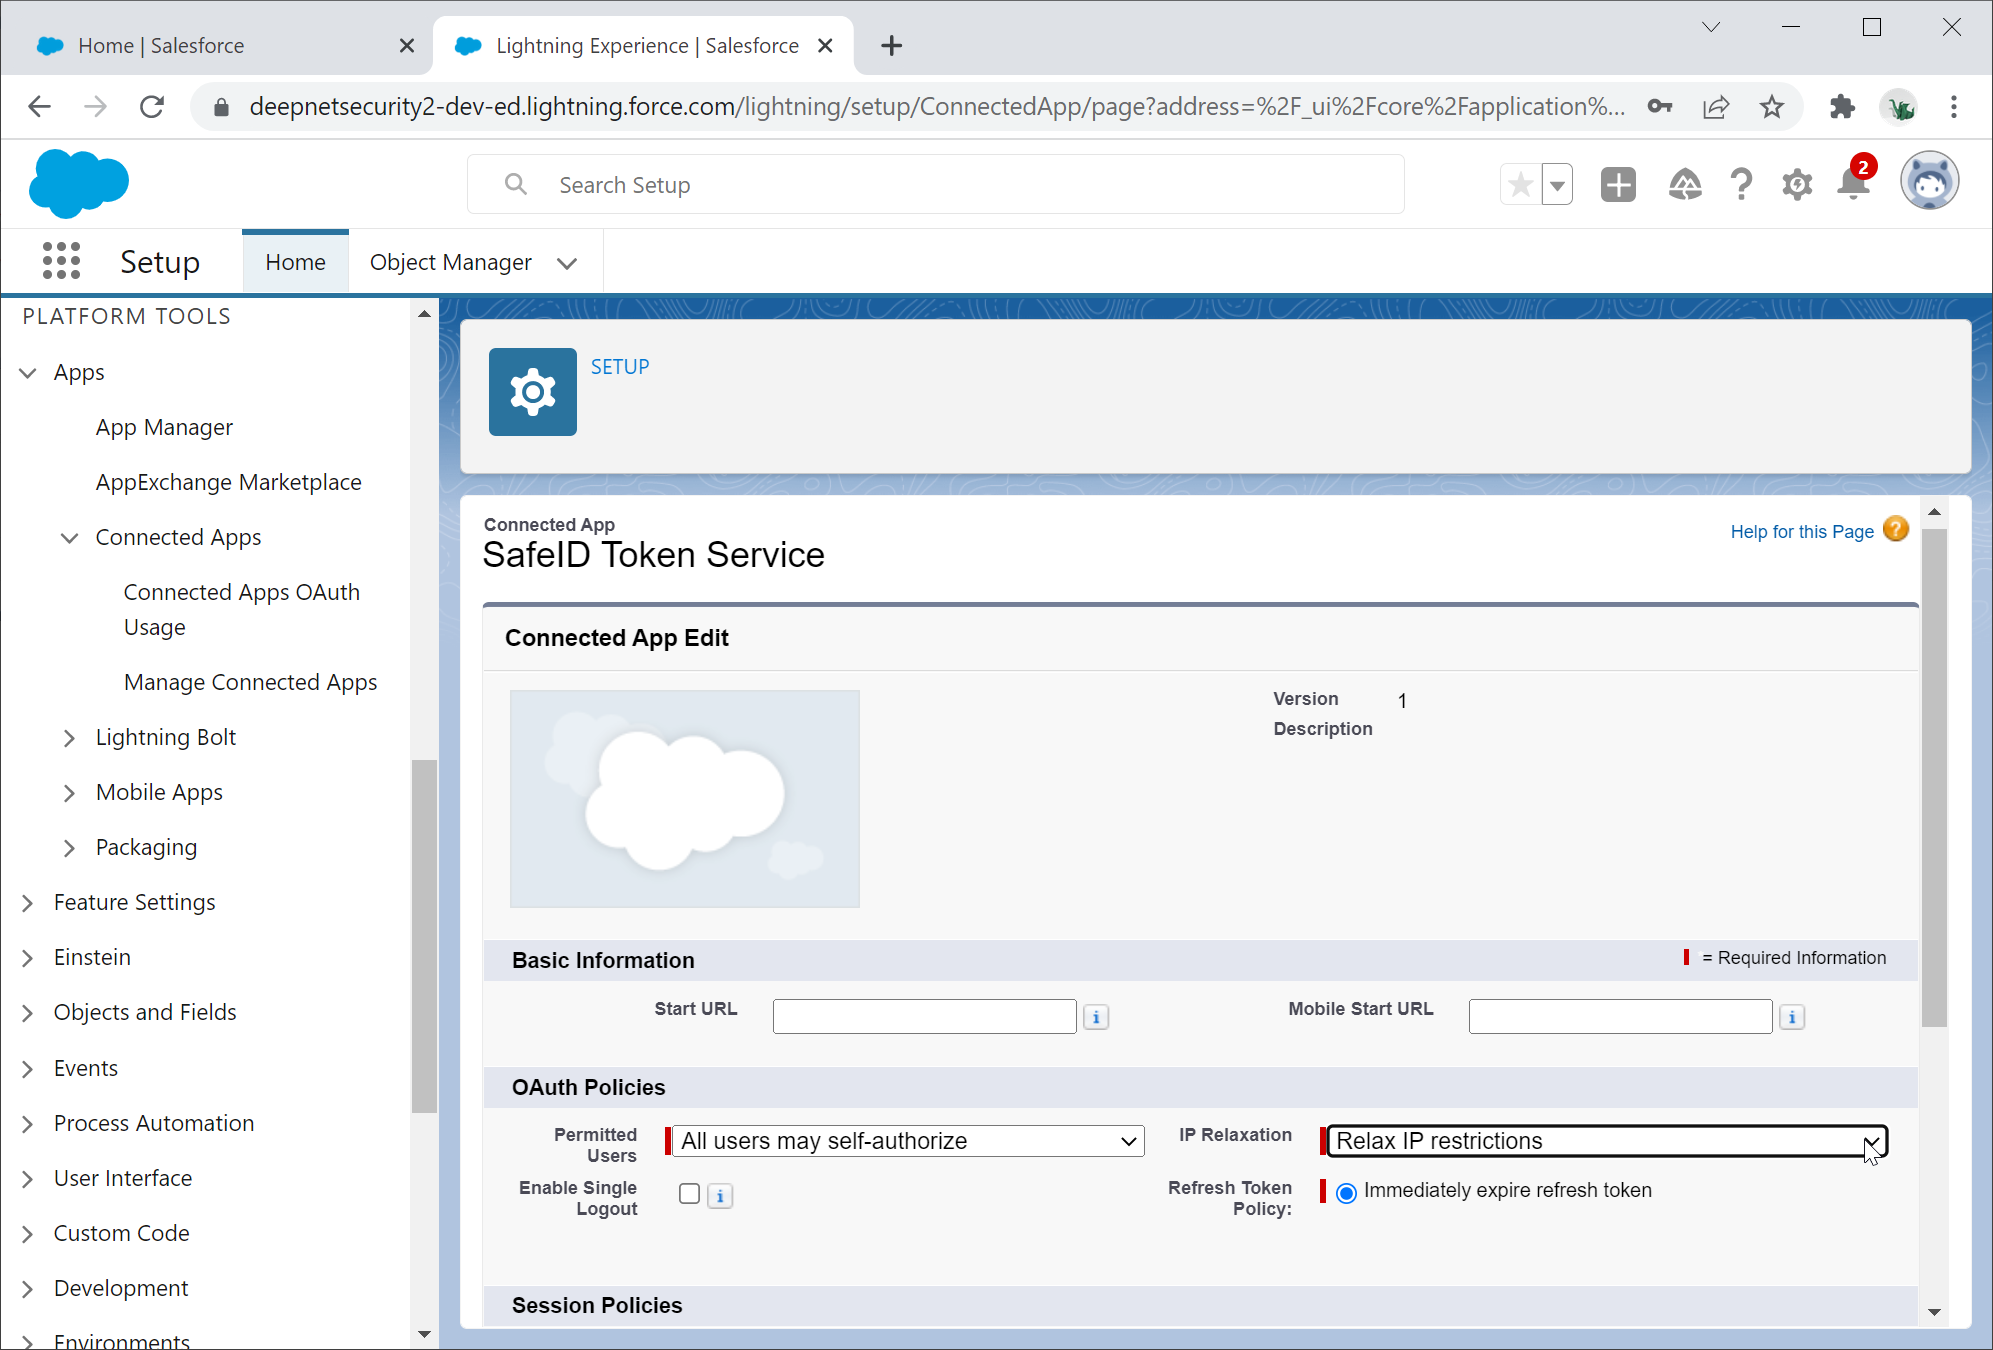
You can select "Relax IP restrictions", or "Enforce IP restrictions"
If you select Enforce IP restrictions, then you must add the IP address range of Azure servers to the trusted IP list
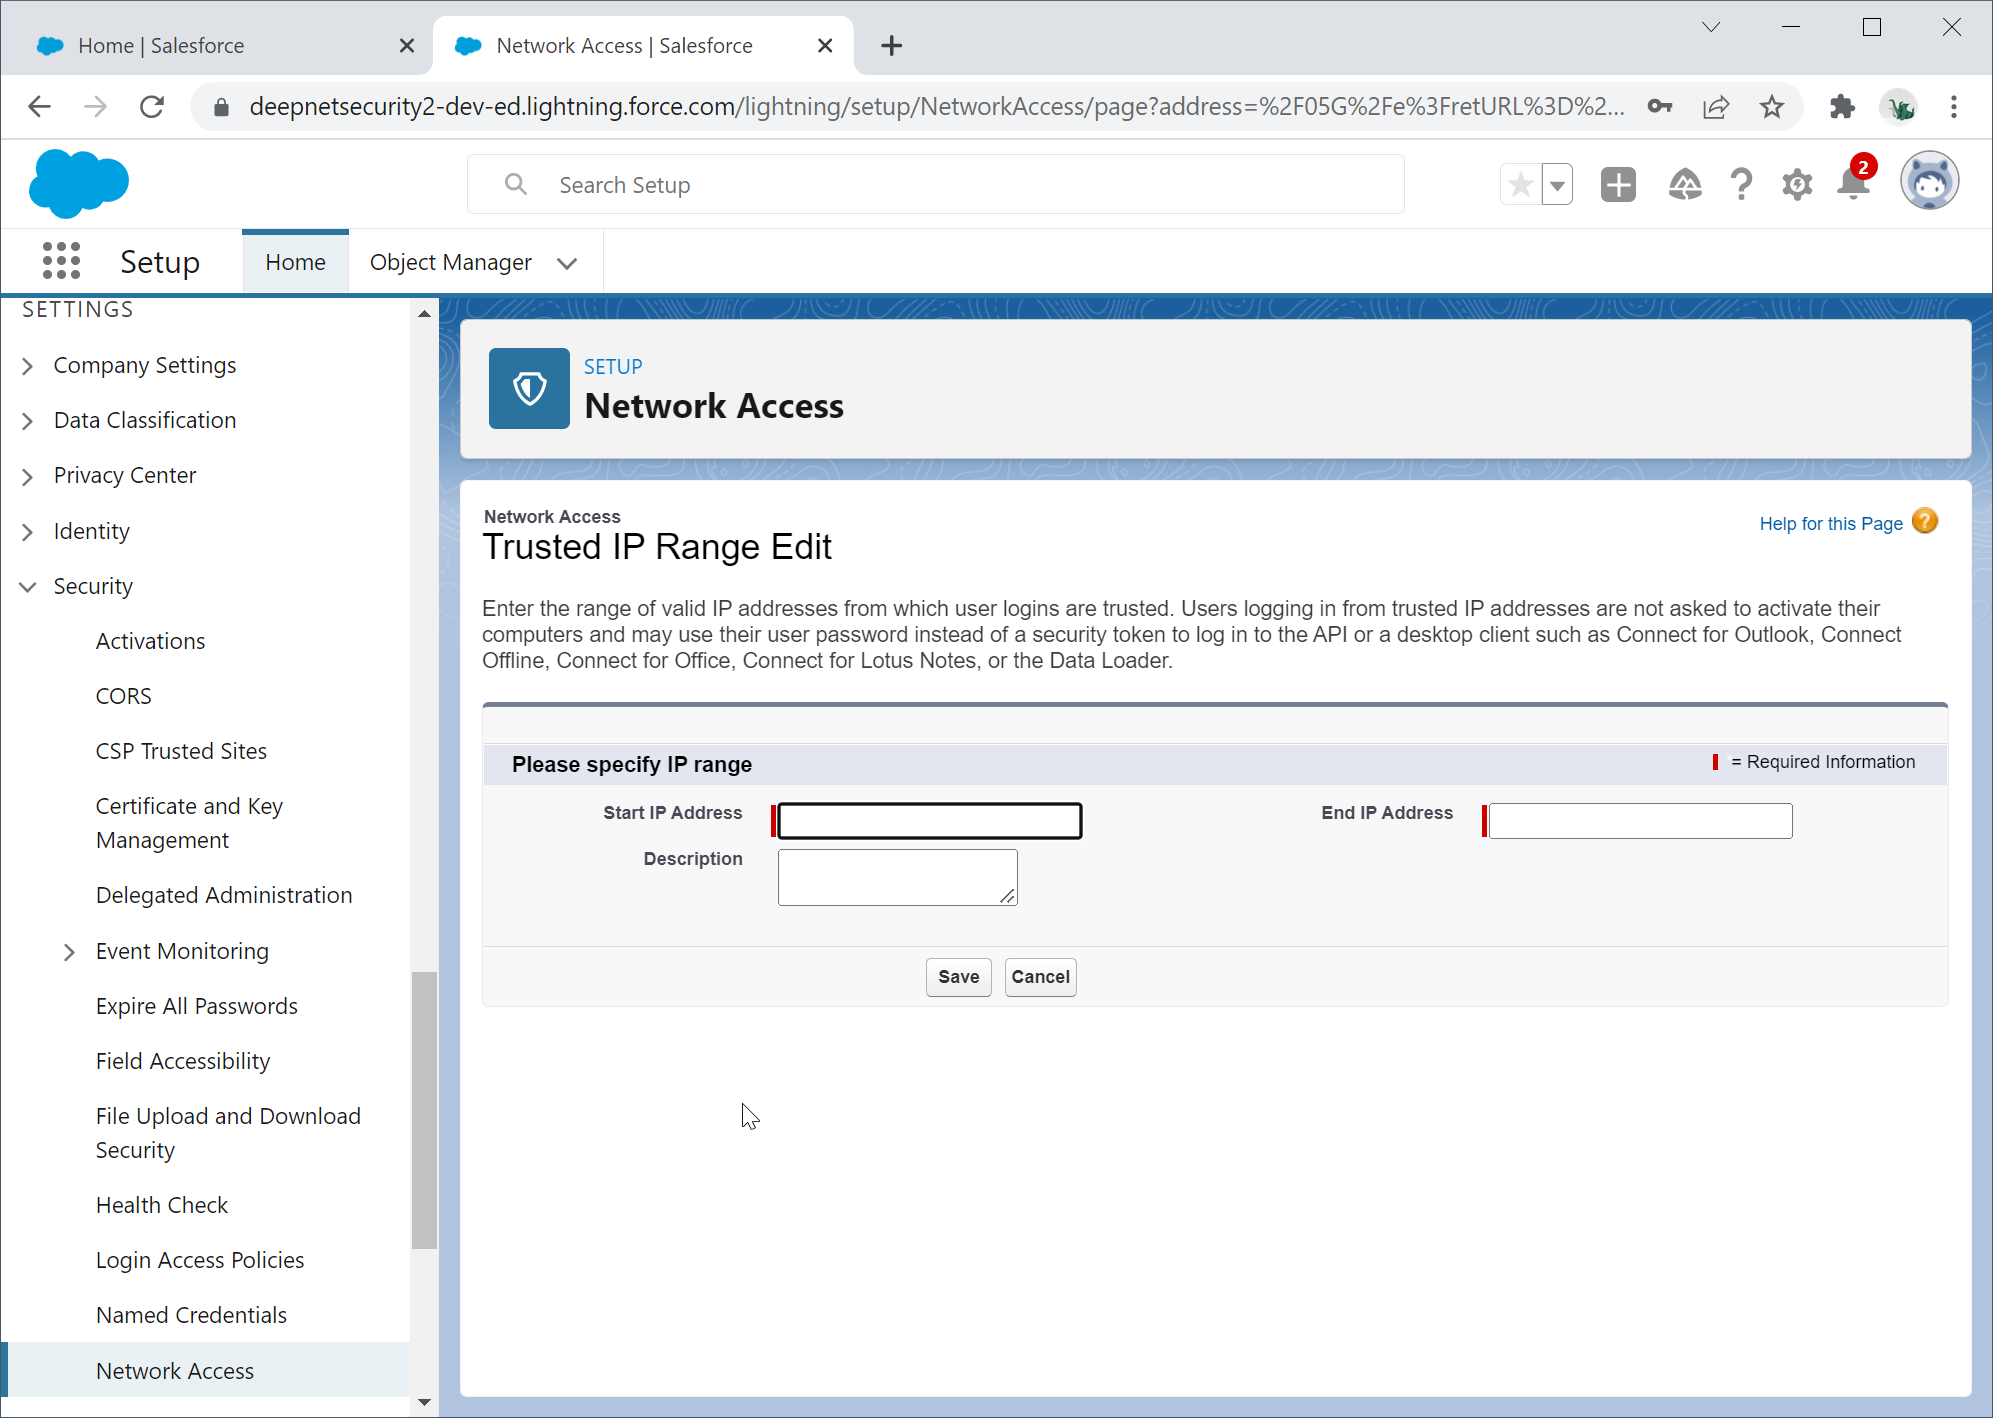
Navigate to SETTINGS | Security | Network Access
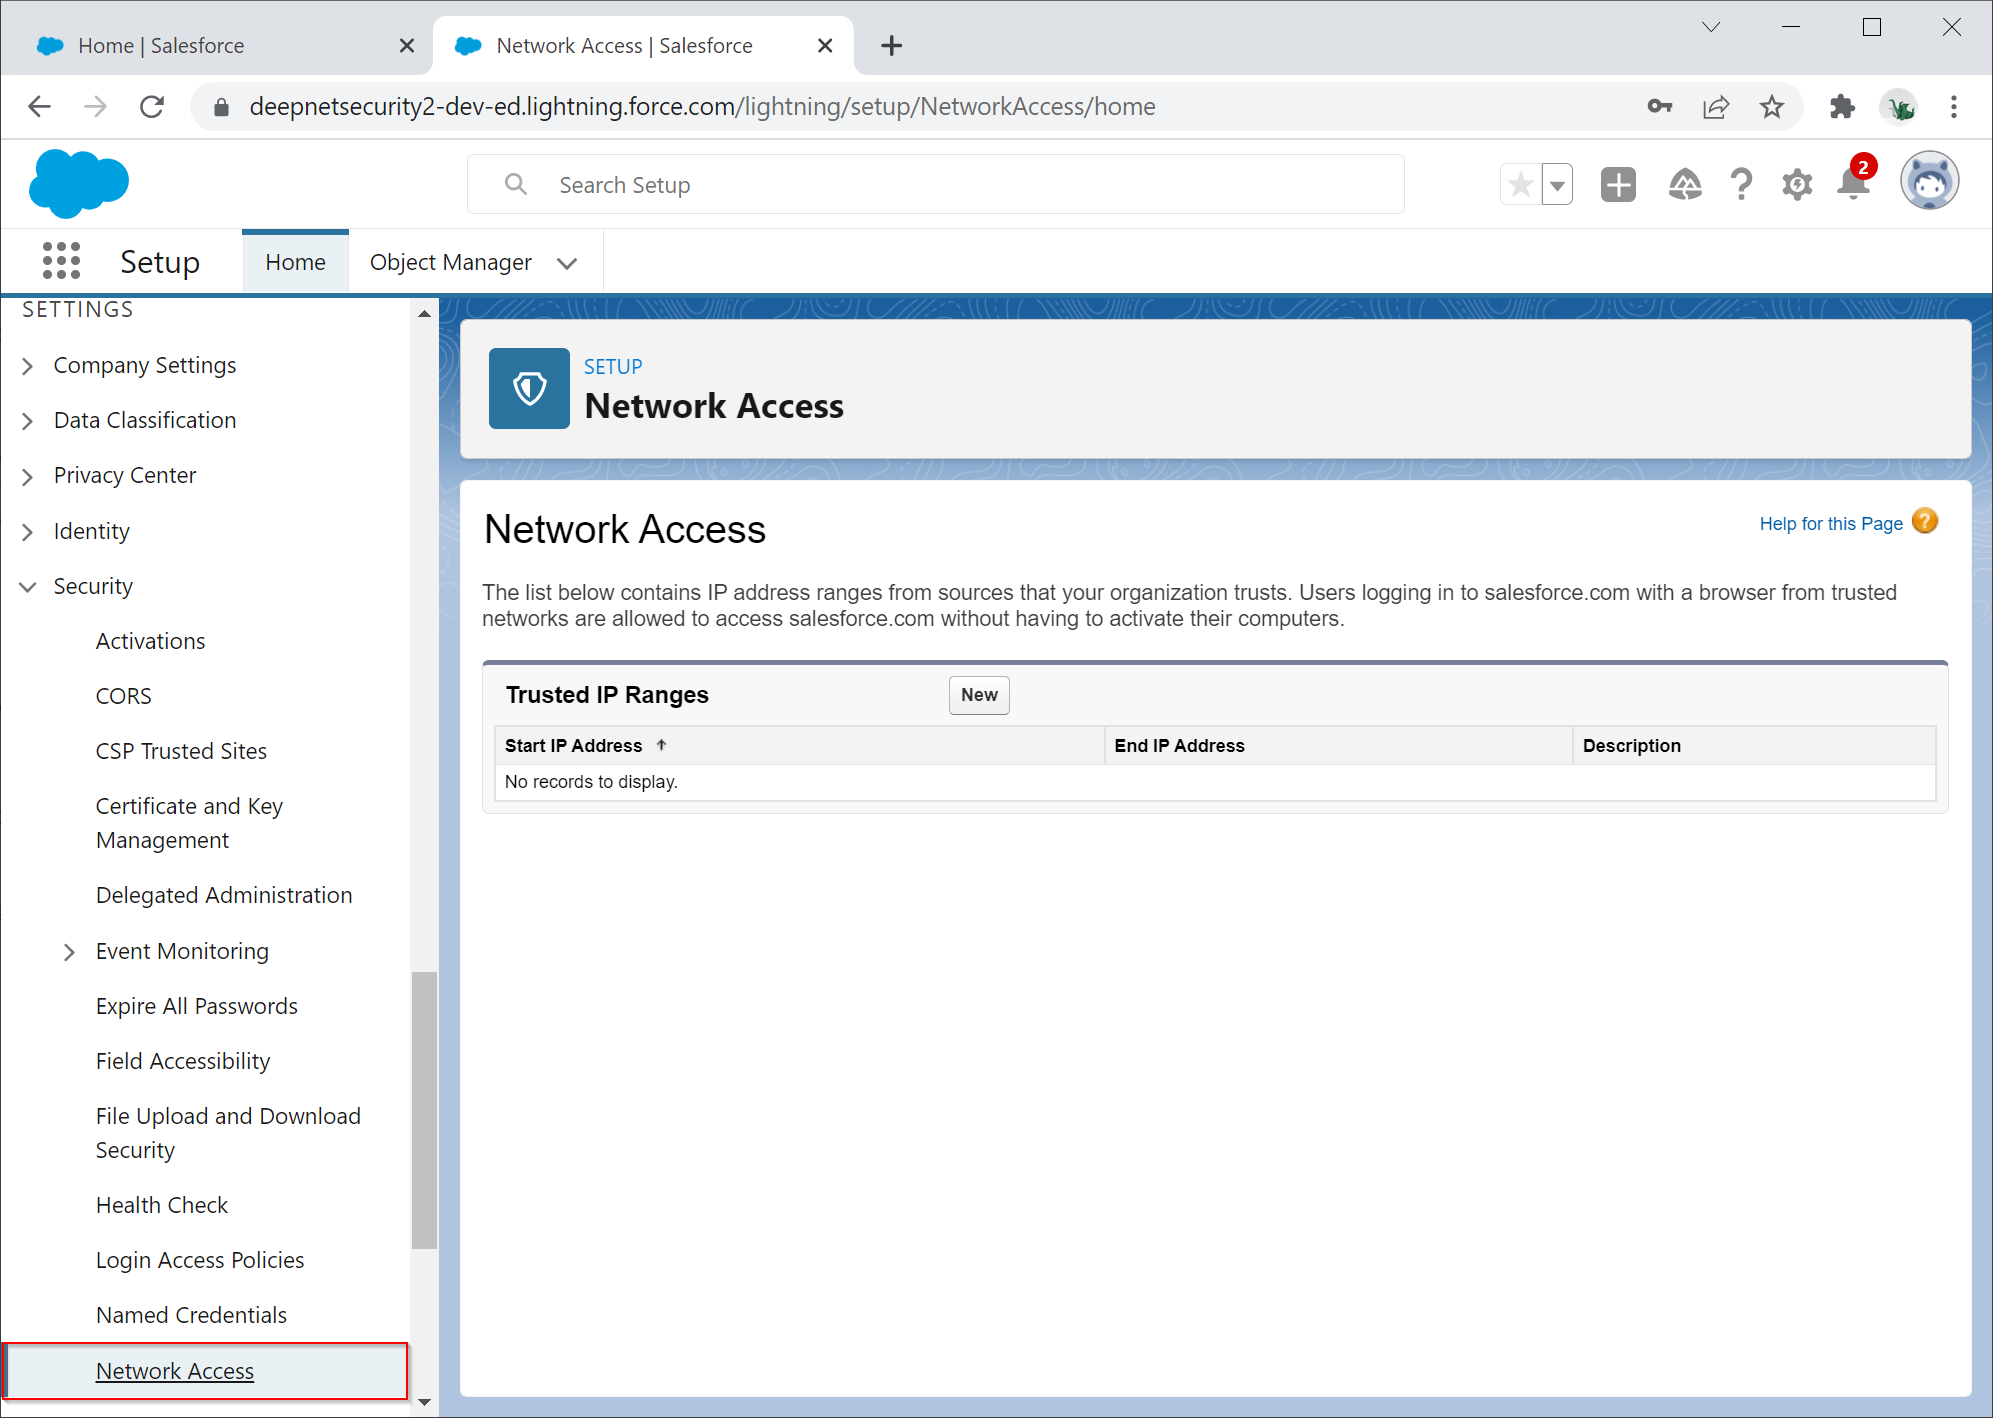
Click New to create a new set of trusted IP ranges