You may find that your DualShield IIS agent stops working after applying an Exchange server CU upgrade. This is because the Exchange CU upgrade has reset all web applications settings, i.e. the "web.config" file, hence caused the settings for the DualShield IIS agent to be lost.
You will have to restore the settings of the DualShield IIS Agent first, then re-apply the settings.
Step 1: Restore Settings
You can restore the DualShield IIS Agent settings in 2 ways, manually restore by GUI or by a PowerShell script.
...
Restore by GUI
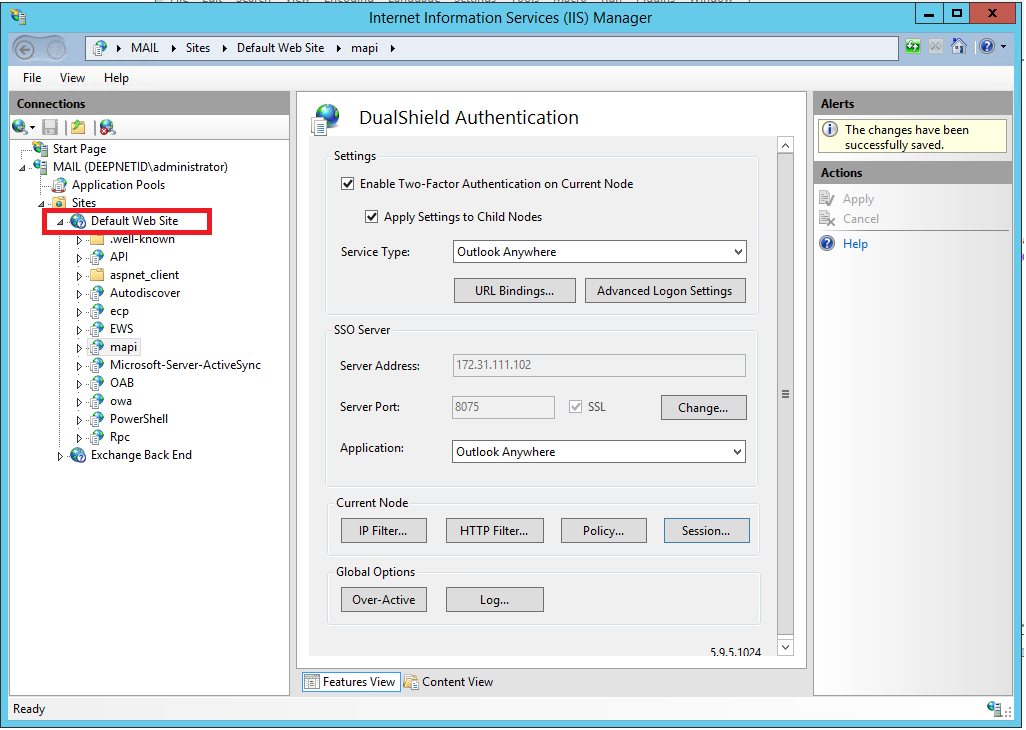
This has to be done on every IIS node that is enabled with DualShield 2FA. Let's use OWA as an example. In the IIS Manager, navigate to the OWA node:
...
Repeat the above work on every node that's been affected.
Restore by PowerShell Script
| Expand | |||||||||
|---|---|---|---|---|---|---|---|---|---|
On the Exchange CAS server, launch a PowerShell window, navigate to the folder: C:\Program Files\Deepnet Security\IIS\DasWeb Then, execute the PowerScript below:
If you get some errors then it means that the name of the web site affected is not "Default Web Site".
In this case, you need to edit the line below in the script: $metapath = $item.path -replace "/LM/W3SVC/1/Root/", "MACHINE/WEBROOT/APPHOST/Default Web Site/"You need to replace the text "Default Web Site" with the correct web site name. You might also need to replace the text "/LM/W3SVC/1/Root/" if you have multiple web sites running on the same server. Once you have made and saved the changes, execute the PowerShell script again. |
Step 2: Re-Apply Settings
In the IIS Manager, select to a node that's enabled with DualShield 2FA, e.g. RDWeb.
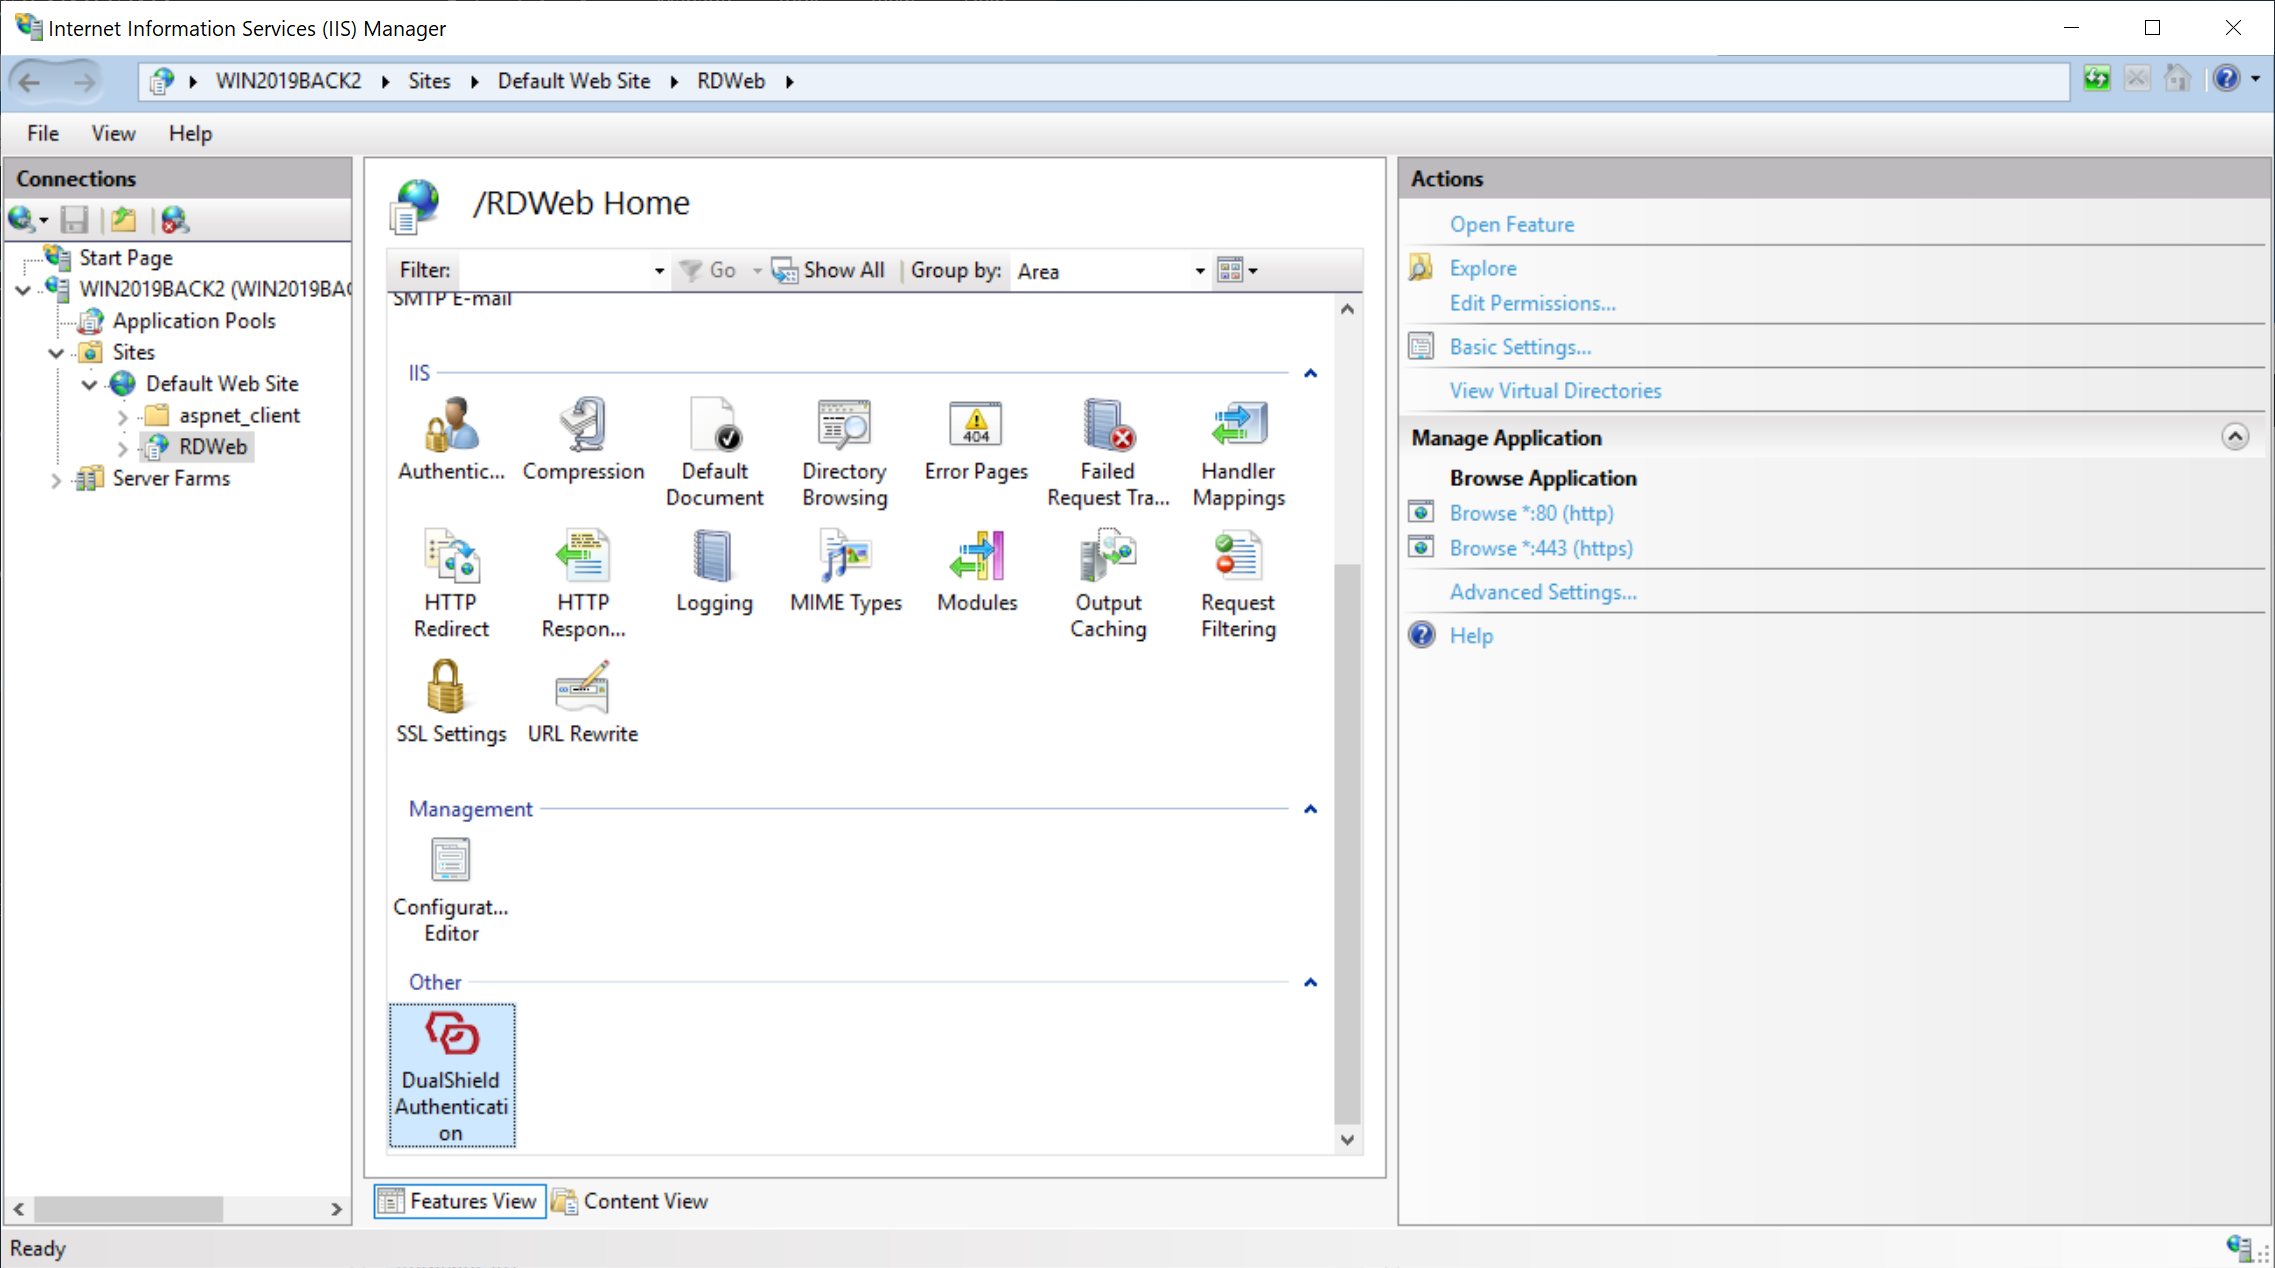
On the right pane, double click the DualShield icon to open its settings
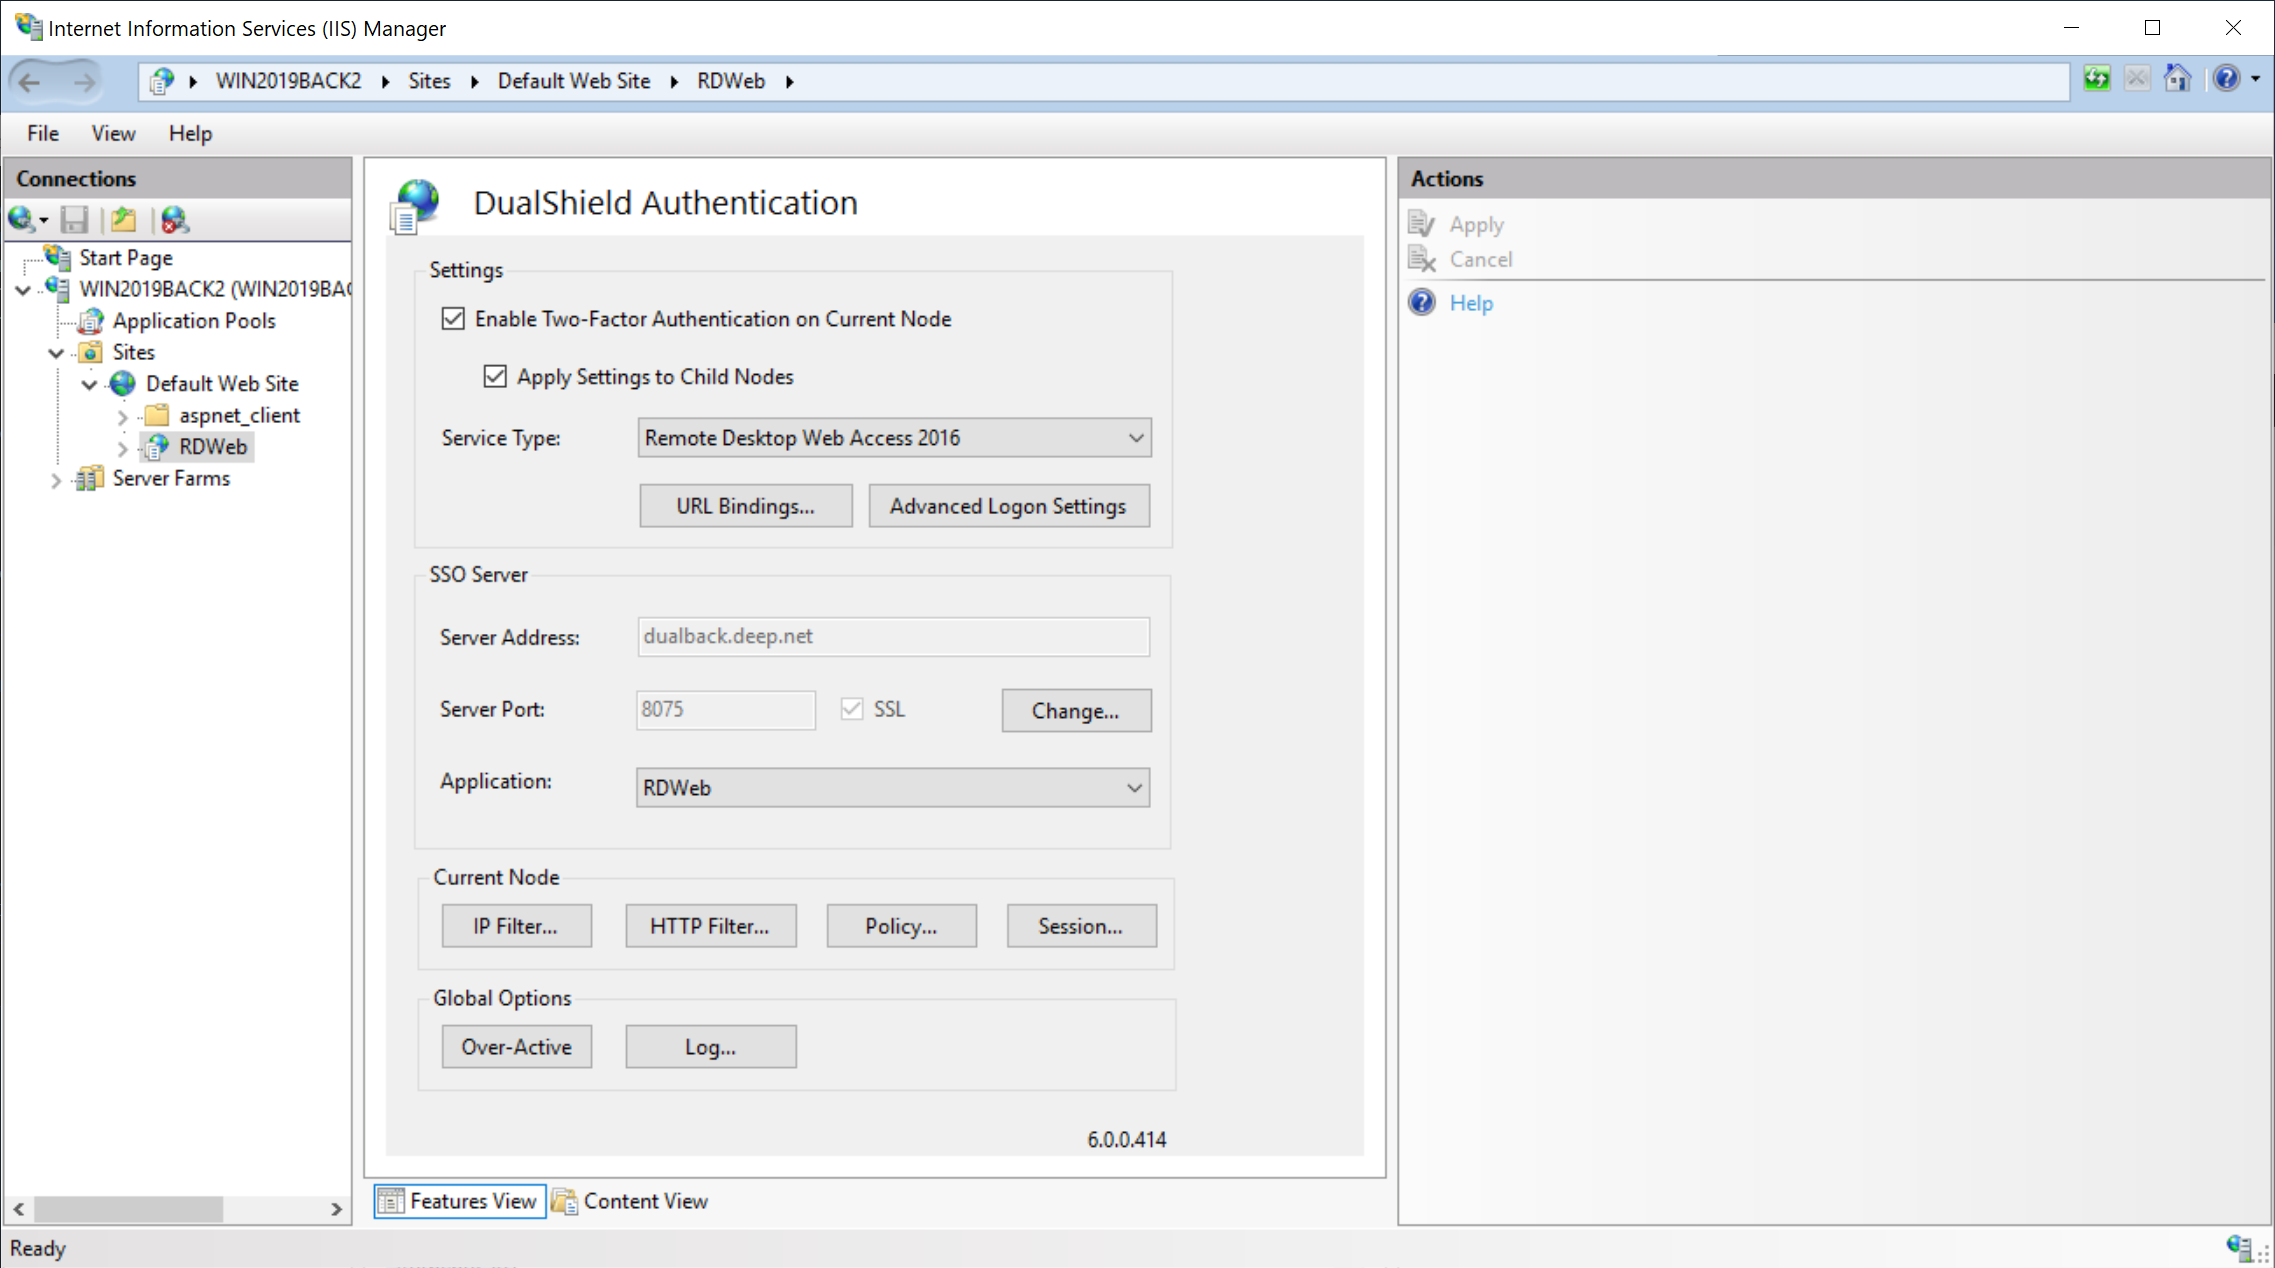
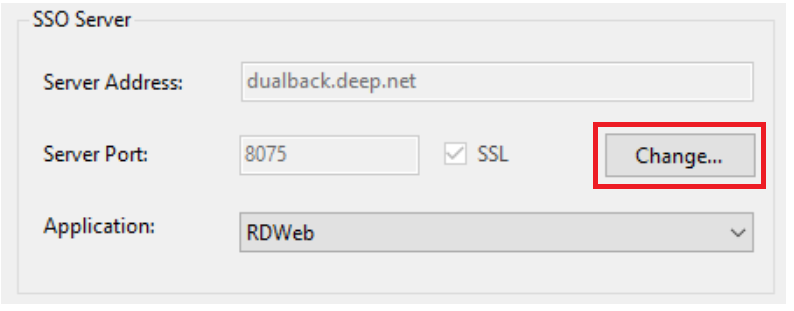
Click the "Change” button in the “SSO Server” section:
In the SSO Server Settings windows, untick the “Enable Proxy” option:
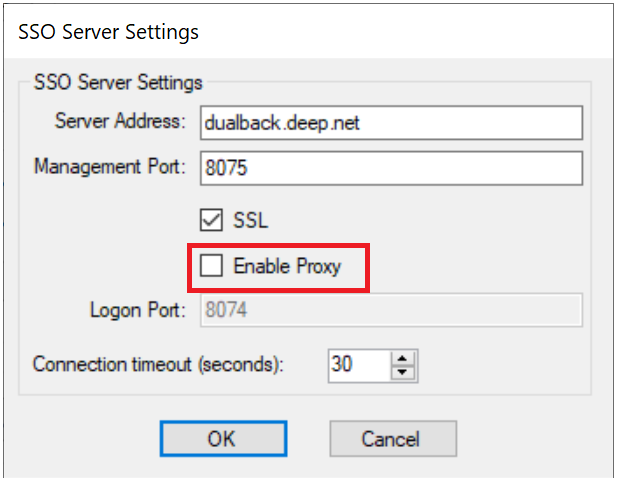
Click “OK”
Then, click “Apply” to save the changes
Now, go back to the “SSO Server Settings” and tick the “Enable Proxy” option:
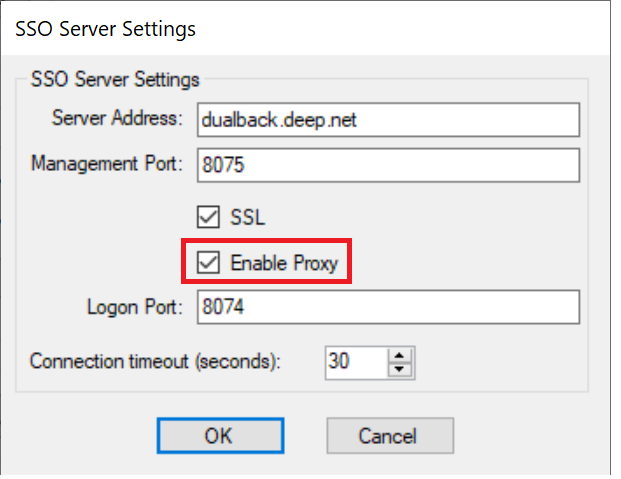
Click “OK”
Then, click “Apply” to save the changes.